


🍃Matcha-flavored fluffy sponge cake
I personally love matcha cakes After trying many recipes, I found that< /span> The following is the best use now Today I will share with you the recipe for this fluffy and sweet matcha sponge cake☺️
Original recipe taken fromYouTuber:StephieWeiss
This square fits10*10cmsquare mold In addition, this recipe is just baked20*20cmHalf of the square mold Need to use the ironing method and the water bath method

The required materials are:
Vegetable Oil 75g
Milk 30g
Condensed milk 50g
Low-gluten flour 70g
Matcha powder 10g
yolk 5pcs
Proteins 5pcs
whole eggs one
Sugar 65g
Salt A pinch
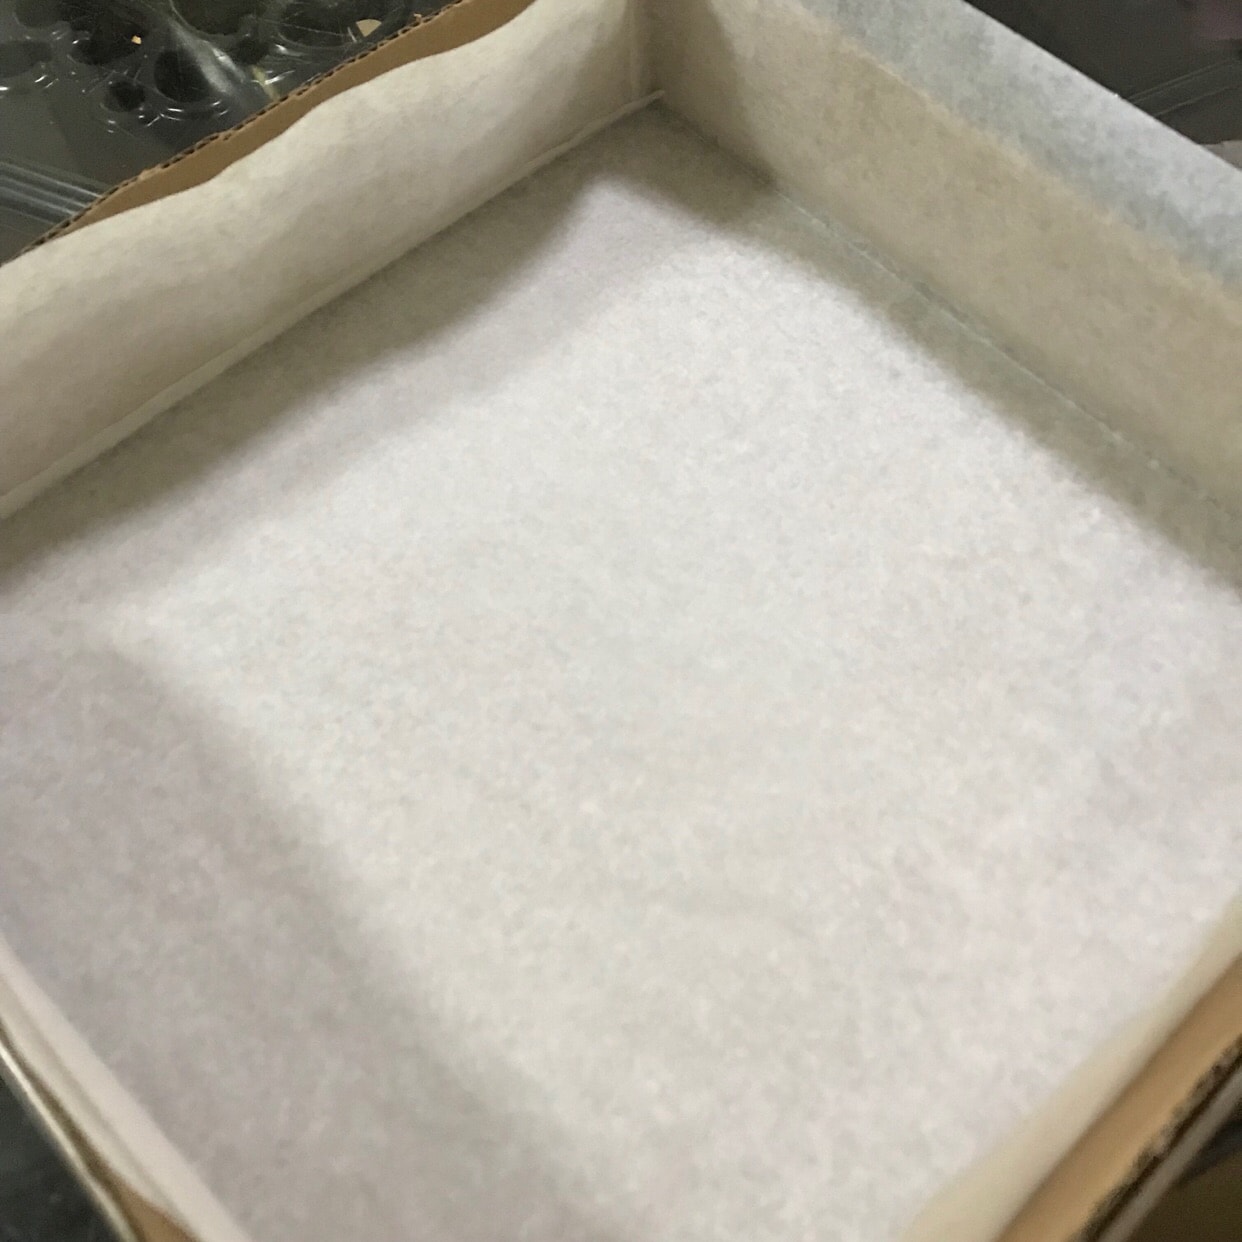
Step 1: Cut the baking paper according to the size of the mold The mold and bake Cardboard can be placed in the middle of the paper for insulation Then we will separate the eggs Separated egg whites can be frozen in the refrigerator There is also a whole egg Beat in egg yolks
Step 2: Heat the vegetable oil to 75-80degrees (I There is a temperature gun here) Friends with microwave ovens can directly heat the oil for two minutes
Step 3: Sift low-gluten flour and matcha powder into the hot oil Use a hand whisk to mix well with a “Z”word

Step 4: Then add milk and stir well
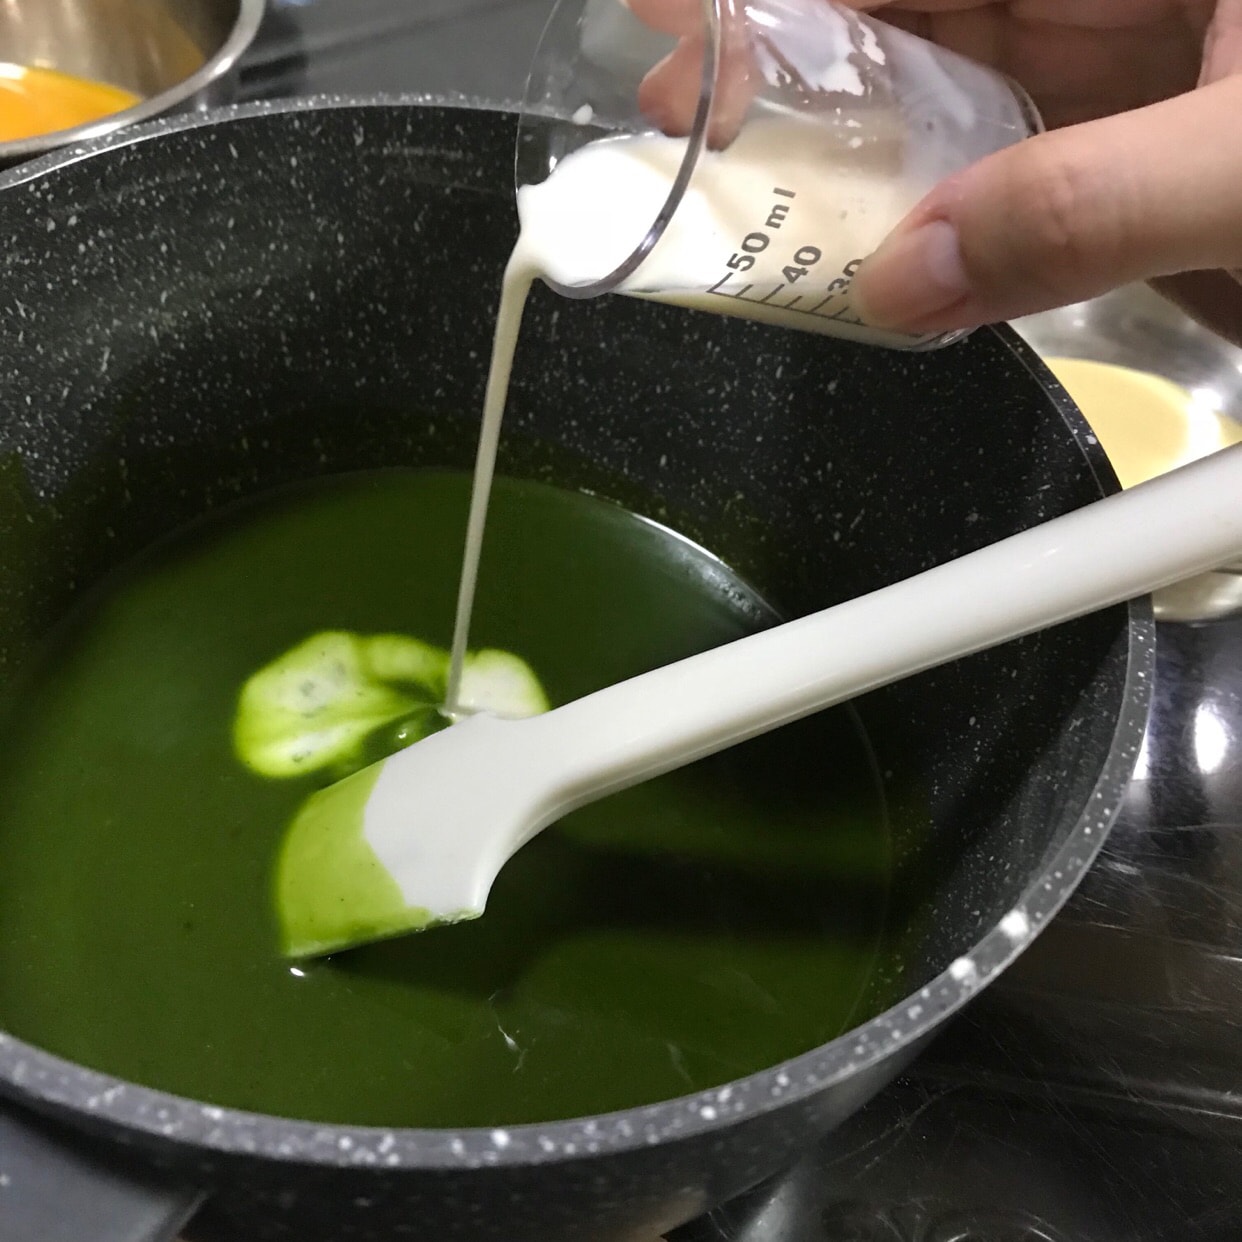
It is normal for the batter to be a little thick at this point👇🏻
Then add the egg yolk and one egg and mix well
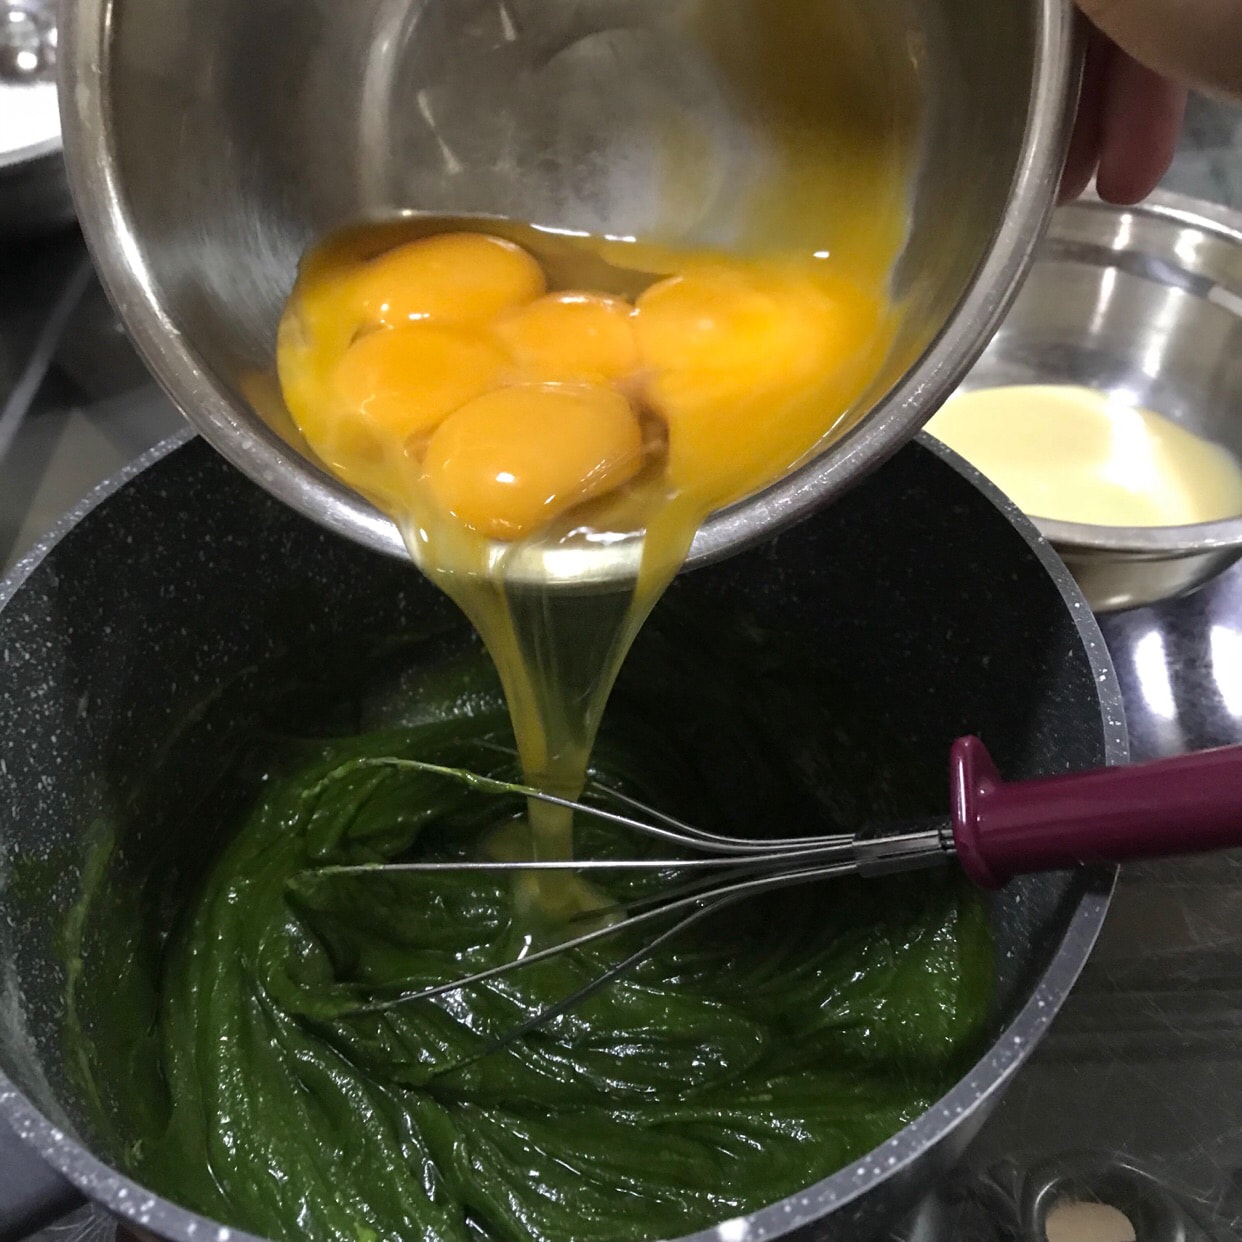
Add condensed milk
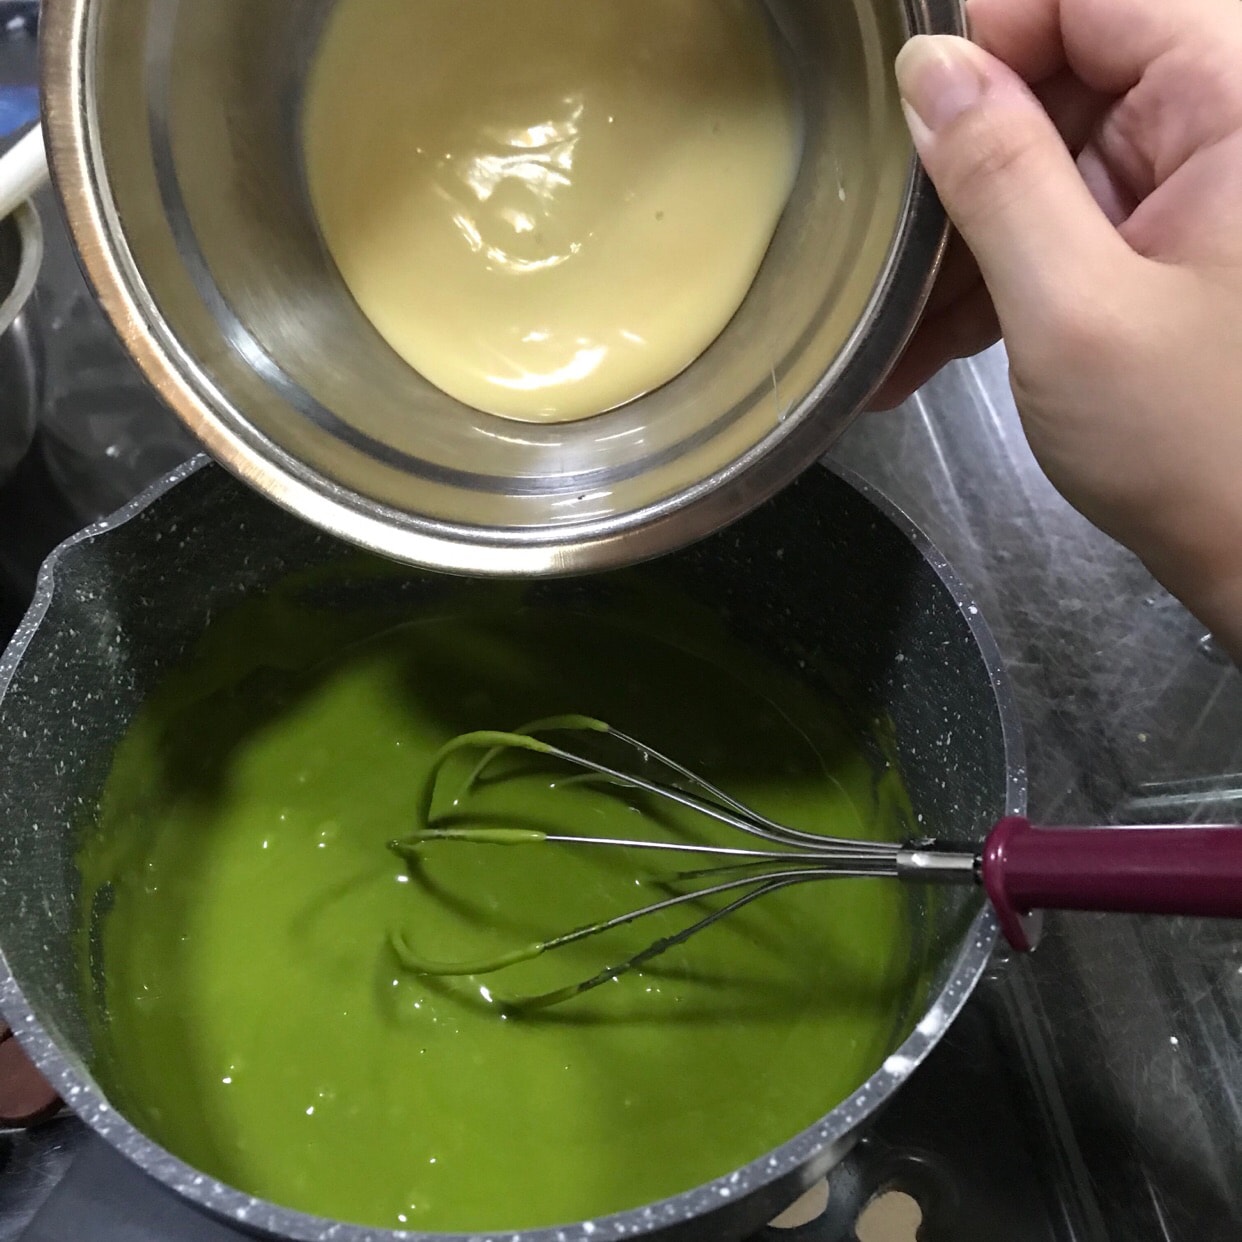
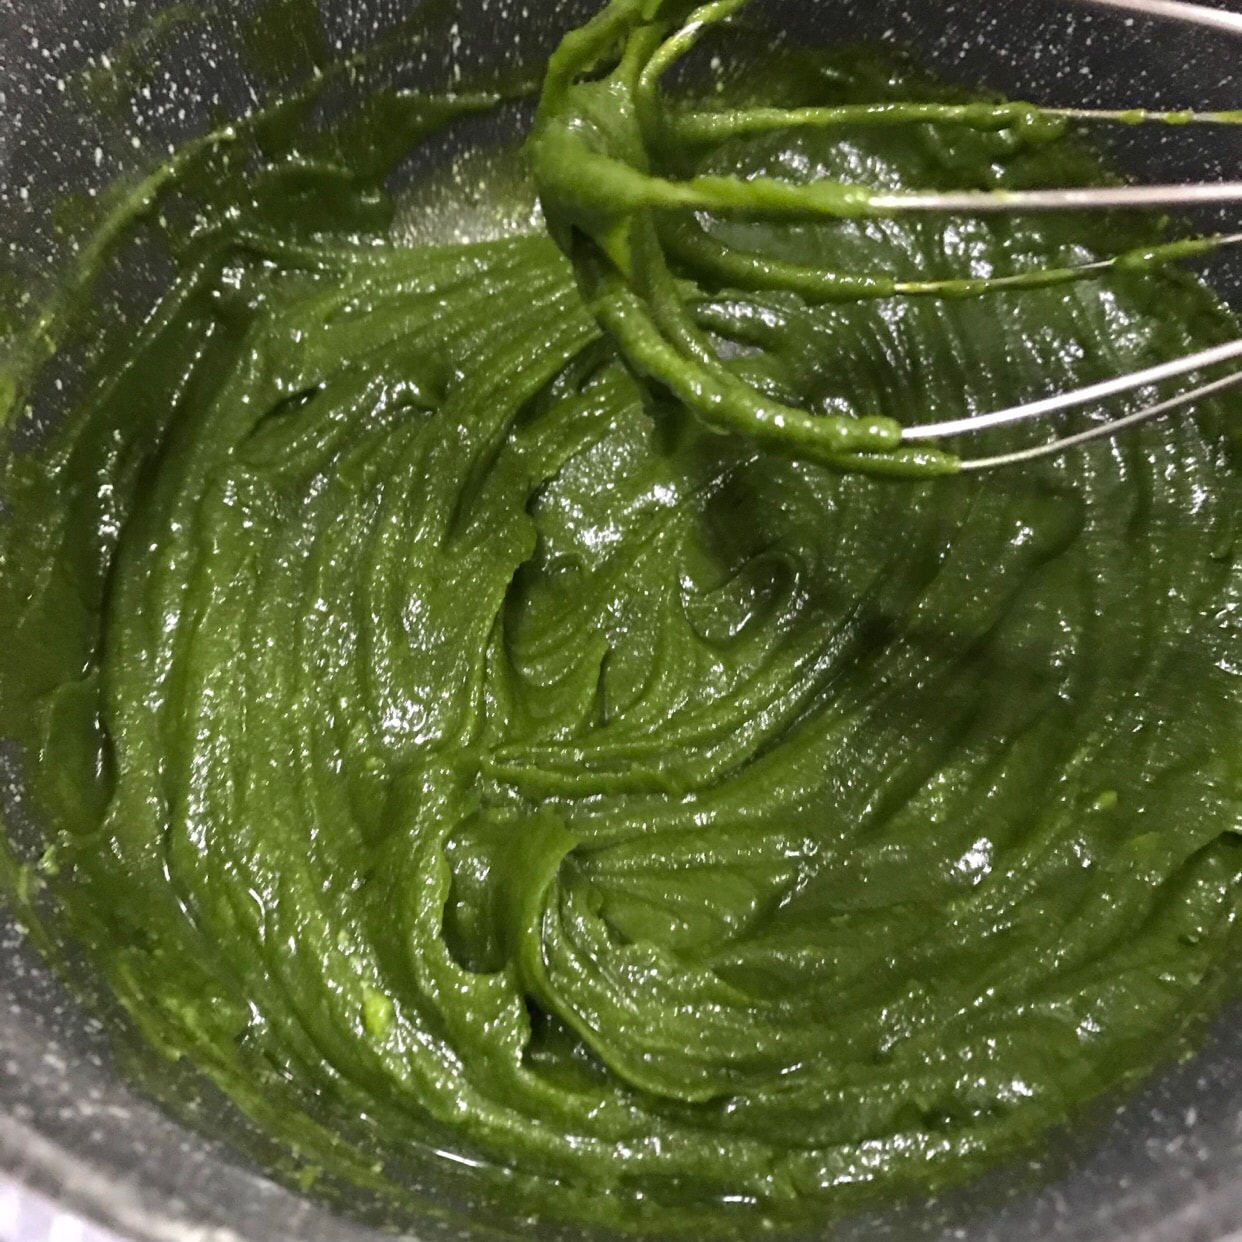
The stirred egg yolk batter should be in this state👇🏻this state
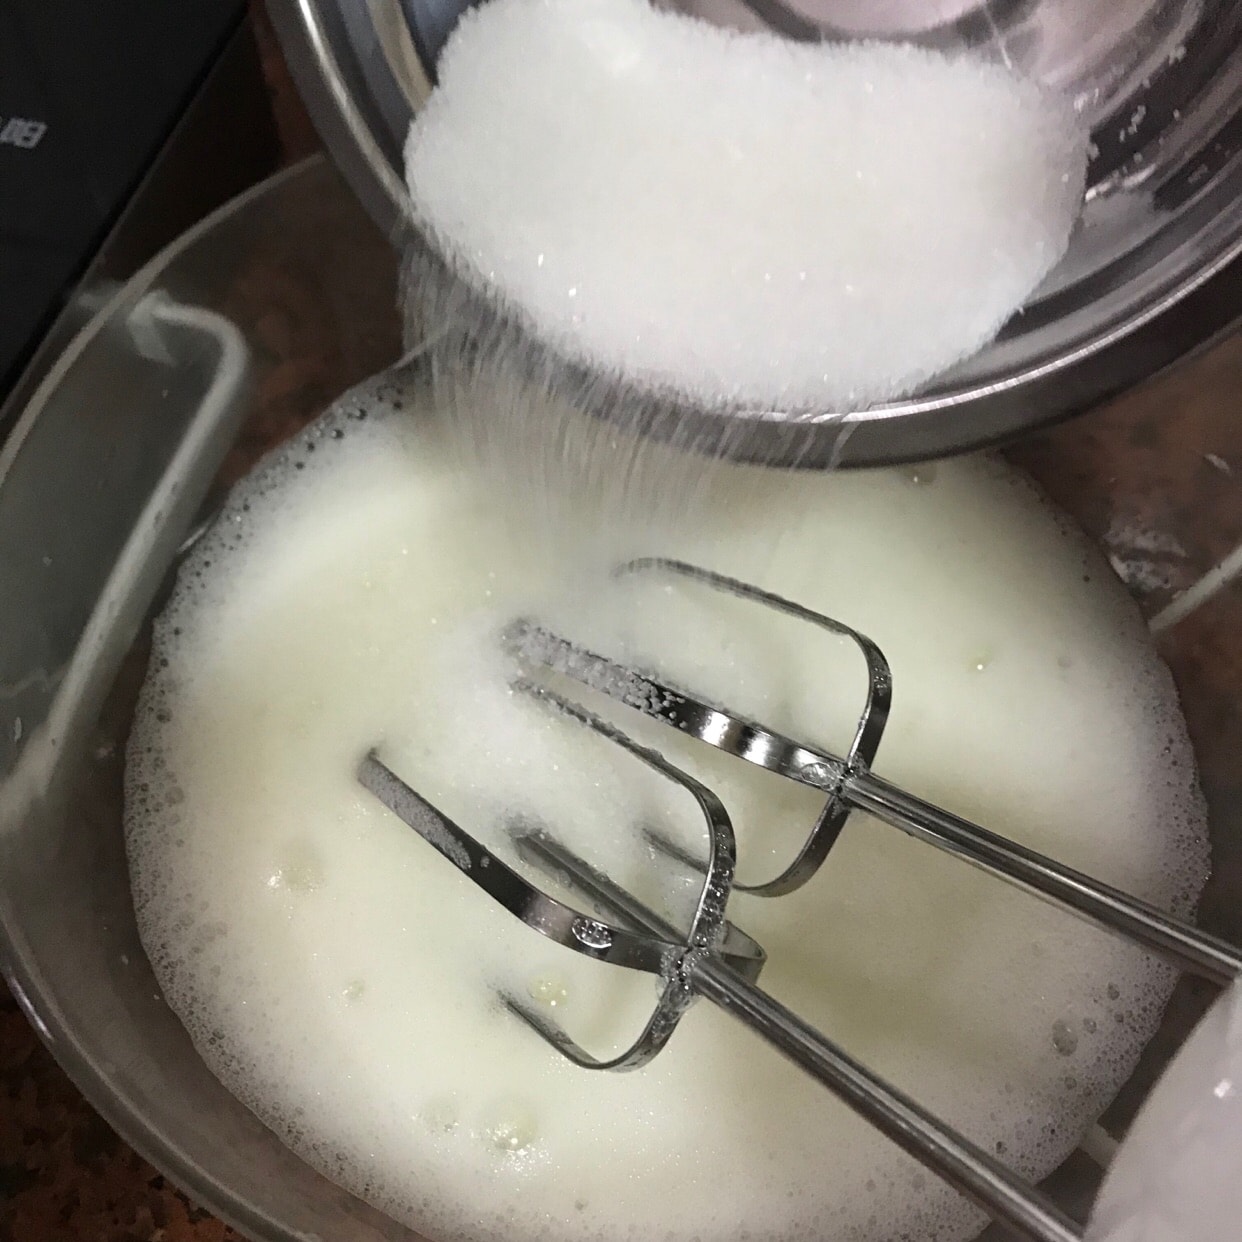
Step 5: Prepare a pan of water and put it in the lower shelf of the oven put the oven Warm up to 160degrees Then you can start whipping the egg whites Add a pinch of salt to the egg whites Add sugar in three additions
Add sugar for the first time👇🏻 (when the egg whites are whipped to the state of coarse foam time)

Add sugar for the second time👇🏻 (when the egg whites are whisked to the state of vesicles) time)
Add sugar for the third time👇🏻 (when the egg whites are beaten to a fine state )

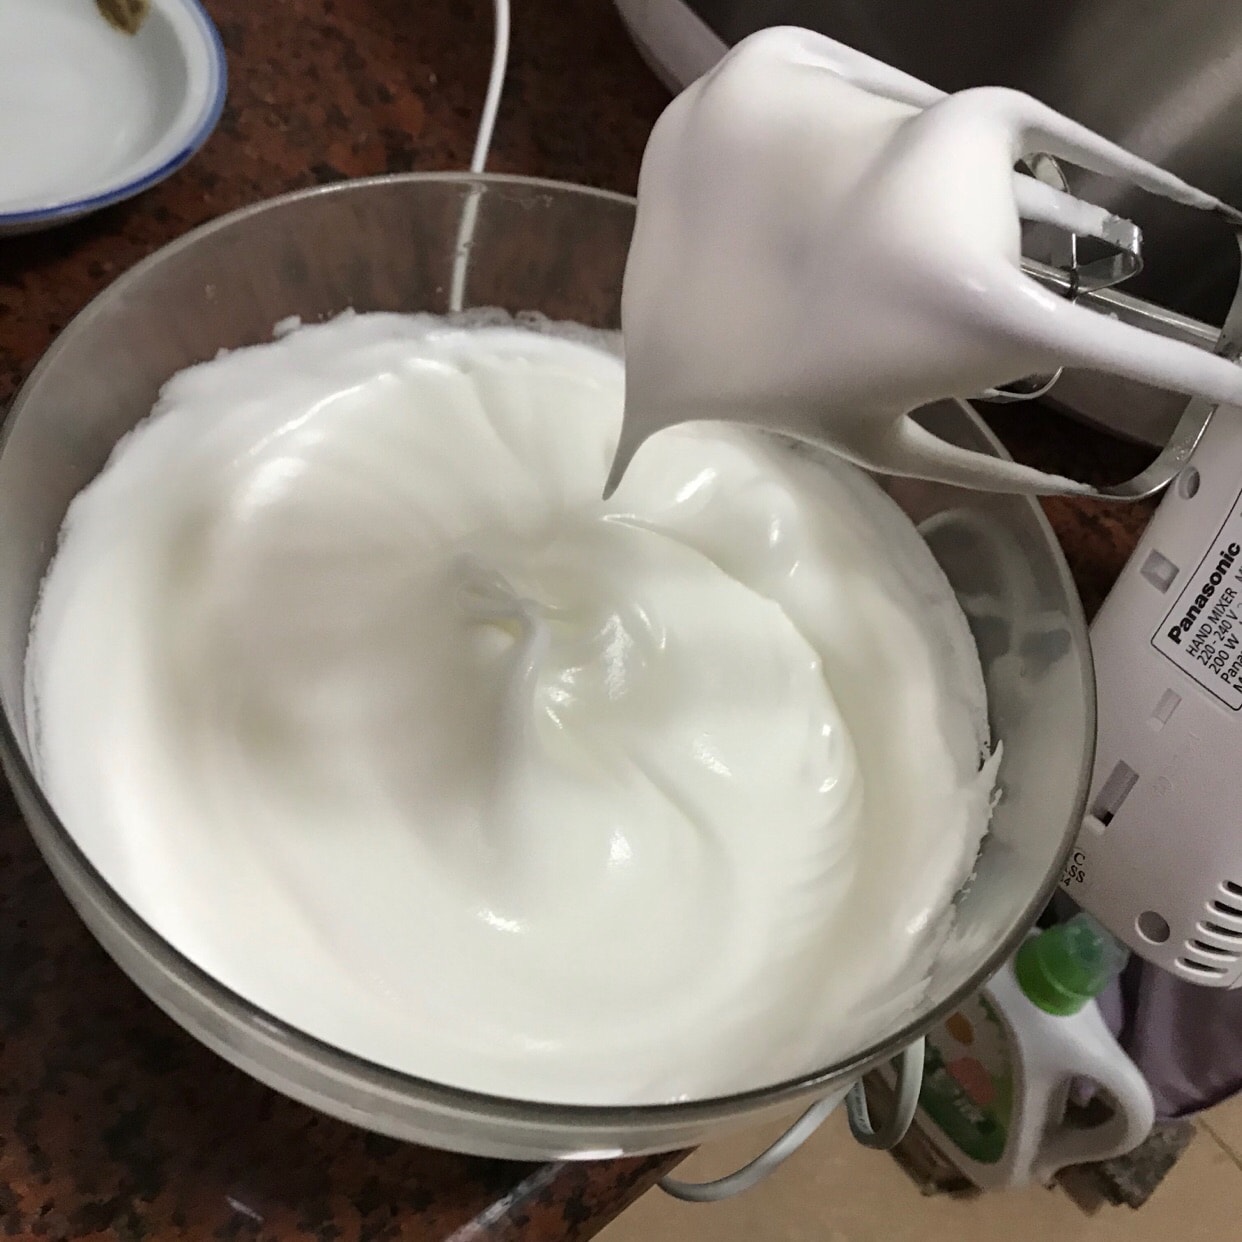
When the egg whites are whipped to a neutral foam that is< span class="s4">👇🏻This is enough
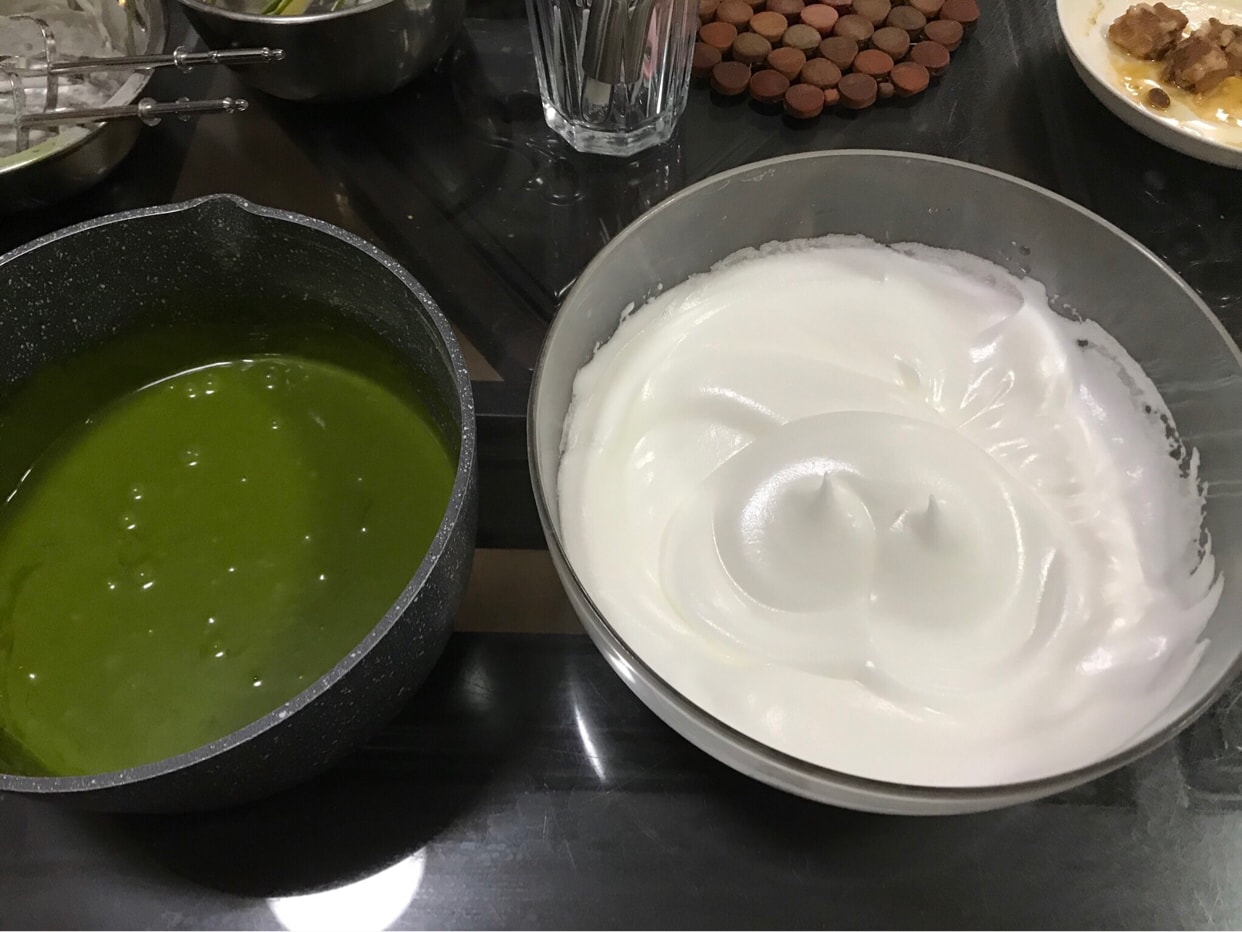
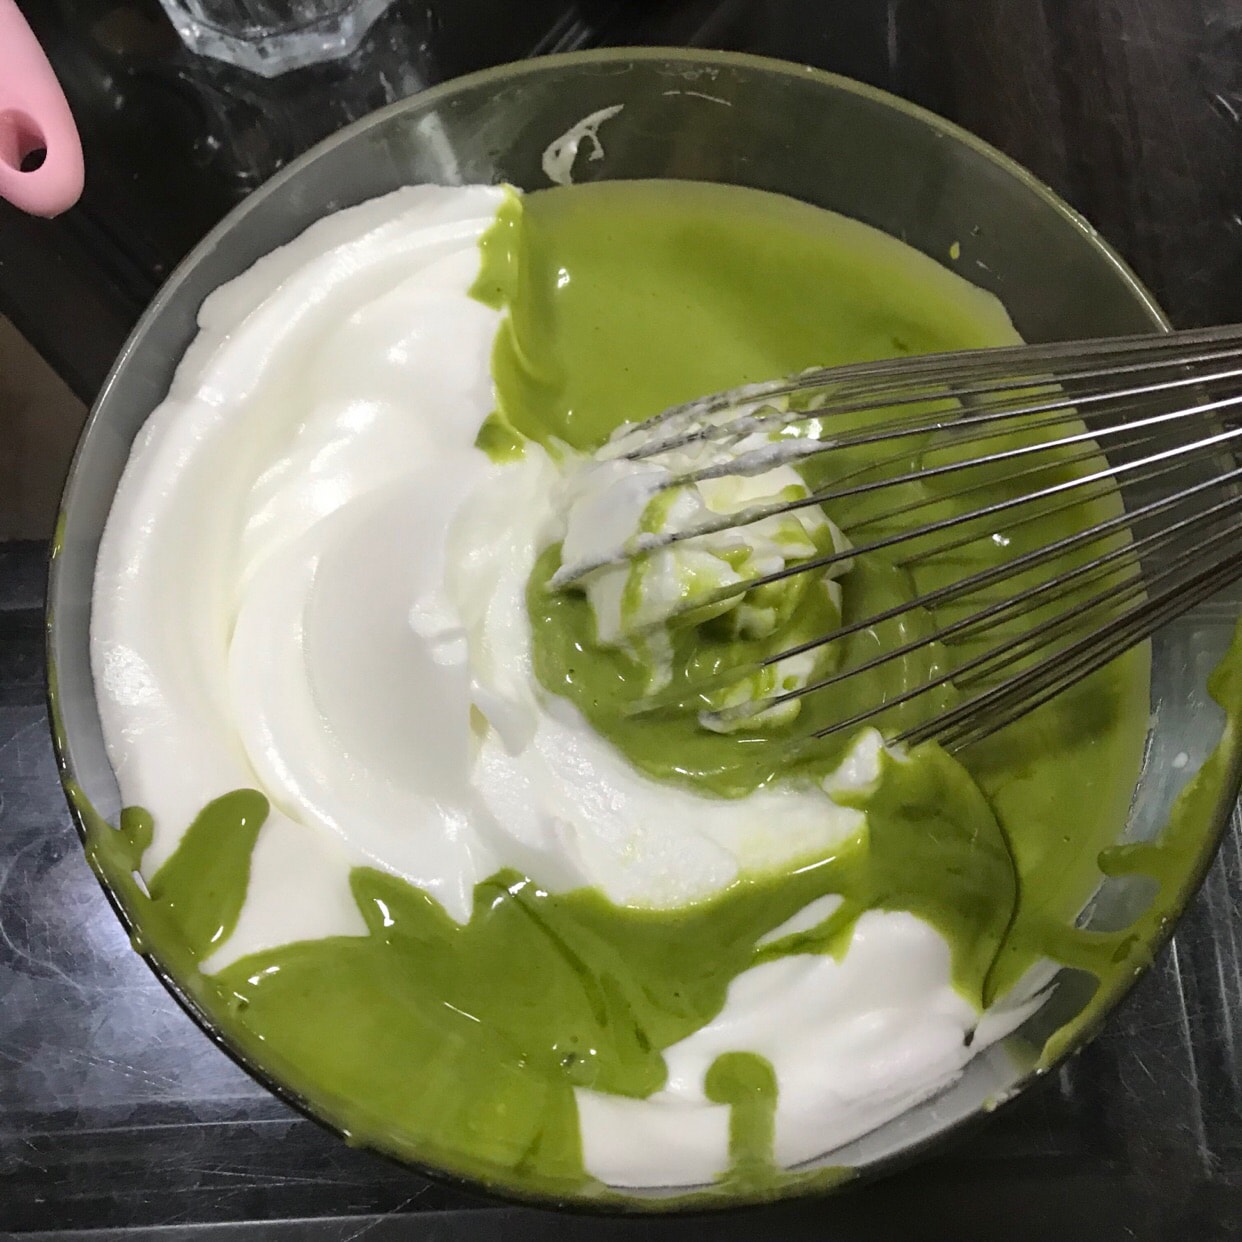
👇🏻Mixed egg yolk batter and whipped egg whites
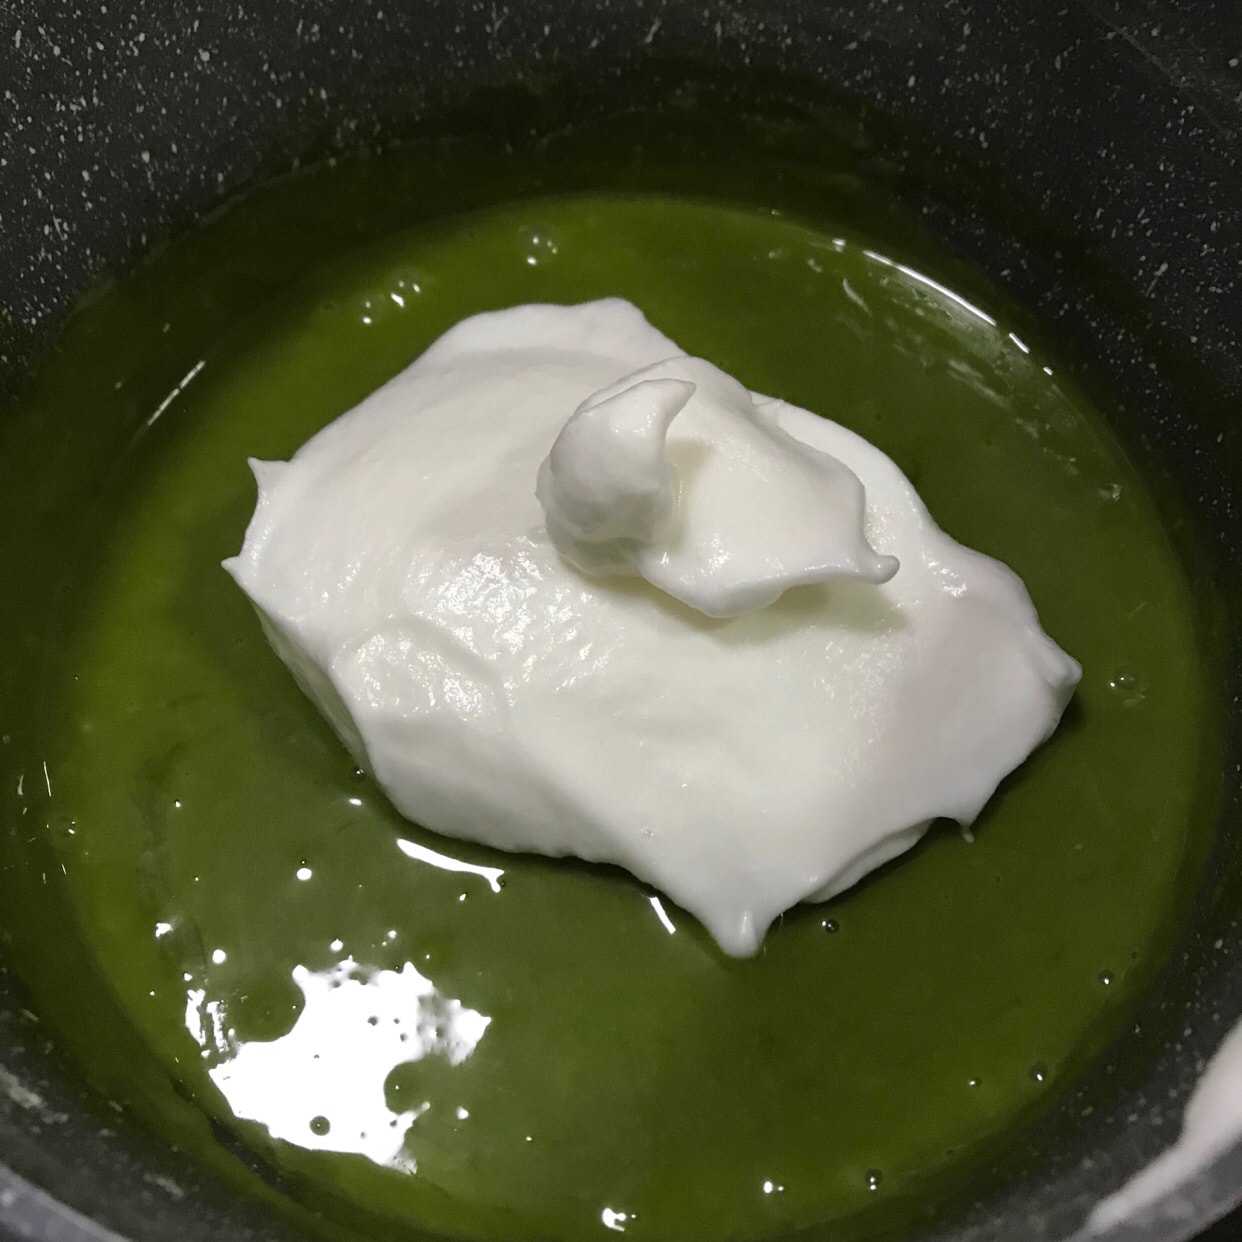
Step 6: Spoon1/3 of the egg whites into the yolk paste Medium Stir well with a stirring technique
Step 7: Pour the mixed batter into the beaten egg whites Stir well with a hand whisk and spatula
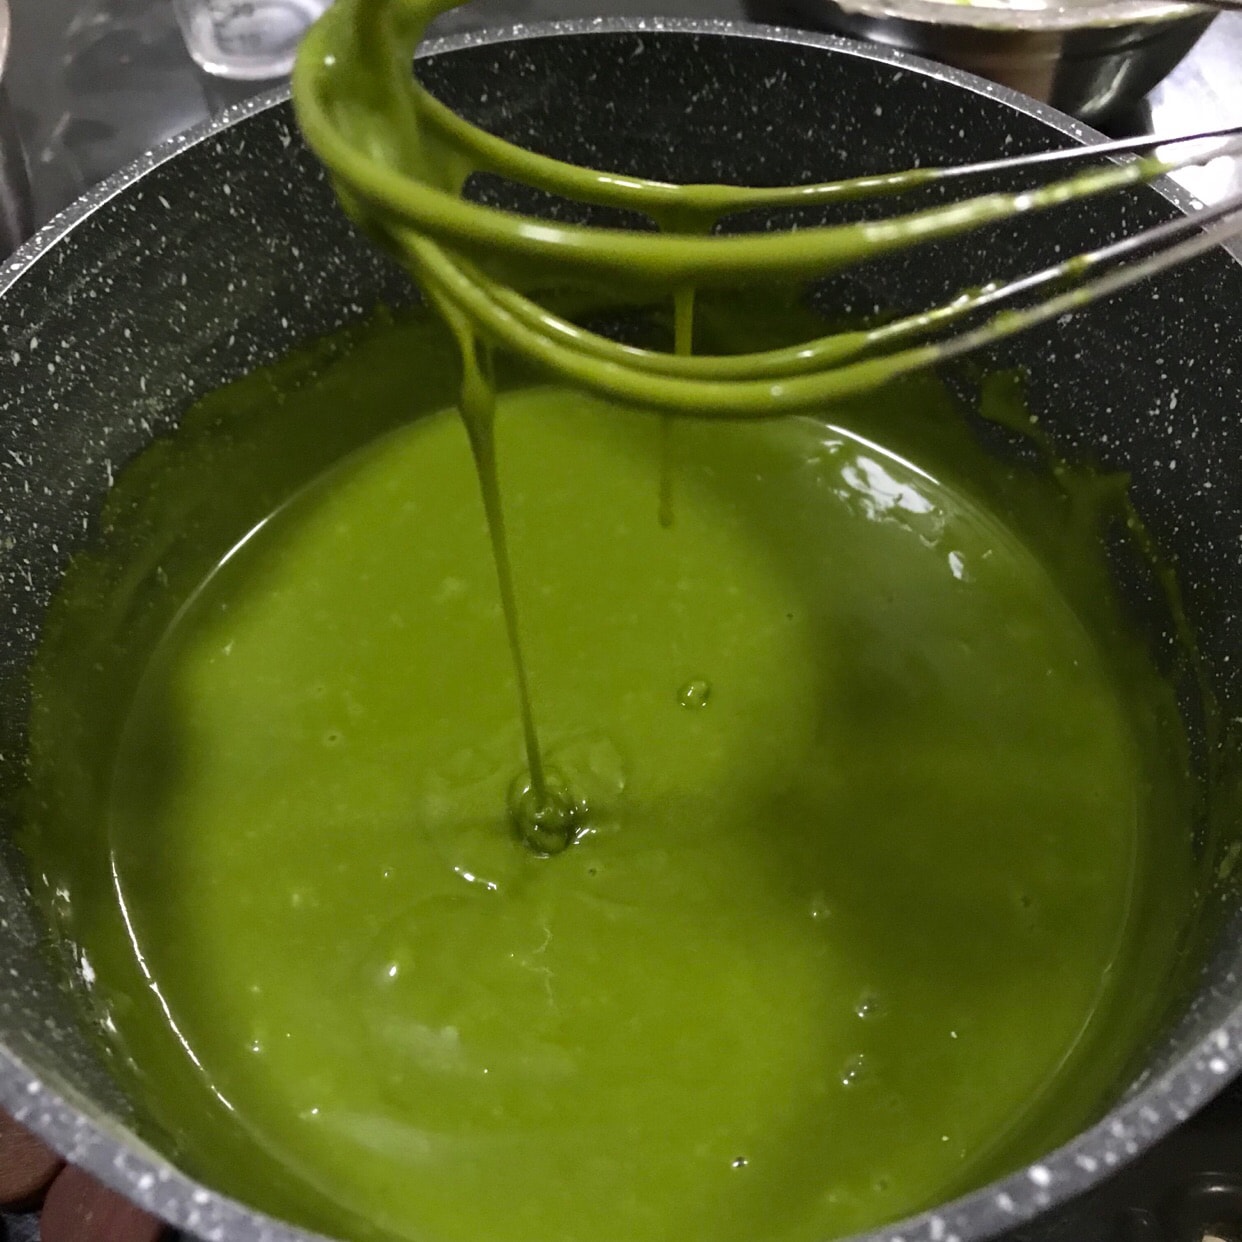
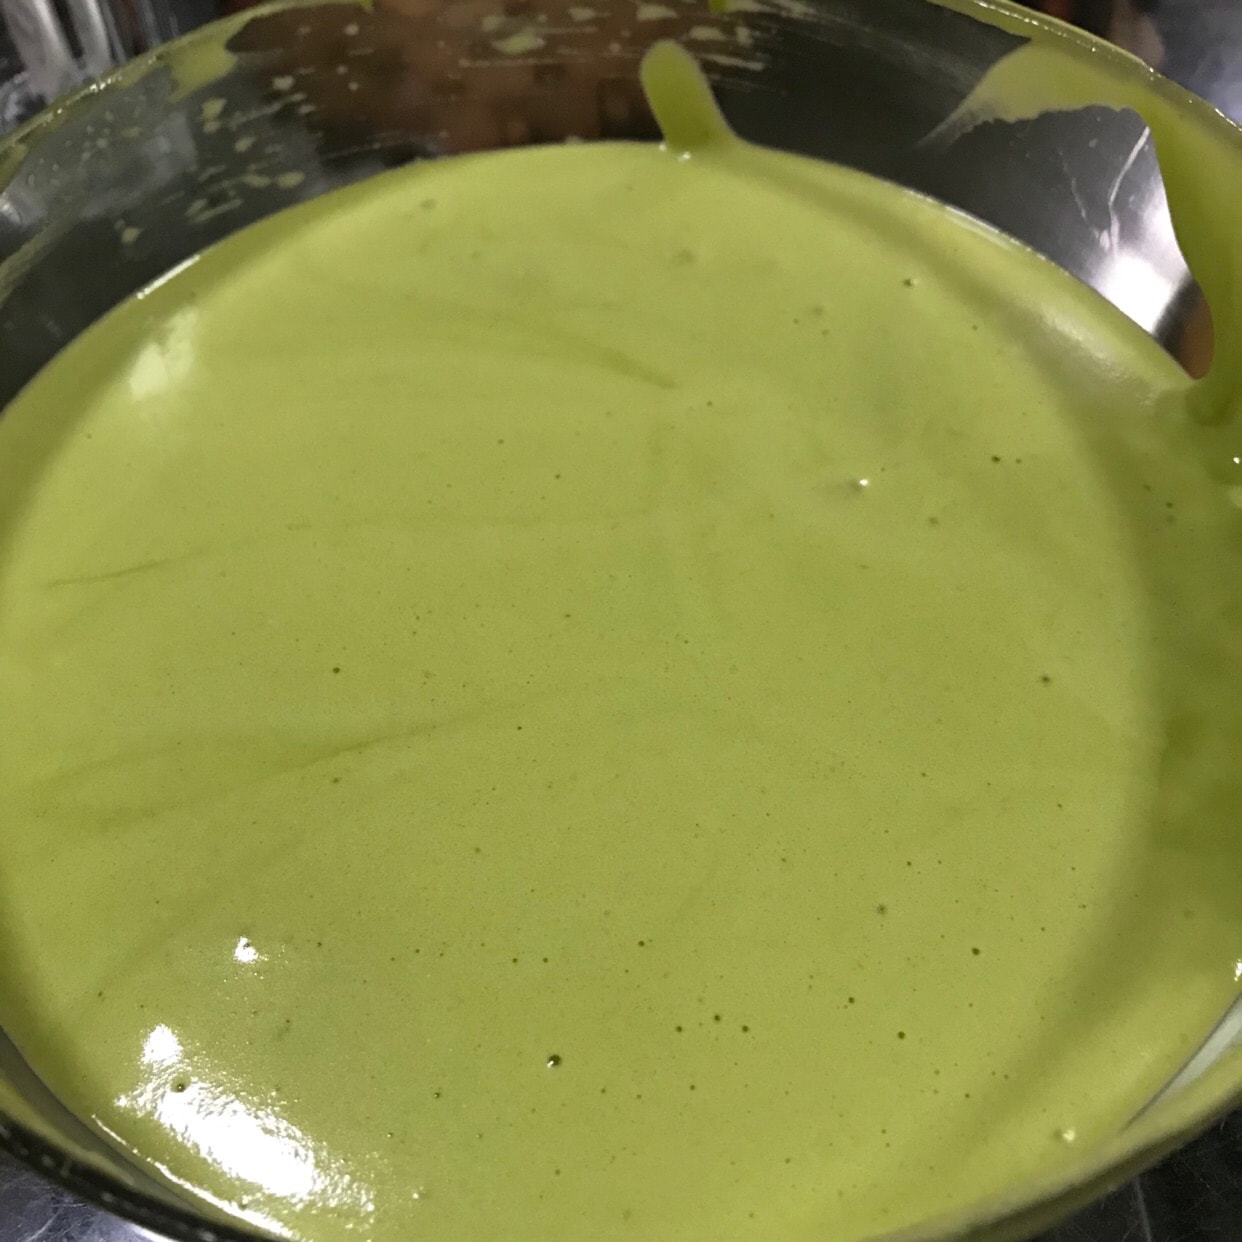
Stir it until👇🏻This state is fine The correct batter should be thick, not thin
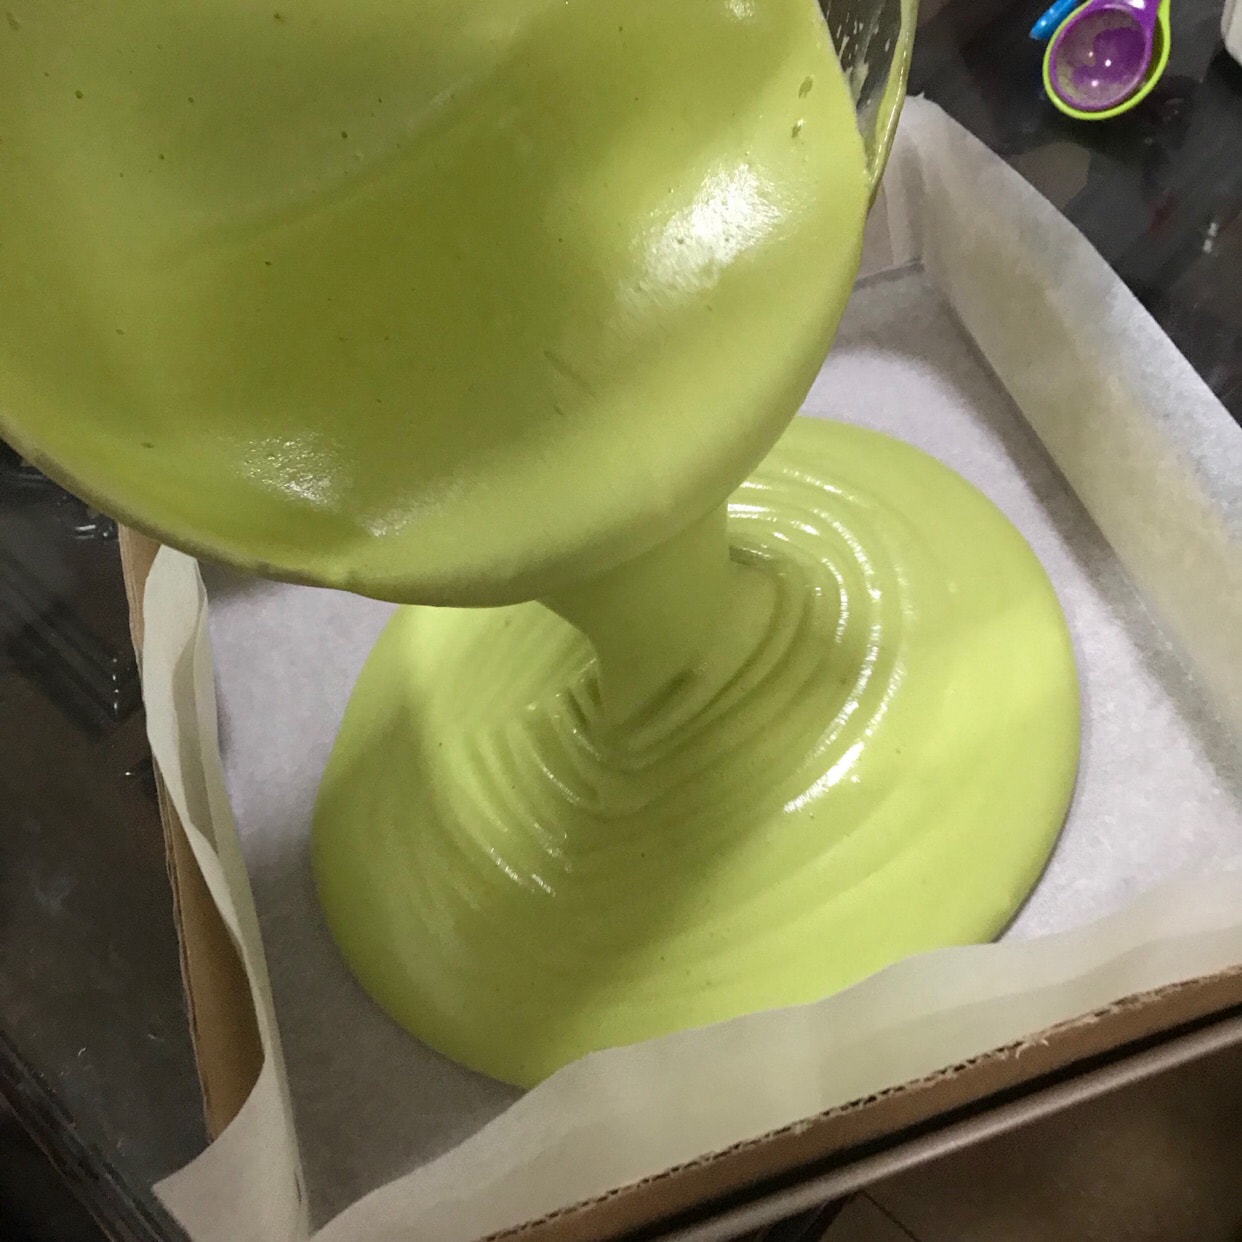
Step 8: Pour the batter into the mold
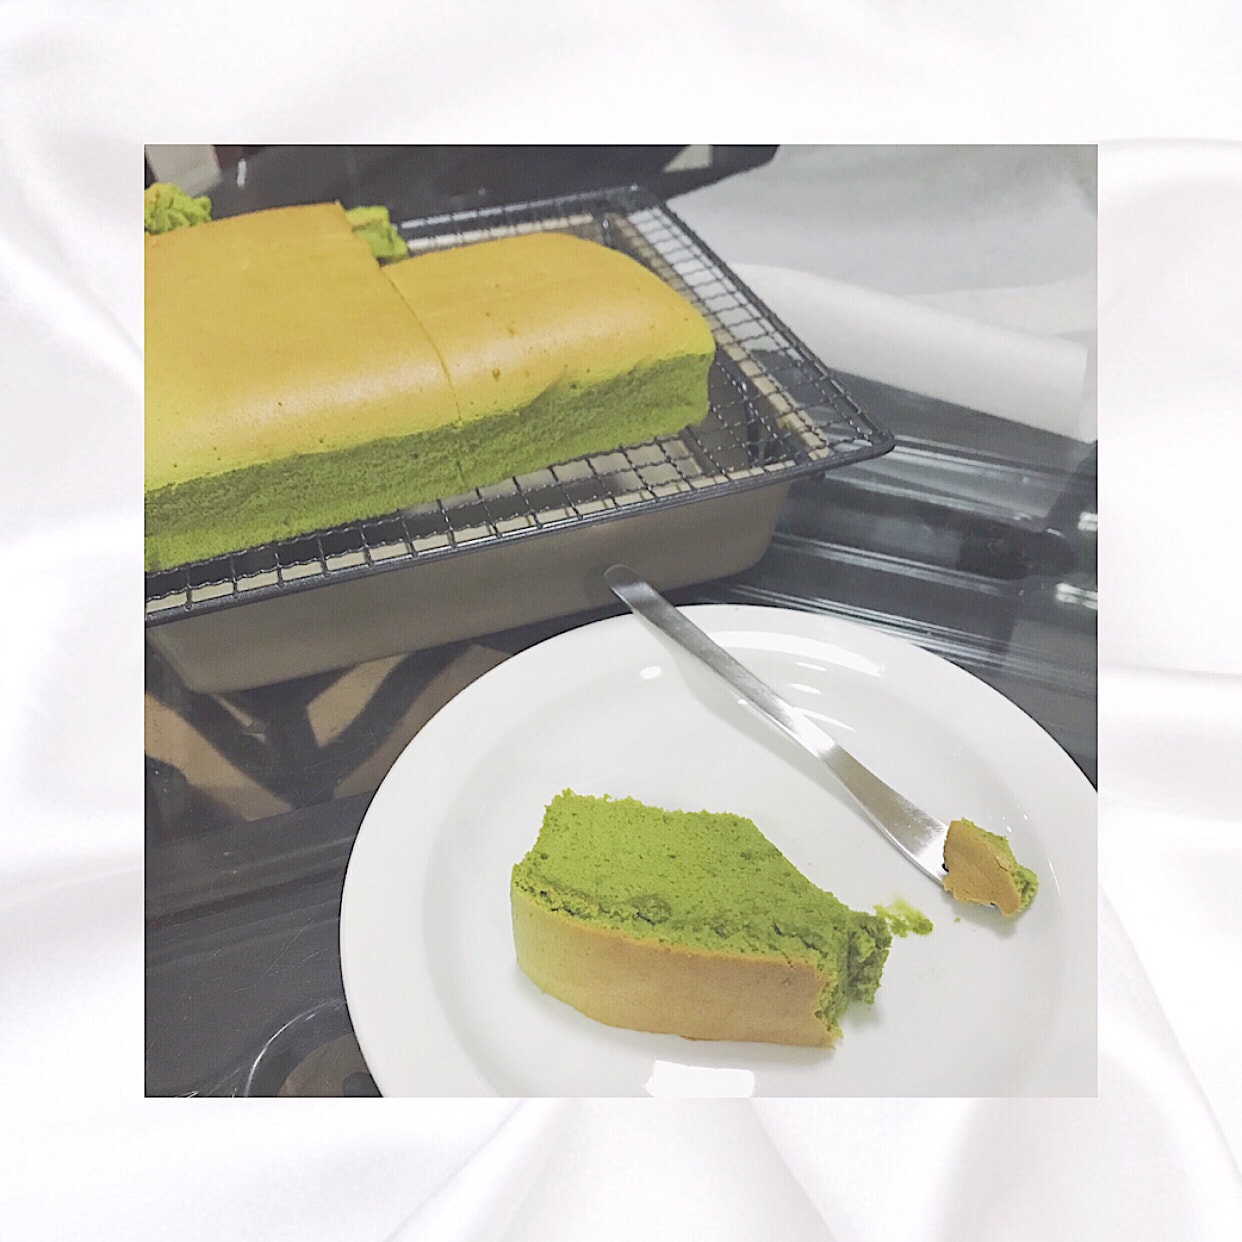
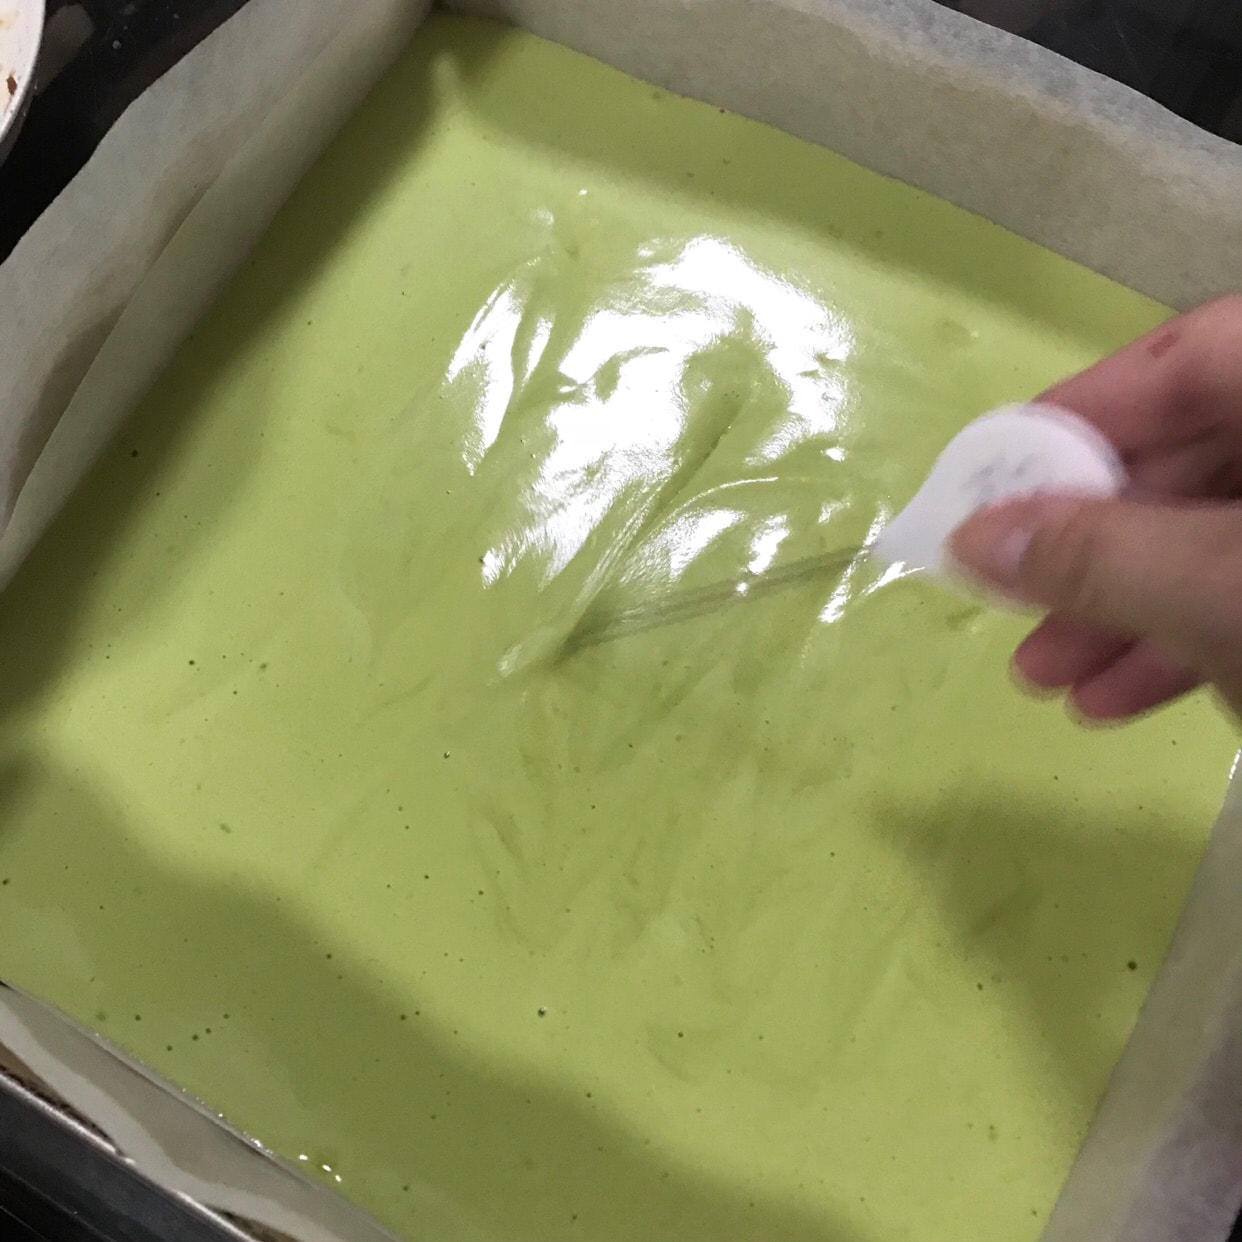
Finally drop the big bubbles from a height or use a probe to break the bubbles in the batter Then put the batter into the middle of the oven on the upper and lower heat160degrees60minutes
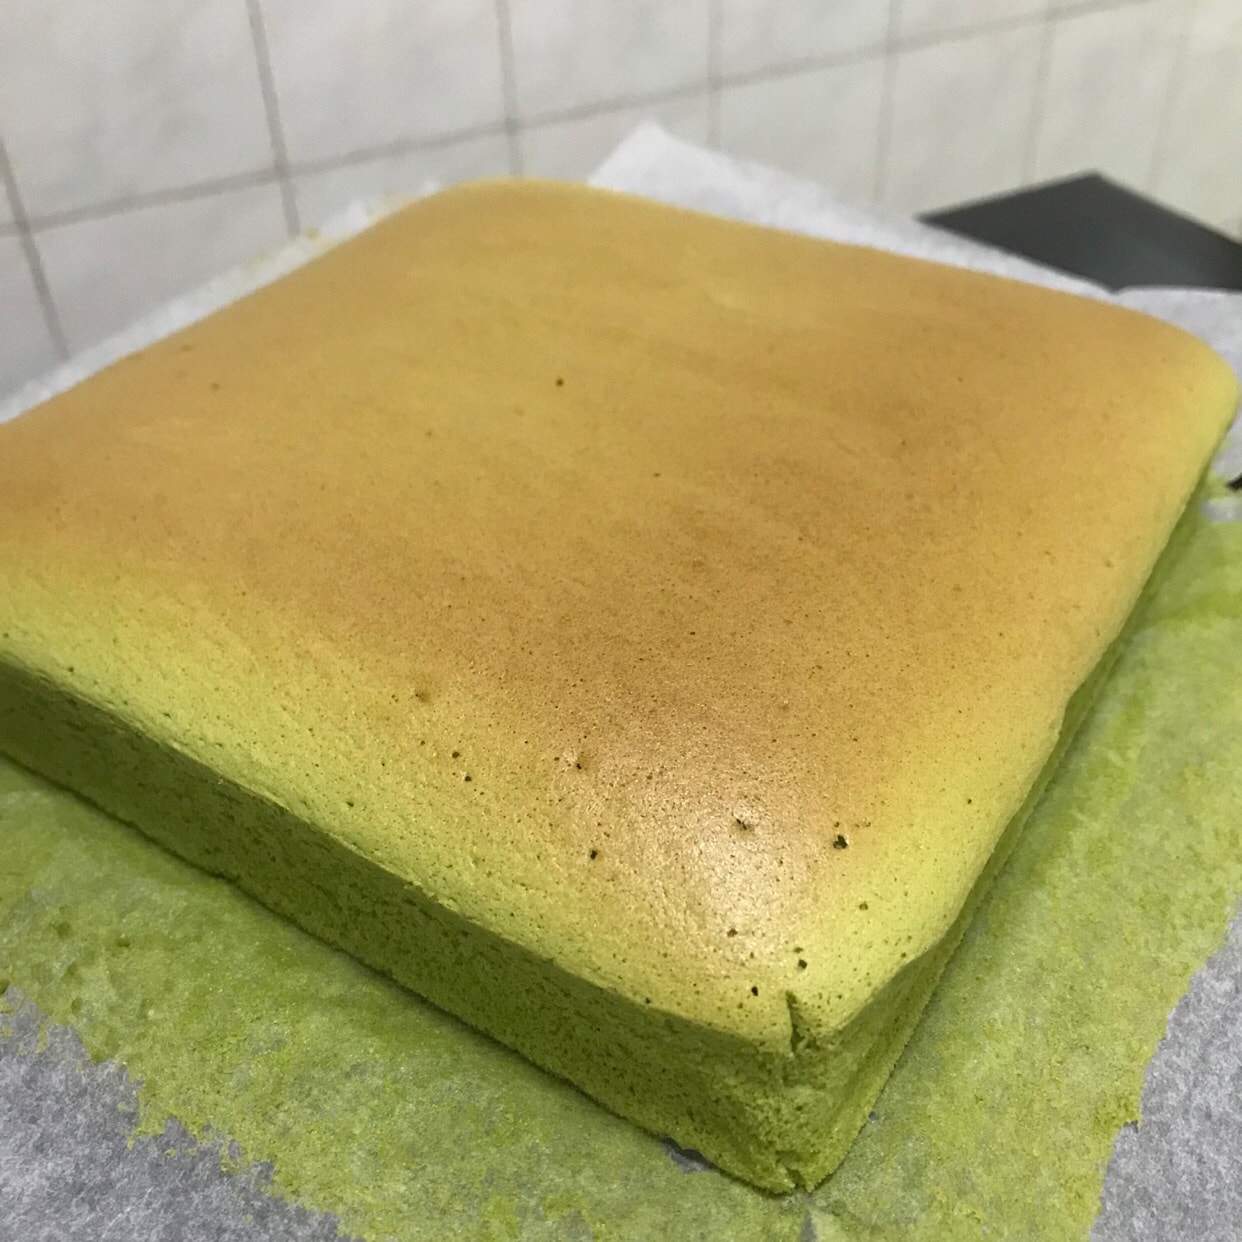
Step 9: Invert the baked cake on the cooling rack Wait Allow to cool to room temperature
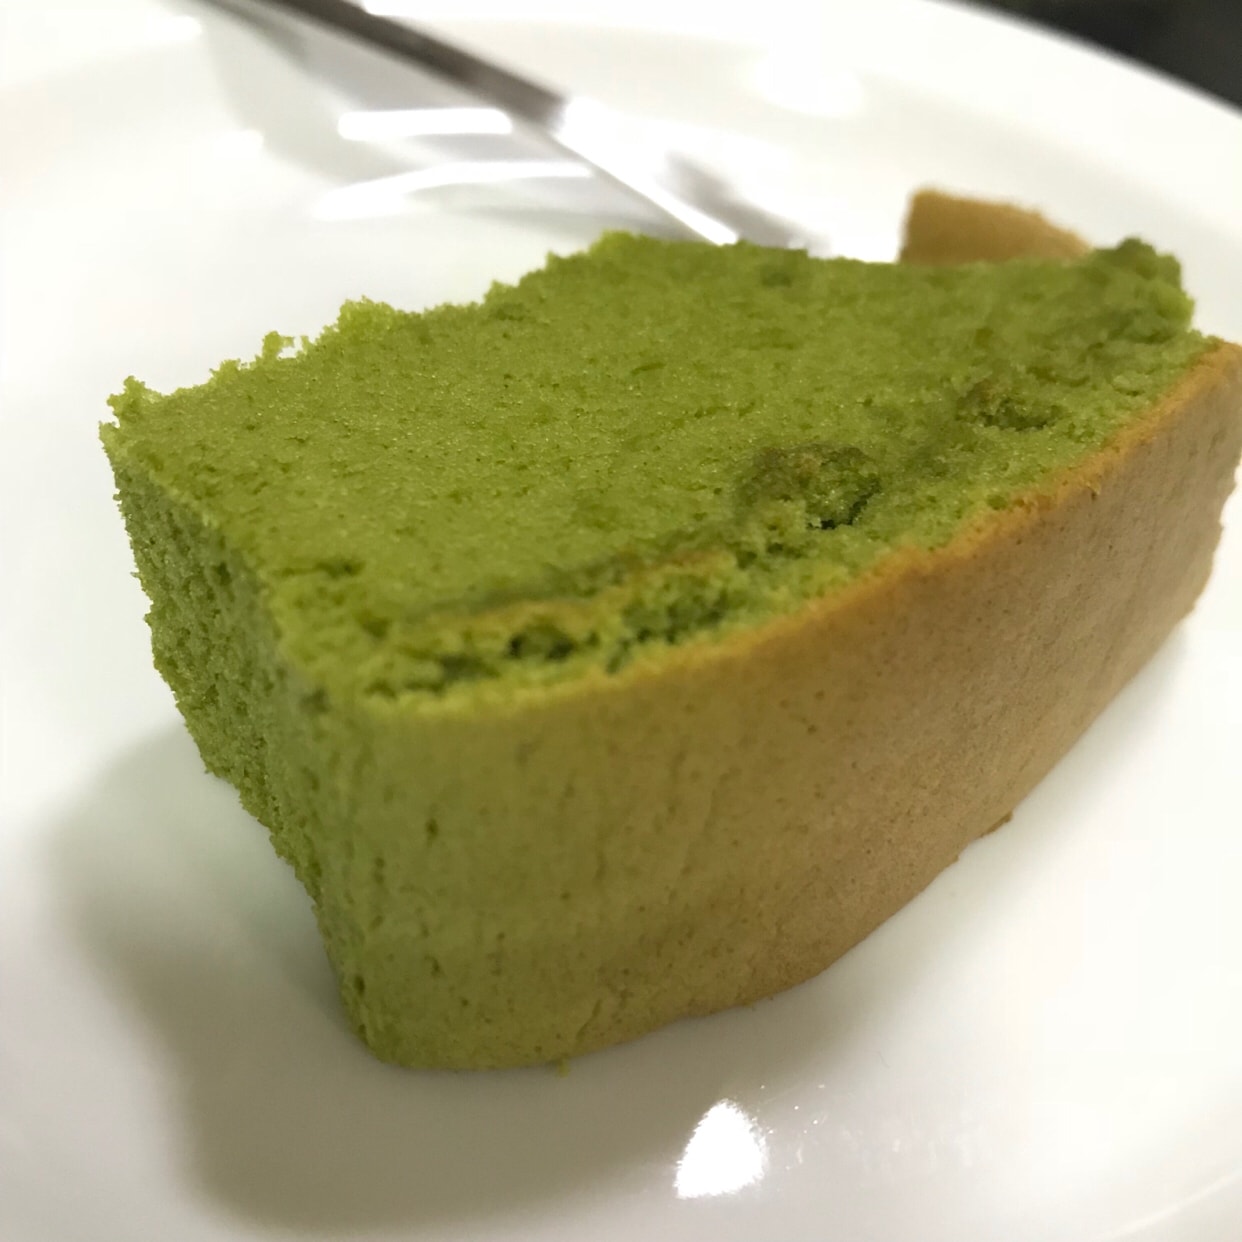
⚠️Note: Because it is heated by a water bath So the final baked cake will be a bit moister If you like it a little bit dry< span class="s1"> Can be baked at the end5-10minutes Take out the hot water from the bottom of the oven
In addition, different ovens have different temperaments Friends should use their own ovens Adjust the temperature according to the situation🤓
This is my sharing I hope you like it💕
 Show Original

🍃抹茶味的松软海绵蛋糕

我个人非常喜欢吃抹茶蛋糕 试了很多个配方后发现 还是现在下面这个最好用 今天我就把这款松软香甜的抹茶海绵蛋糕的配方分享给大家☺️
原方摘自YouTuber:Stephie蔚丝
此方适合10*10cm的方形模具 另外此方烤出来刚好是20*20cm的方形模具的一半 需要用到烫面法和水浴法

需要用到材料有:
植物油 75g
牛奶 30g
炼奶 50g
低筋面粉 70g
抹茶粉 10g
蛋黄 5个
蛋白 5个
全蛋 一个
糖 65g
盐 一丢丢
第一步:根据模具的尺寸裁剪烘培纸 模具和烘培纸中间可放入纸板隔热 然后我们来分蛋 分好的蛋白可以放在冰箱冷冻 还有一个全蛋打在蛋黄中

第二步:将植物油加热到75-80度左右(我这里有用到温度枪)有微波炉的朋友们直接将油加热两分钟即可
第三步:在热油中筛入低筋面粉和抹茶粉 用手动打蛋器以“Z”字的手法搅拌均匀

第四步:接着加入牛奶后搅拌均匀

此时面糊可能有点稠是正常的👇🏻

然后加入蛋黄和一个鸡蛋拌匀

再加入炼奶

搅拌好的蛋黄面糊应该是👇🏻这种状态

第五步:准备一盘水放入烤箱下层 再把烤箱预热至160度 然后可以开始打发蛋白了 在蛋白中加入一丢丢的盐 分三次加入白砂糖

第一次加糖👇🏻(当蛋白打发到粗泡的状态时)

第二次加糖👇🏻(当蛋白打发到小泡的状态时)

第三次加糖👇🏻(当蛋白打发到细腻的状态时)

当蛋白打发到中性发泡 也就是👇🏻这种程度即可

👇🏻搅拌好的蛋黄面糊和打发好的蛋白

第六步:勺取1/3的蛋白放入蛋黄糊中 用翻拌的手法搅拌均匀

第七步:将搅拌好的面糊倒入打发好的蛋白中 用手动打蛋器和刮刀搅拌均匀

搅拌到👇🏻这种状态即可 正确的面糊应该是浓稠的而不是稀的

第八步:将搅拌好的面糊倒入模具中

最后从高处摔一下振出大气泡或者用探针划破面糊中的气泡 然后将面糊送入烤箱中层上下火160度60分钟

第九步:烤好的蛋糕倒扣在散热架上 待其冷却至室温即可享用


⚠️注意事项:因为是水浴加热 所以最后烤出来的蛋糕会偏湿润一点 如果喜欢干身一点的话 可以在最后烘烤的5-10分钟的时候 拿出烤箱下层的热水
另外不同的烤箱不同的脾气 朋友们要自行根据自己的烤箱情况调节温度哦🤓
以上就是我的分享 希望你们会喜欢💕