
[Recommendation of Little Cola's Favorites] Use Yami's small gift to paint a summer makeup💕
Received a small gift today on the topic of eye makeup~
I immediately used them for a summer look.
(There are grasses and weeds.)
But because I am handicapped.. < /span>
I really don't know how to match colors.
So this is probably a .. Walking but unprofessional eye Makeup to share.
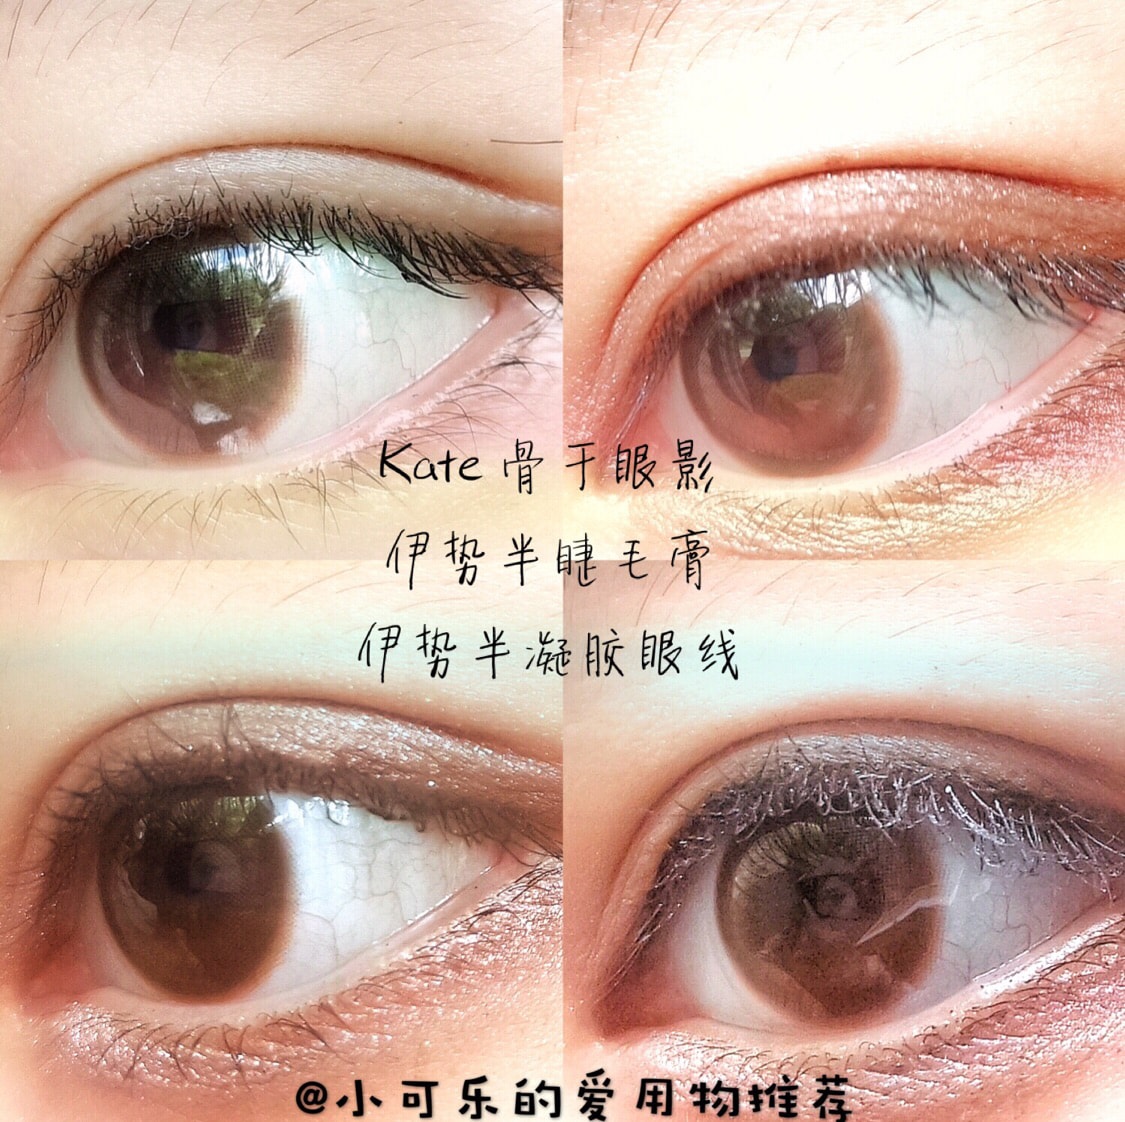
The prizes include:
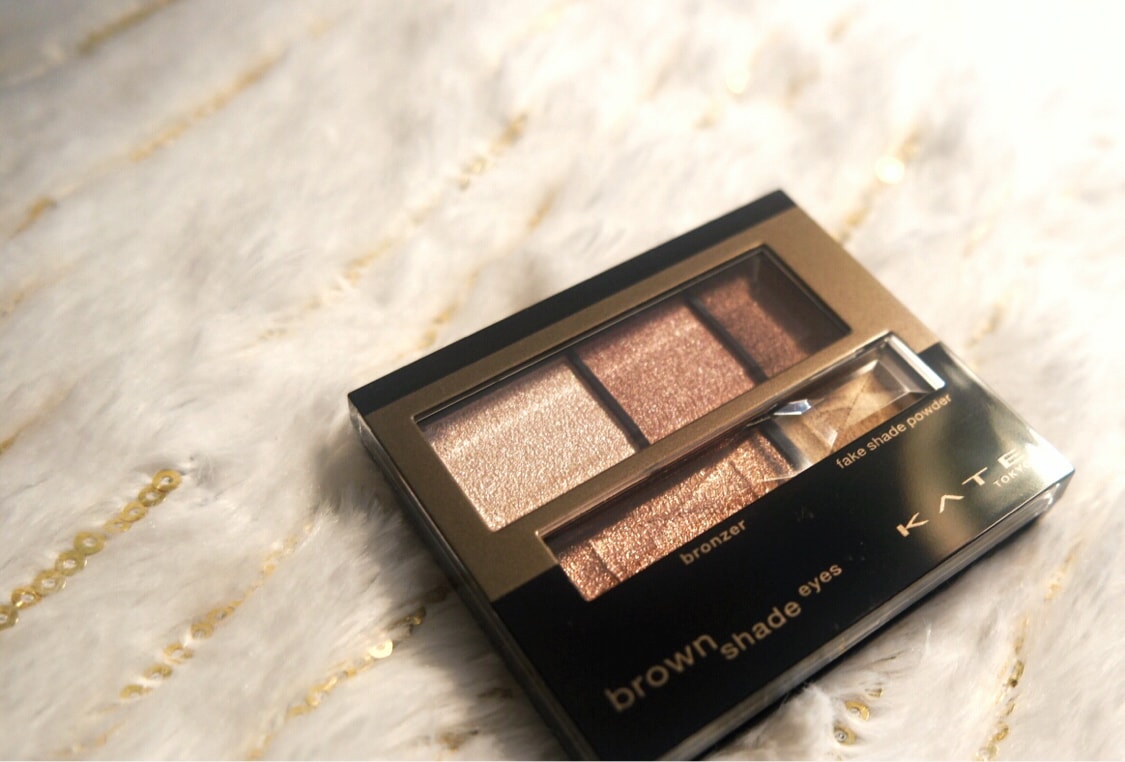
[Kate Five Shades of Backbone Eyeshadow]
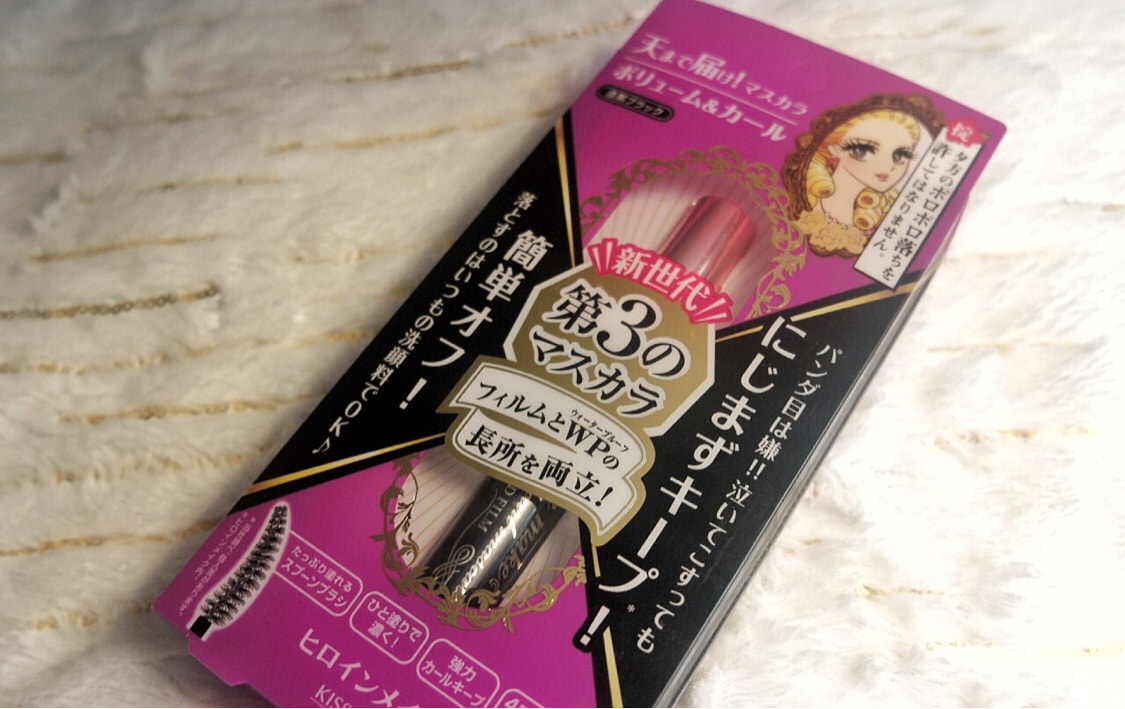
【Ise Semi-Waterproof Mascara】
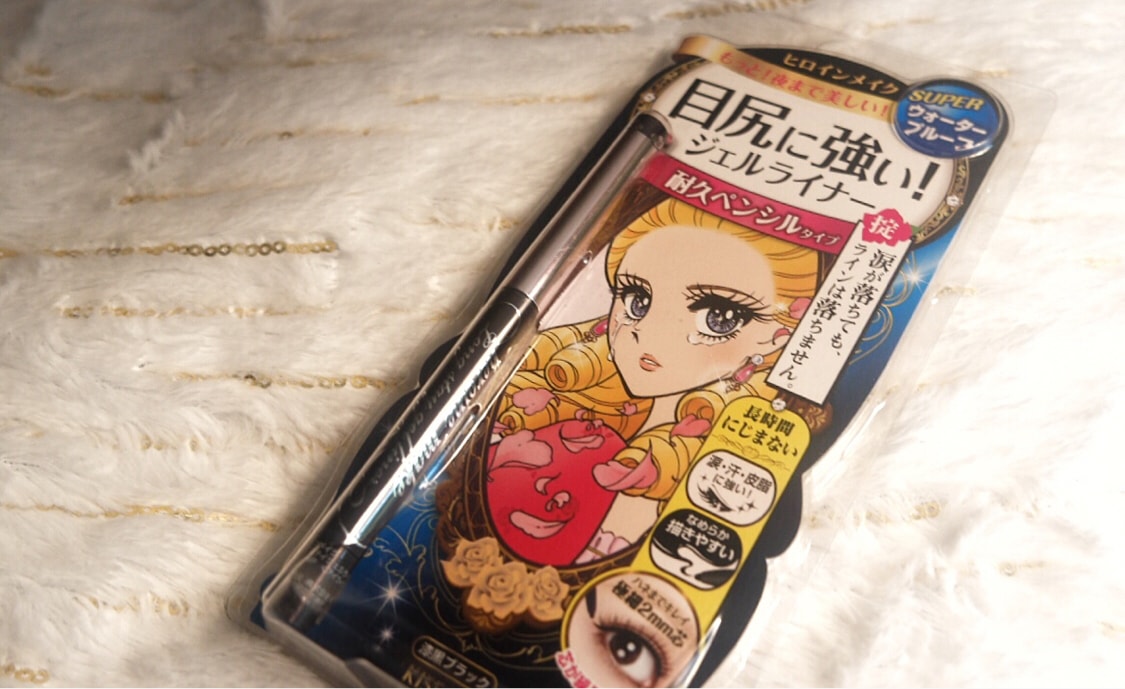
【Ise Semi-Gel Eyeliner】
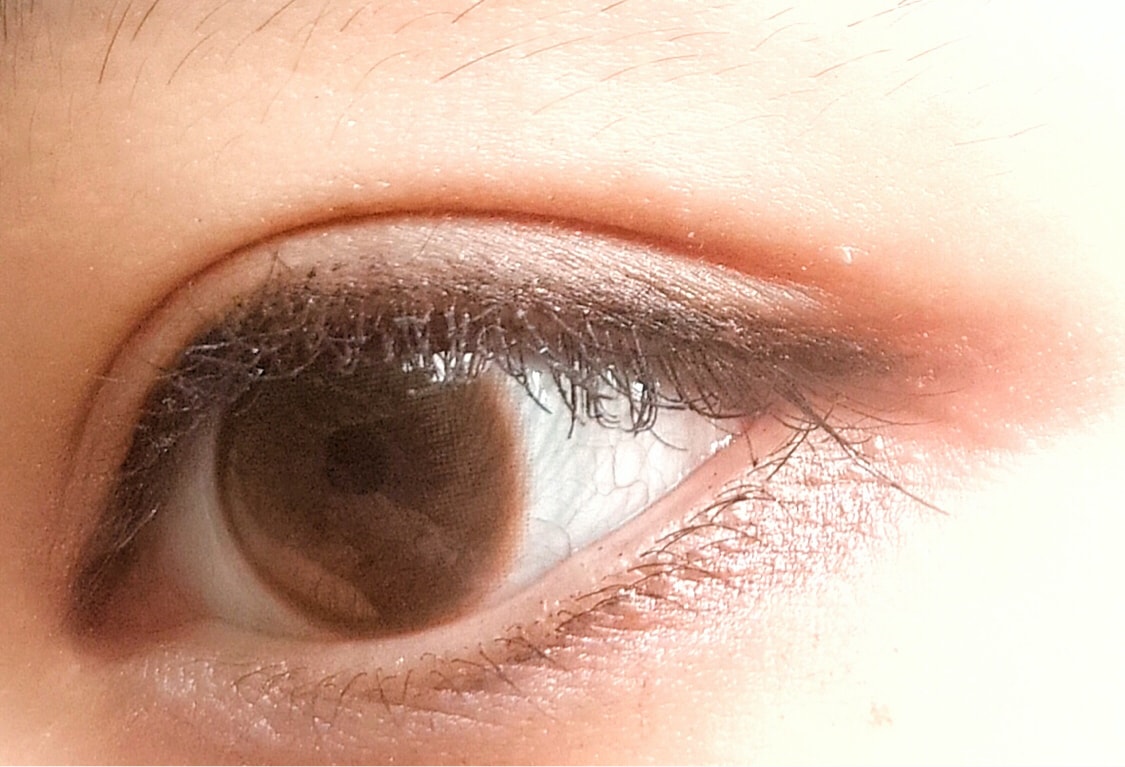
Nude eyes:

A state where nothing is drawn on the eye.
Please ignore the stray hairs around the eyes and the moles at the corners of the eyes😂😂😂. .
Take it just after washing my face.
The lashes are still wet. 🤦♀️
💫Step 1:Eyeshadow
My first step in eye makeup is eye shadow.
[Kate Five Shades of Backbone Eyeshadow]
It's a popular eye shadow.
Crowds of influencers use Amway's eye products.
Outer packaging:
Very simple design~
A small plate.
Easy to carry.
Internal:
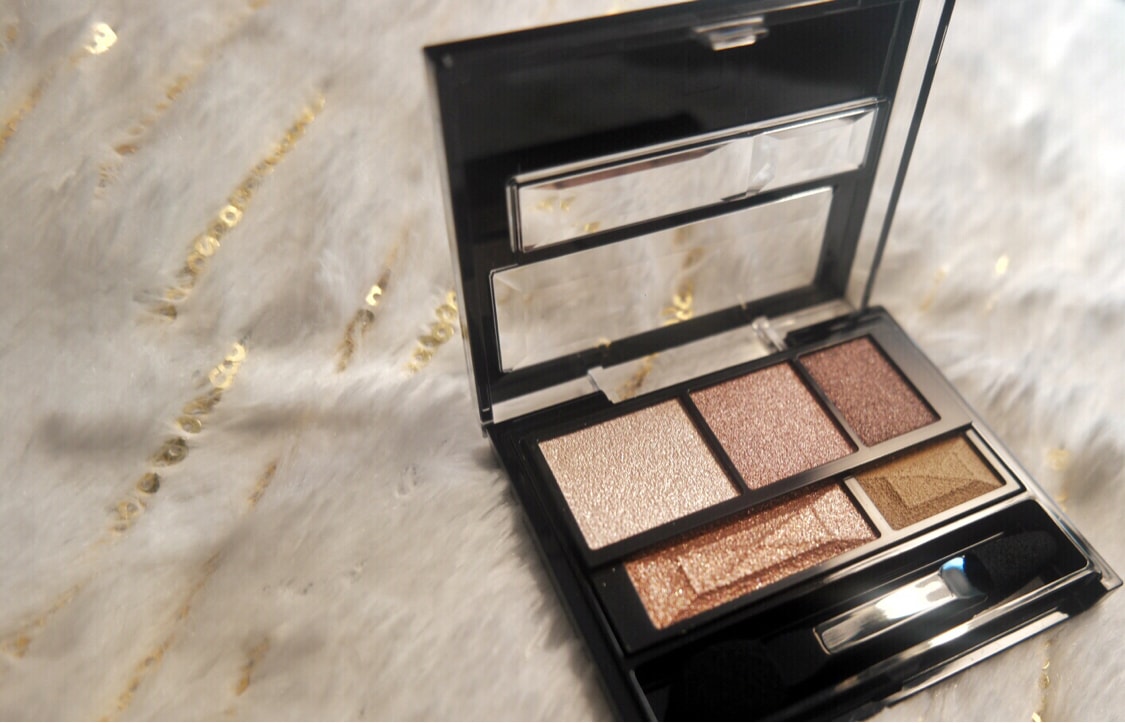
Most are pearlescent.
Colors are very everyday.
arm test:

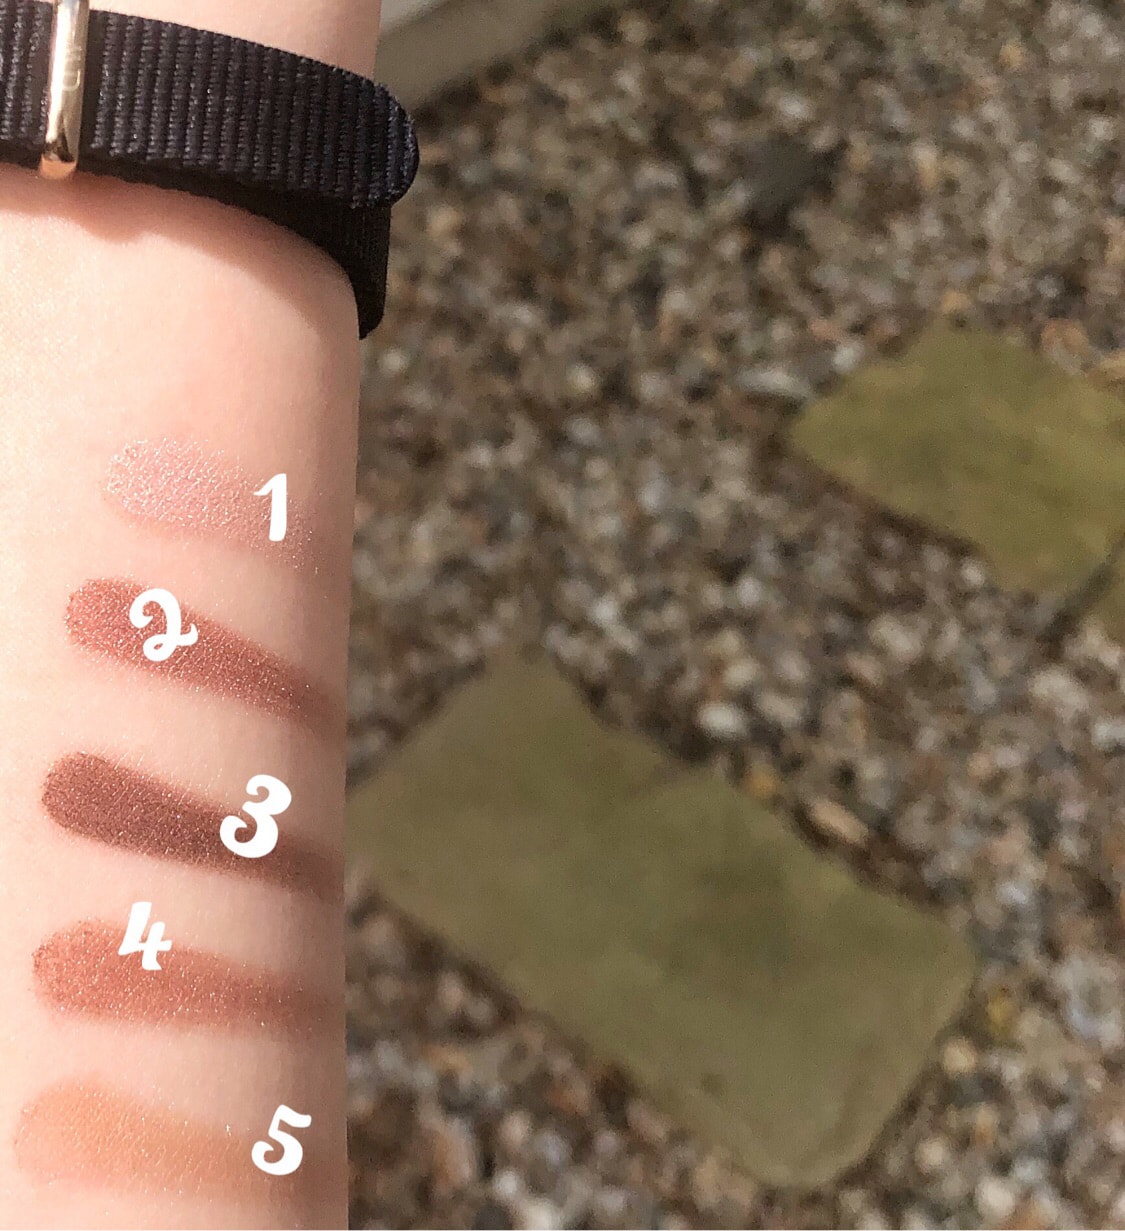
The small downside of this plate is that most of the colors are pearlescent.
This dish is not suitable for girls with puffy eyes.
Because the pearlescent color will make the eyes look more puffy.
The arm swatches are all thick coats!
The actual color is much lighter and more natural than this.
My usage:
1. Use matte first5The shade gives a light base to the eyelids.

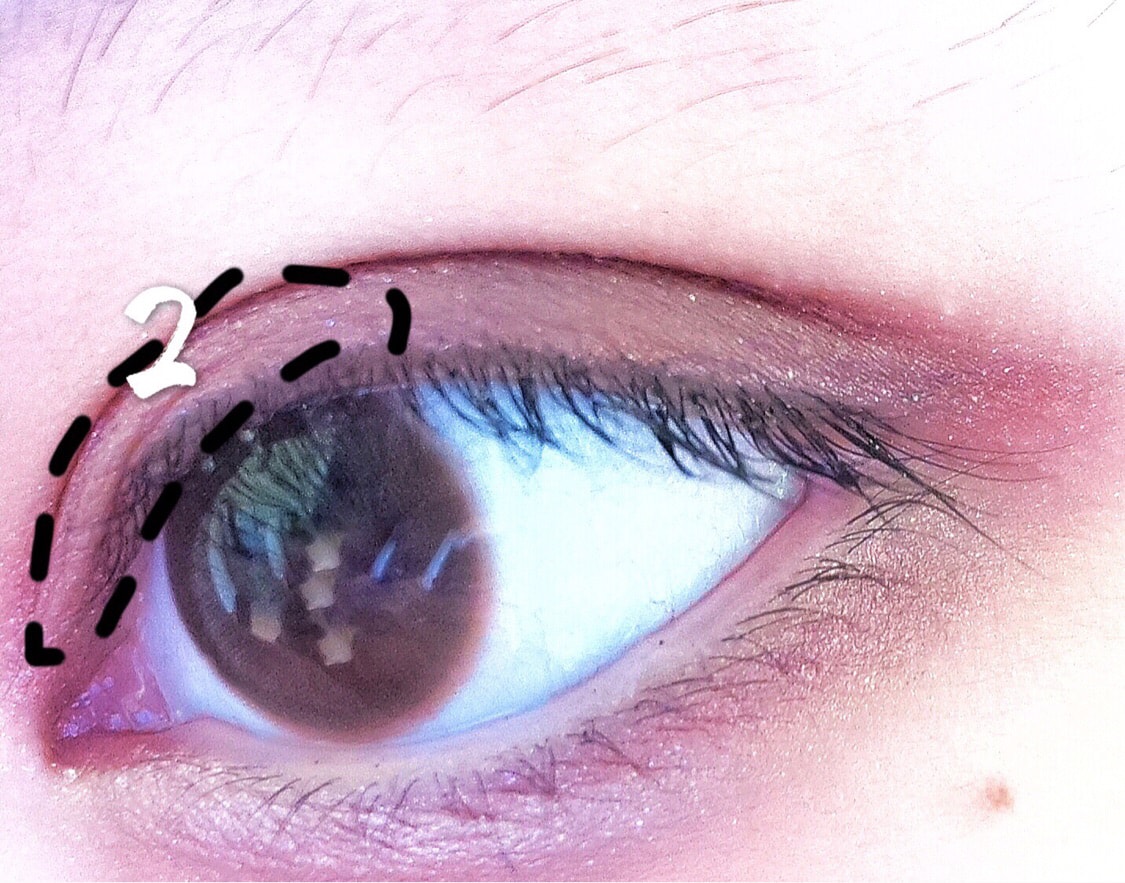
2.Use lighter2 rose pink deepens and brightens the corners of the eyes.
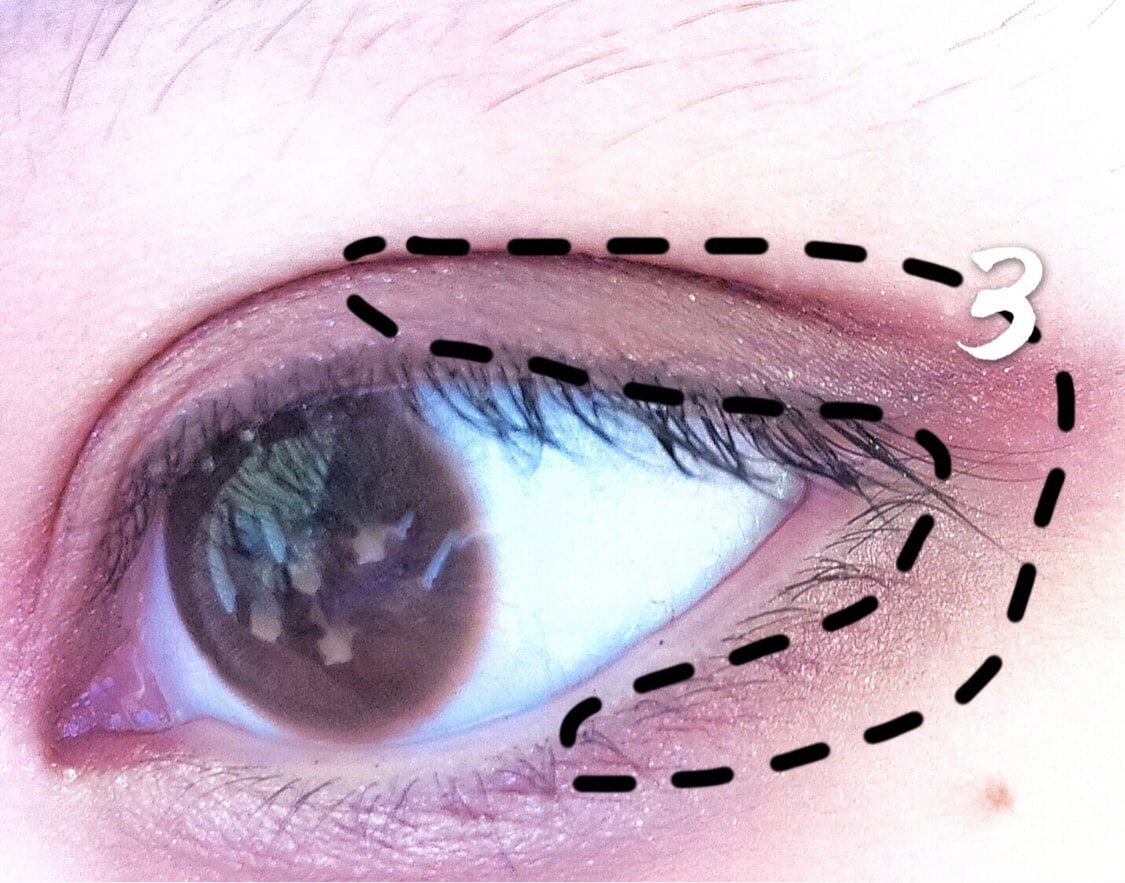
3. Use the darkest color3Plum color deepens the double eyelid&eye end.
I took my eyeshadow by the way.
4. Use4 No. Peach pink transition eye color. And smudge with a smudge brush.

5. Final use1The highlight color brightens the lying cicada.

Finish:

Shooting in the sun.
The pearl effect is really nice.
Great for summer.
💫Step 2:Mascara
I prefer to apply mascara before eyeliner.
【Ise Semi-Waterproof Mascara】
Go crazy for this mascaraCall!!
A product I will definitely repurchase.
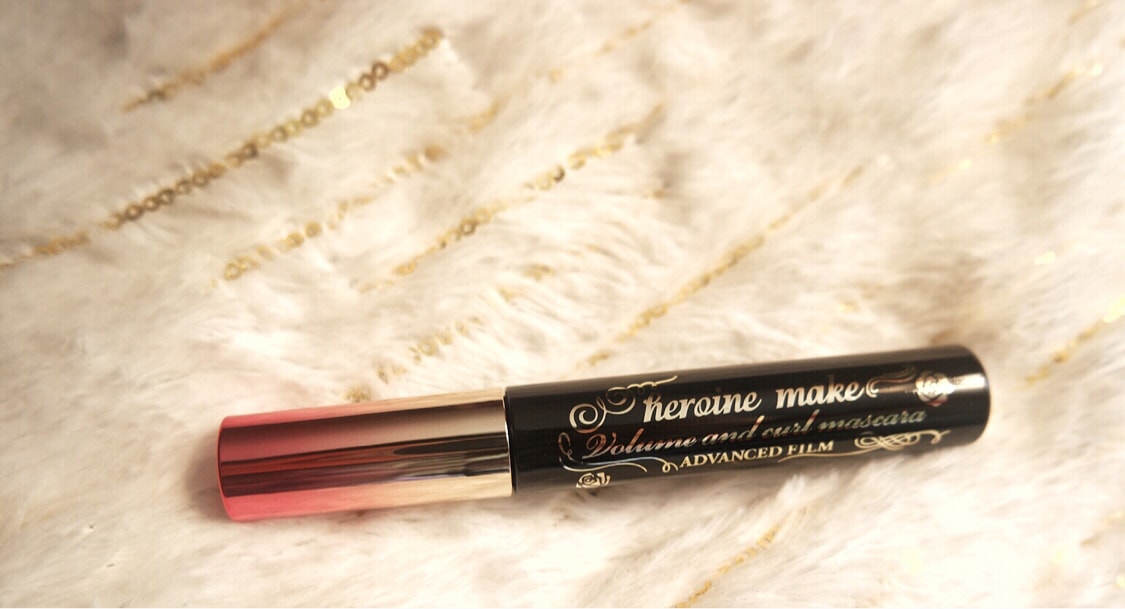
The outer packaging is also a classic design of Ise Banya.
Brush head:
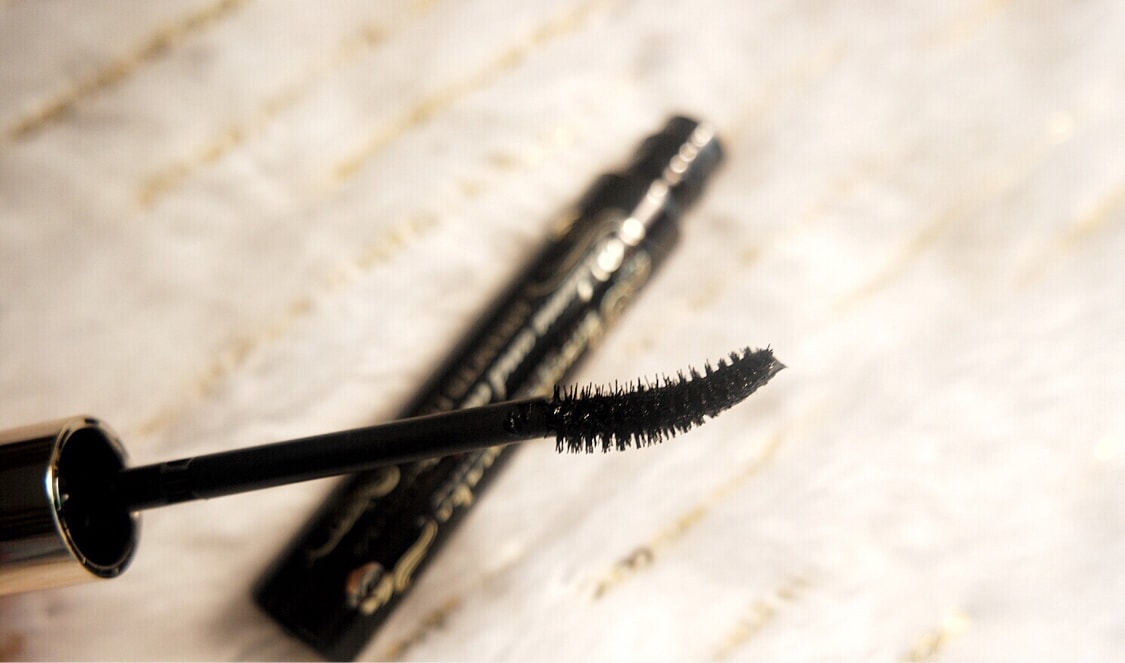
The brush head is designed with a slight curvature.
A great brush for both upper and lower lashes.
It also prevents accidental application to the eyelids.
The color is solid black.
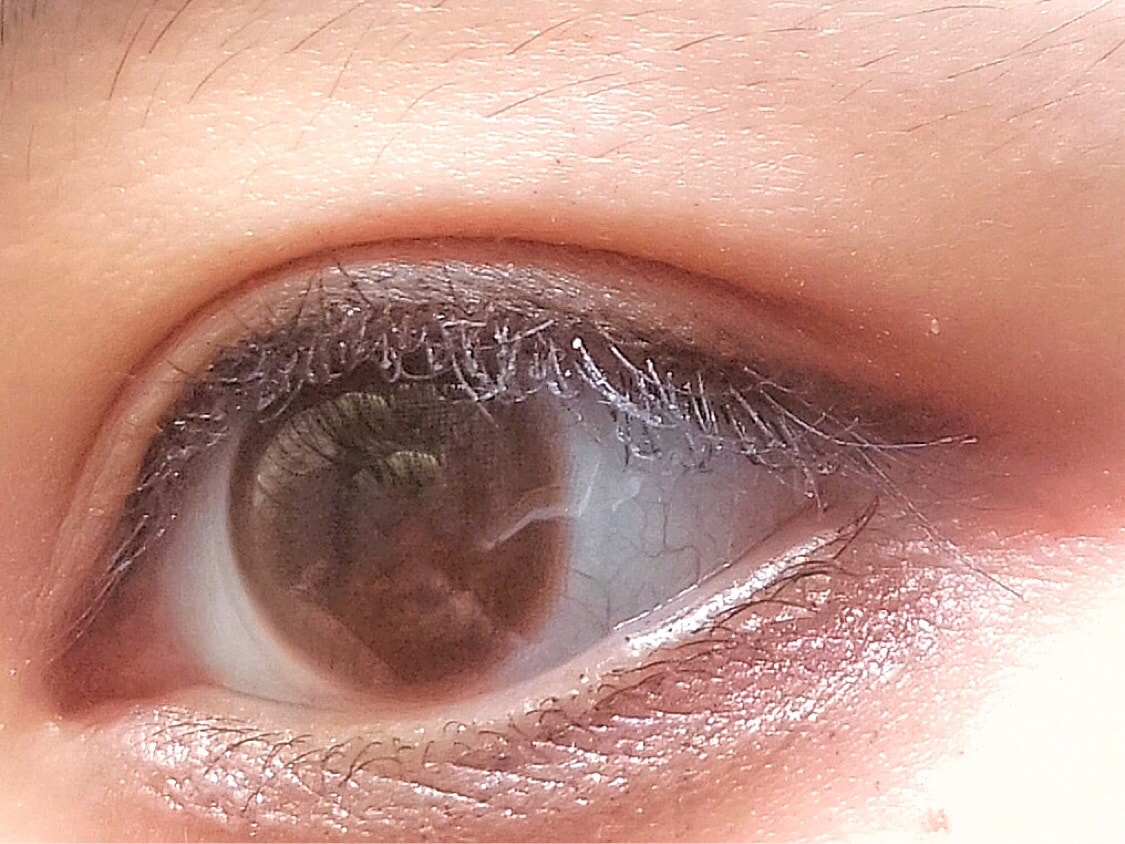
Up-eye effect:


Very natural effect!
Makes lashes look thicker and longer.
The main thing is.
No knots at all or“fly legs ”.
It can be said that the roots are distinct.
Recommended for all makeup beginners.
💫Step 3:Eyeliner
The last step is the eyeliner.
【Ise Semi-Gel Eyeliner】
This is also the only product I want to pull weeds today.
I really like their liquid eyeliner. So have high hopes for this one.
But the effect is not as good as I expected.
Outer packaging:
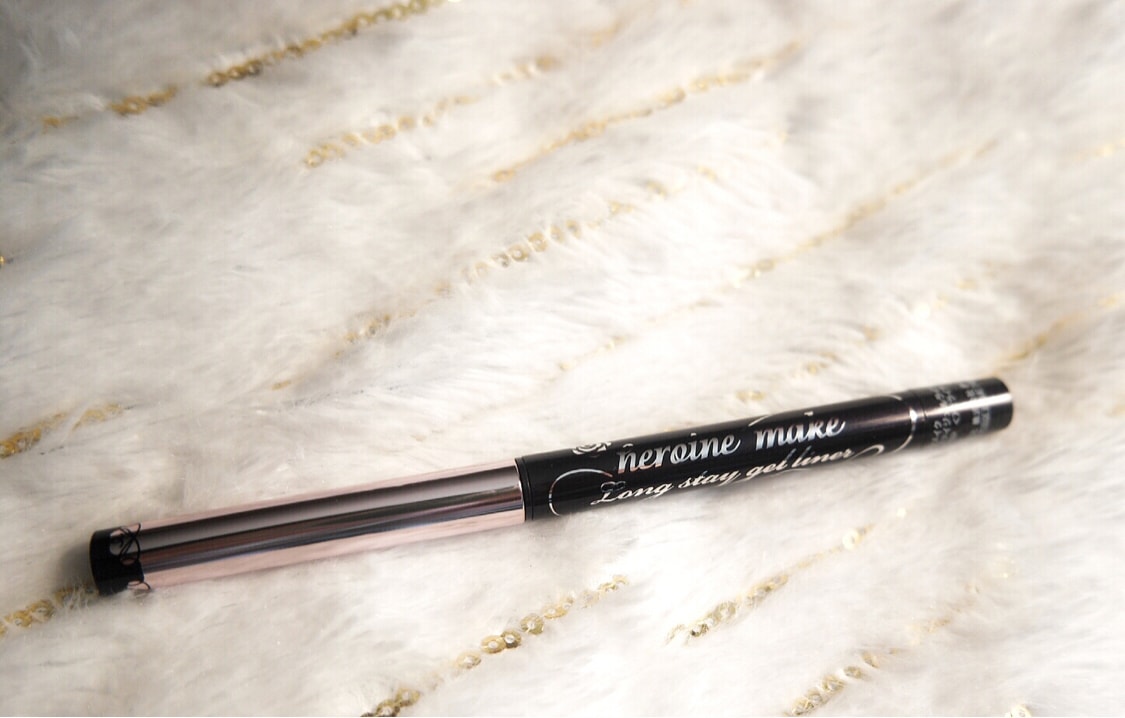
Ise Banya's classic design.
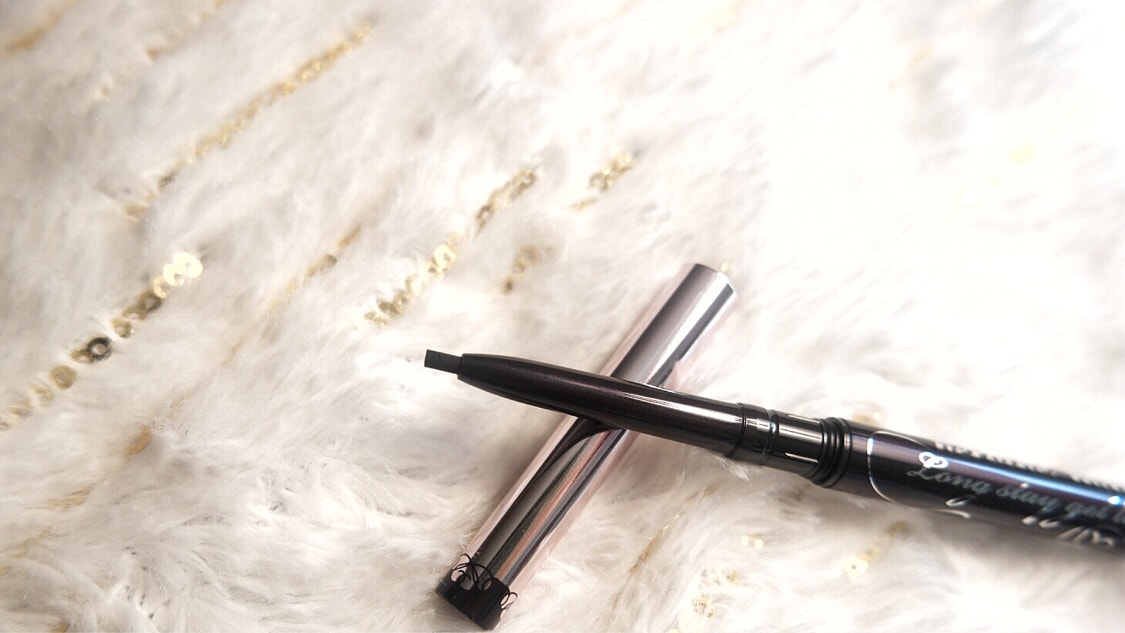
Tips:
Umm..
The nib is relatively hard.
The advantage is that it is not easy to draw mistakes.
However, there is a downside: it feels abrasive on the eyes. Coloring is not smooth.
Up-eye effect:
You can see that there is very little color in the eyes.
Because it's not very pigmented.
The design of the tip of the pen is not very good for drawing the shape of the tail.
It's not easy to apply makeup. Even if you rub your eyes, the color will not fade.
Not recommended for beginners.
Final effect:

 Show Original

【小可乐的爱用物推荐】用亚米小礼物画个夏日妆💕

今天收到了眼妆话题的小礼物~
于是马上用它们画了个夏日妆。
(有种草也有拔草。)
但由于我比较手残..
实在不太会搭配颜色。
所以这大概是一篇.. 走心但不专业的眼妆分享。
奖品包括:
【Kate 五色骨干眼影】

【伊势半防水睫毛膏】

【伊势半凝胶眼线笔】

裸眼:

眼部什么都没画的状态。
请忽略眼周的杂毛和眼角的痣😂😂😂..
刚刚洗完脸时拍的。
睫毛还是湿的。🤦♀️
💫Step 1:眼影
我画眼妆的第一步就是眼影啦。
【Kate 五色骨干眼影】
算是大火的一盘眼影了。
众网红都在安利的眼部产品。
外包装:
很简简单单的设计~
小小一盘。
很方便携带。
内部:

大部分都是珠光色。
颜色都是属于很日常的。
手臂试色:


这一盘的小缺点就是大部分颜色都是珠光系的。
如果眼部经常浮肿的女生就不太适合这盘了。
因为珠光的颜色会让眼睛看起来更肿。
手臂试色都是厚涂!
实际颜色比这个淡很多也自然很多。
我的用法:
1. 先用雾面的5号色给眼皮做一个淡淡的打底。

2.用较浅的2号玫瑰粉色加深并提亮眼角。

3. 用最深色的3号梅子色加深双眼皮&眼神眼尾。
顺便带过下眼影。

4. 用4号桃粉色过渡眼头眼尾的颜色。并用晕染刷晕染。

5. 最后使用1号高光色提亮卧蝉。

最后效果:

在阳光下拍摄。
珠光效果真的非常好看。
很适合夏天。
💫Step 2:睫毛膏
我比较喜欢在画眼线前涂睫毛膏。
【伊势半防水睫毛膏】
为这款睫毛膏疯狂打Call!!
绝对会回购的产品。

外包装也是伊势半家经典的设计。
刷头:

刷头设计带一点点弧度。
不管上睫毛或下睫毛都非常好刷。
也可以避免不小心涂到眼皮上。
颜色是纯黑色。
上眼效果:


很自然的效果!
让睫毛看起来更浓密更长。
最主要的是。
完全不会有任何打结或“苍蝇腿”的情况。
可谓是根根分明。
推荐给所有化妆新手。
💫Step 3:眼线
最后一步就是眼线啦。
【伊势半凝胶眼线笔】
这也是我今天唯一想要拔草的产品。
我非常喜欢他家的眼线液笔。所以对这只也抱着很大的期望。
但效果并没有我预期那么好啦。
外包装:

伊势半家经典的设计。
笔头:

Umm..
笔头属于比较硬的。
优点就是不容易画错。
不过也有缺点:上眼会觉得磨。上色不流畅。
上眼效果:


可以看到眼中部分颜色很少。
因为不太上色。
笔头的设计不太好画出尾部的形状。
不过不容易花妆。揉眼睛颜色也不会掉。
不推荐给新手。
最后的效果:

[{"image_id":91686,"post_id":379653,"type":null,"image_url":"sns\/9f3a54725b72977972988fbf0b20a7d9_0x0.jpeg","size":null,"imgScale":null,"imageTagList":[{"rec_id":96998,"post_id":379653,"image_id":91686,"ref_id":1709,"ref_item_number":null,"type":3,"location":"x:0.461333333333333,y:0.508021390374332","tag_name":"\u4eca\u65e5\u773c\u5986\u6253\u5361","tag_ename":null,"topic_type":1,"is_sticky":0,"sticky_dtm":0,"tag_post_id":null,"tag_ref_id":null,"tag_type":null},{"rec_id":96999,"post_id":379653,"image_id":91686,"ref_id":1697,"ref_item_number":null,"type":3,"location":"x:0.345777750651042,y:0.819073070179332","tag_name":"\u7231\u7528\u54c1\u5206\u4eab","tag_ename":null,"topic_type":2,"is_sticky":0,"sticky_dtm":0,"tag_post_id":null,"tag_ref_id":null,"tag_type":null},{"rec_id":97000,"post_id":379653,"image_id":91686,"ref_id":534,"ref_item_number":null,"type":3,"location":"x:0.840888875325521,y:0.816399273387889","tag_name":"\u4ec0\u4e48\u503c\u5f97\u4e70","tag_ename":null,"topic_type":1,"is_sticky":0,"sticky_dtm":0,"tag_post_id":null,"tag_ref_id":null,"tag_type":null}]},{"image_id":91687,"post_id":379653,"type":null,"image_url":"sns\/f0b4166506f2469f1a99eb2e2f177e83_0x0.jpeg","size":null,"imgScale":null,"imageTagList":[]},{"image_id":91688,"post_id":379653,"type":null,"image_url":"sns\/954cb9412e828dc7547ff7411e023a44_0x0.jpeg","size":null,"imgScale":null,"imageTagList":[]},{"image_id":91689,"post_id":379653,"type":null,"image_url":"sns\/94094e6812ae52eeff506b8a844d7d34_0x0.jpeg","size":null,"imgScale":null,"imageTagList":[]},{"image_id":91690,"post_id":379653,"type":null,"image_url":"sns\/9600c155b564a6289385095457d4245d_0x0.jpeg","size":null,"imgScale":null,"imageTagList":[]},{"image_id":91691,"post_id":379653,"type":null,"image_url":"sns\/f0b4166506f2469f1a99eb2e2f177e83_0x0.jpeg","size":null,"imgScale":null,"imageTagList":[]},{"image_id":91692,"post_id":379653,"type":null,"image_url":"sns\/26b36c32717c65e9b57d5525be9b67ed_0x0.jpeg","size":null,"imgScale":null,"imageTagList":[]},{"image_id":91693,"post_id":379653,"type":null,"image_url":"sns\/0f17eda3c2d00e294ce2d78201390b08_0x0.jpeg","size":null,"imgScale":null,"imageTagList":[]},{"image_id":91694,"post_id":379653,"type":null,"image_url":"sns\/27c06e6757e02fefcf2765640ad5df67_0x0.jpeg","size":null,"imgScale":null,"imageTagList":[]},{"image_id":91695,"post_id":379653,"type":null,"image_url":"sns\/0f17eda3c2d00e294ce2d78201390b08_0x0.jpeg","size":null,"imgScale":null,"imageTagList":[]},{"image_id":91696,"post_id":379653,"type":null,"image_url":"sns\/ce24538f0976be2543844733fa96c0ce_0x0.jpeg","size":null,"imgScale":null,"imageTagList":[]},{"image_id":91697,"post_id":379653,"type":null,"image_url":"sns\/cb45da4cd707692149e075f95633e8d0_0x0.jpeg","size":null,"imgScale":null,"imageTagList":[]},{"image_id":91698,"post_id":379653,"type":null,"image_url":"sns\/c44ecef5b6f88f775c3a27de6fafc671_0x0.jpeg","size":null,"imgScale":null,"imageTagList":[]},{"image_id":91699,"post_id":379653,"type":null,"image_url":"sns\/c4e4f1904cdffbe63cfc422aaf2d8992_0x0.jpeg","size":null,"imgScale":null,"imageTagList":[]},{"image_id":91700,"post_id":379653,"type":null,"image_url":"sns\/f5403ce6f0963801c566cd554bbb68d9_0x0.jpeg","size":null,"imgScale":null,"imageTagList":[]},{"image_id":91701,"post_id":379653,"type":null,"image_url":"sns\/334a909e40d6054dee8ace69a34c2b10_0x0.jpeg","size":null,"imgScale":null,"imageTagList":[]},{"image_id":91702,"post_id":379653,"type":null,"image_url":"sns\/e57589972ed77d90a60d1a2cbbcdb8d6_0x0.jpeg","size":null,"imgScale":null,"imageTagList":[]},{"image_id":91703,"post_id":379653,"type":null,"image_url":"sns\/23900a081c295116012a6ccdb96782f6_0x0.jpeg","size":null,"imgScale":null,"imageTagList":[]},{"image_id":91704,"post_id":379653,"type":null,"image_url":"sns\/51c56425dcc3828f3e8effd2a0a4a256_0x0.jpeg","size":null,"imgScale":null,"imageTagList":[]},{"image_id":91705,"post_id":379653,"type":null,"image_url":"sns\/01edeea774ac0140a598f0e938c4655d_0x0.jpeg","size":null,"imgScale":null,"imageTagList":[]},{"image_id":91706,"post_id":379653,"type":null,"image_url":"sns\/bc68bff1cbe32314b36847a8c4f9c214_0x0.jpeg","size":null,"imgScale":null,"imageTagList":[]},{"image_id":91707,"post_id":379653,"type":null,"image_url":"sns\/18451785260b1def7d52ad67958fb23a_0x0.jpeg","size":null,"imgScale":null,"imageTagList":[]},{"image_id":91708,"post_id":379653,"type":null,"image_url":"sns\/3bc0d612e391a2eb2f0dcbd4e952fbc9_0x0.jpeg","size":null,"imgScale":null,"imageTagList":[]},{"image_id":91709,"post_id":379653,"type":null,"image_url":"sns\/3d90bfbaff916c5e411205bd9e343d59_0x0.jpeg","size":null,"imgScale":null,"imageTagList":[]},{"image_id":91710,"post_id":379653,"type":null,"image_url":"sns\/70800cfd7de35cd018fbb483db08e738_0x0.jpeg","size":null,"imgScale":null,"imageTagList":[]}]


吃货的日常
May 31, 2018
very nice. Yami is so nice
真好。亚米真好