
[Cool Kitchen] Novice Xiaobai's First Cake
For this topic, I worked hard all night to make a cake embryo, I hope everyone can learn and discuss more easily. If you don't understand, you can leave a message and ask me. Is it possible to get your praise for working so hard?
The cake I made this time has changed the proportion of the original recipe because the baking container was changed, but I still use the original recipe as the standard to explain the production. The original formula is also a formula adjusted by me after many experiments, and I will share it with you here. PSThis is a copy6 inch cake, so the container size ratio will also change accordingly. The pictures are all 9.5inch containers, so I have adjusted the proportions without affecting the explanation.

Because this is the first time I try to pipe buttercream, and when I am pipetting, my roommate keeps telling me I want a flower here, a flower there, and it needs to be filled with flowers. It was so beautiful that the cream melted later. So the result is uglier than I thought😂Forgive me
This is a coffee flavored cake🎂
First, two large bowls are needed to make the cake embryos:
BowlAis the yolk, bowlB is egg white.
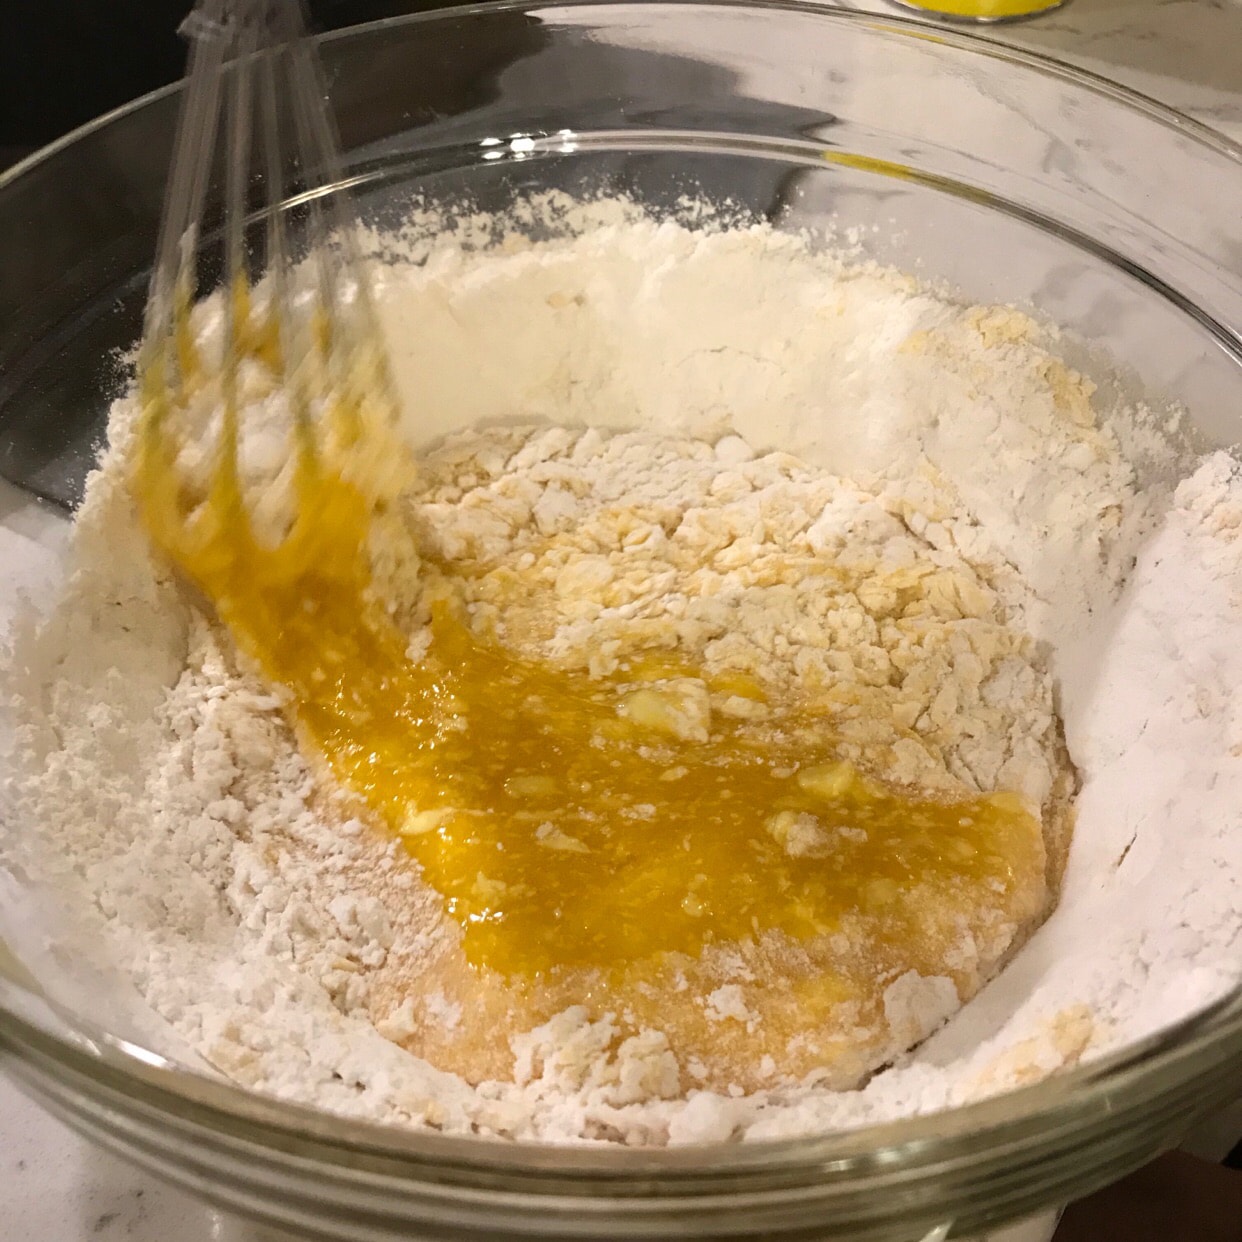
Let's start withAThis bowl of ingredients: p>
8 egg yolks (put all egg whites in a bowlB< span class="s1">in)
1/3cup sugar (already 1< span class="s1">Cup sugar minus 2/3, suitable for friends who don't like sweets)
1CakeCake Flour
1/2cup of oil
1/2Water
1tspSoda
Stir8minutes
As shown below


Let's talk aboutBBowl ingredients:
Separated from the yolk side8egg whites< /p>
1tsp cream of tartar
High speed mixing8minutes
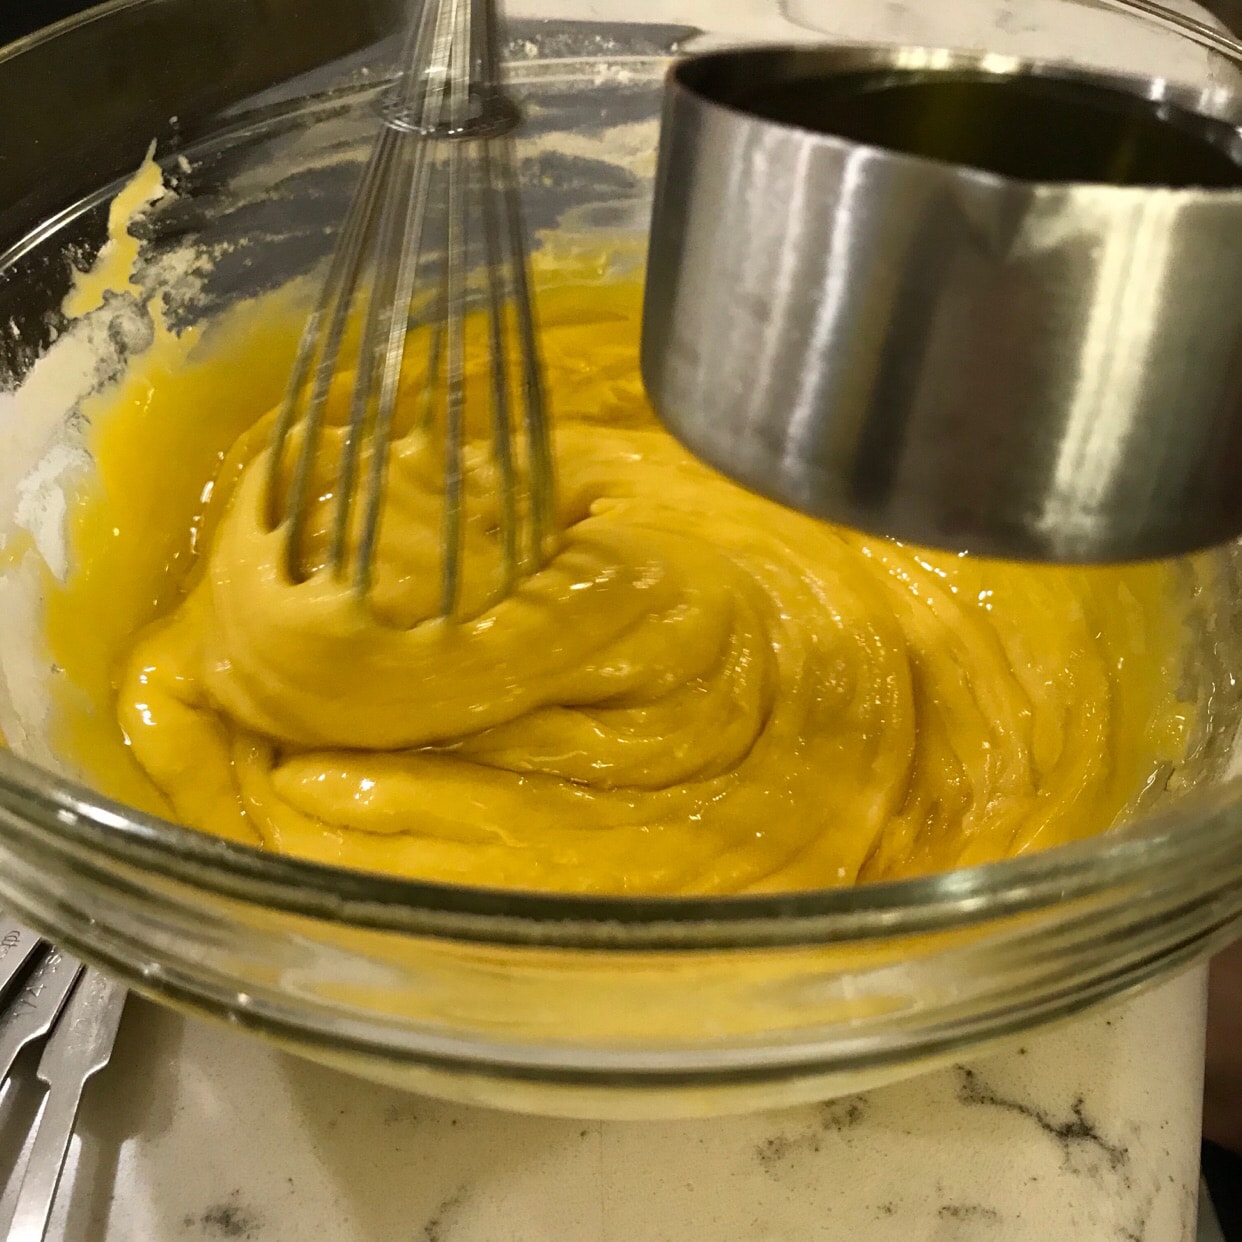
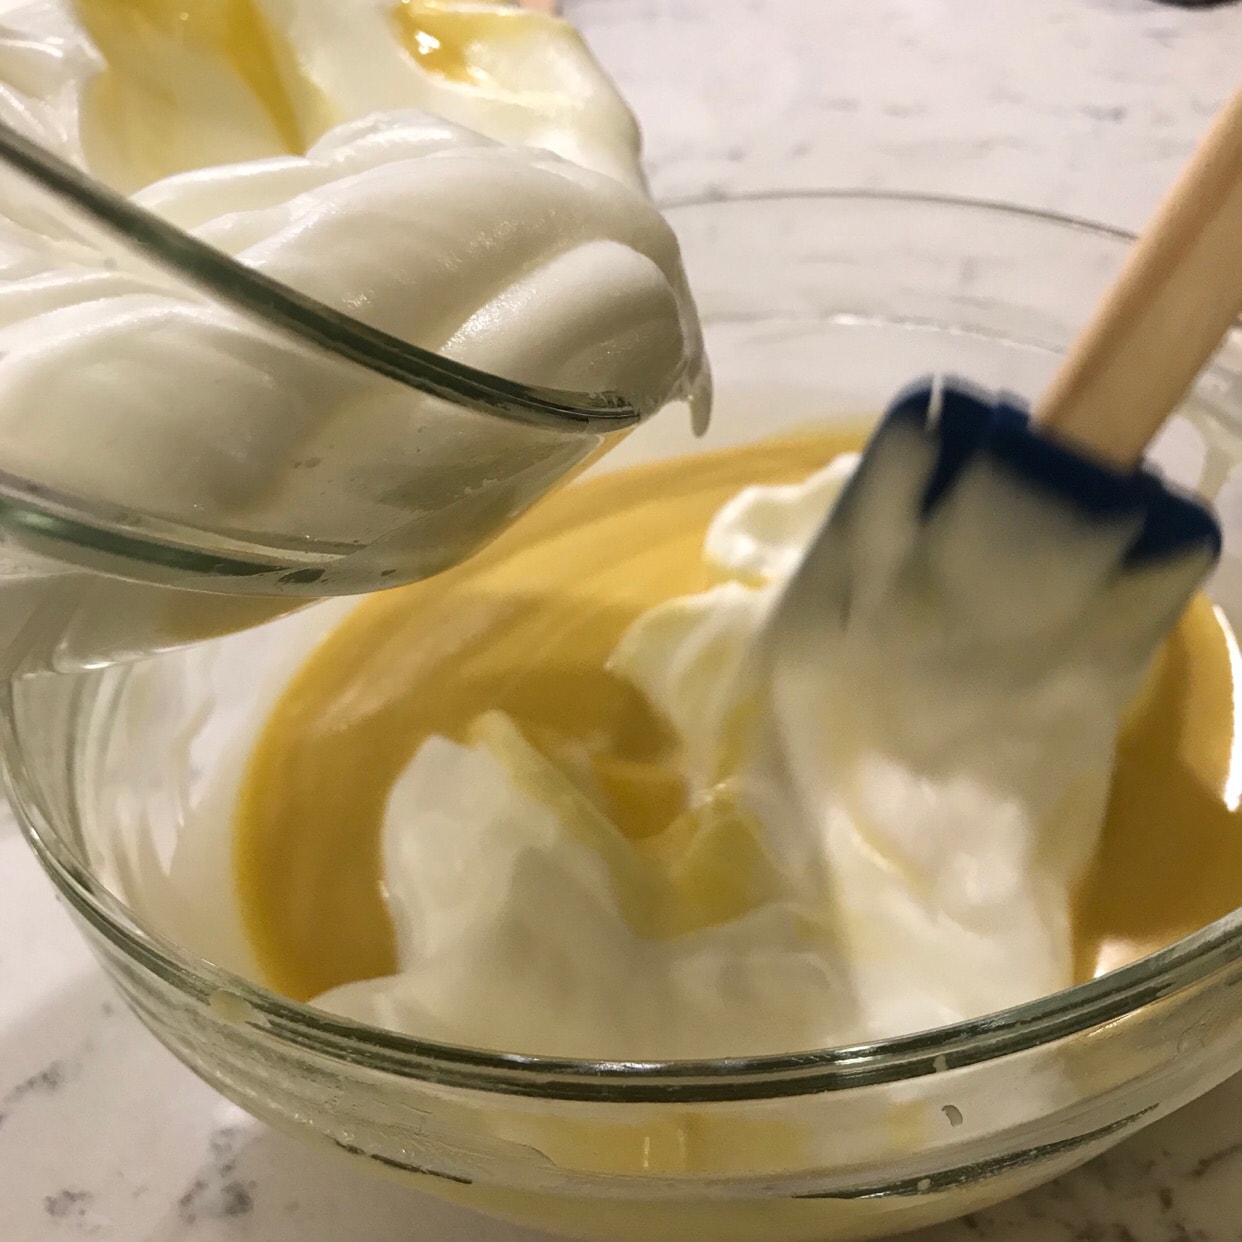
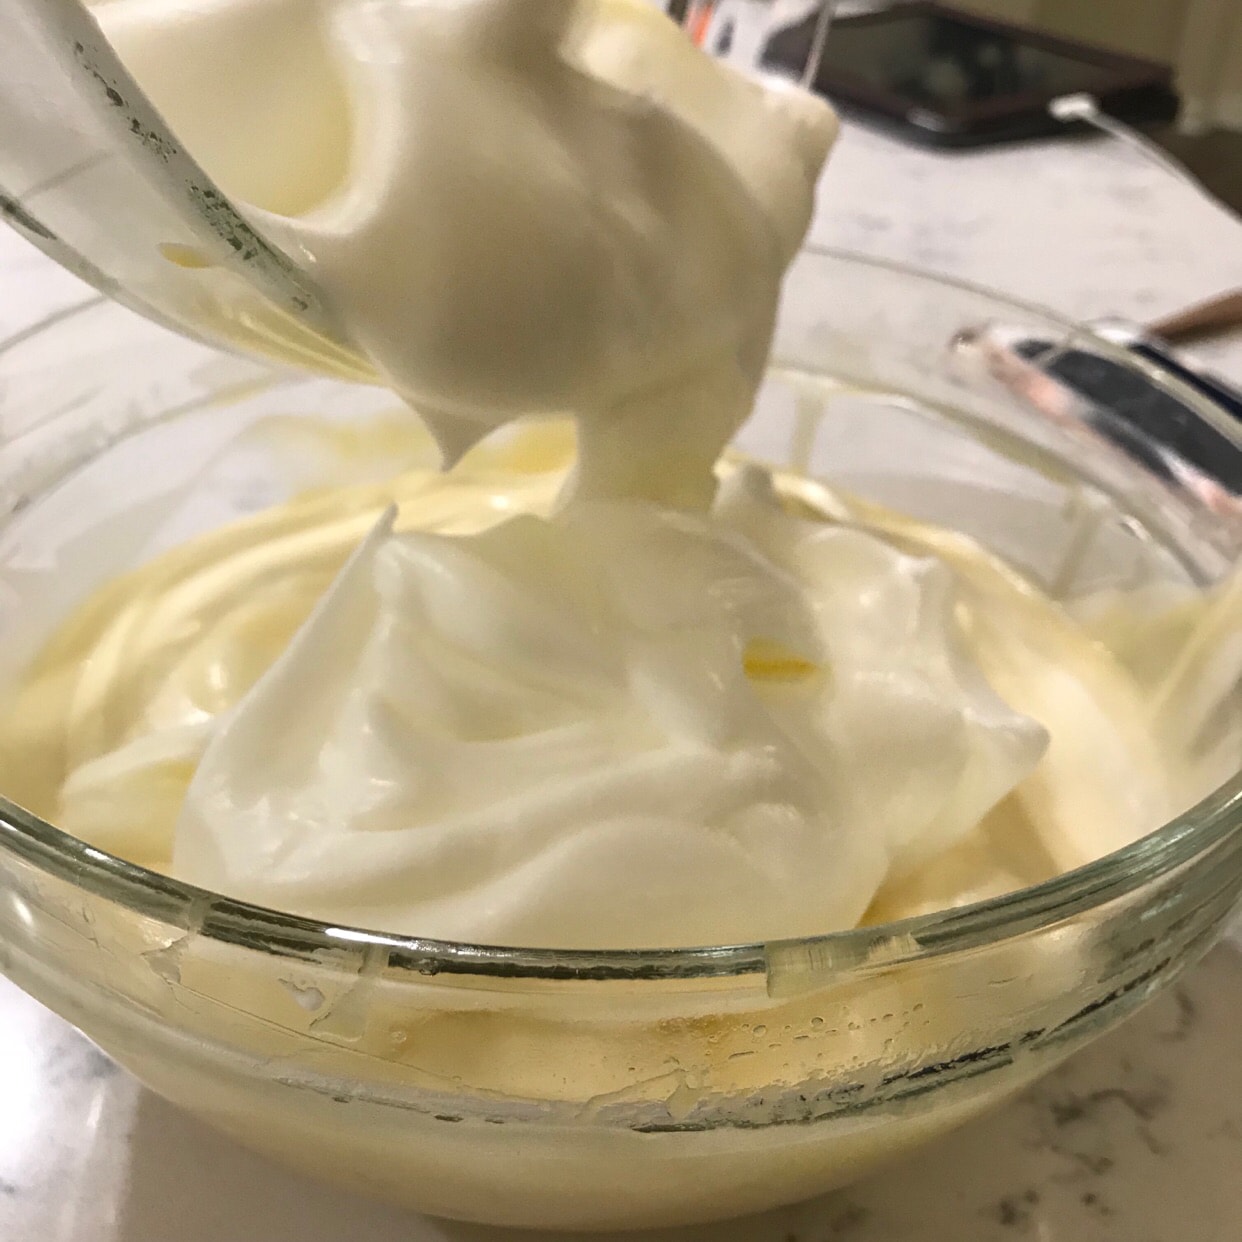
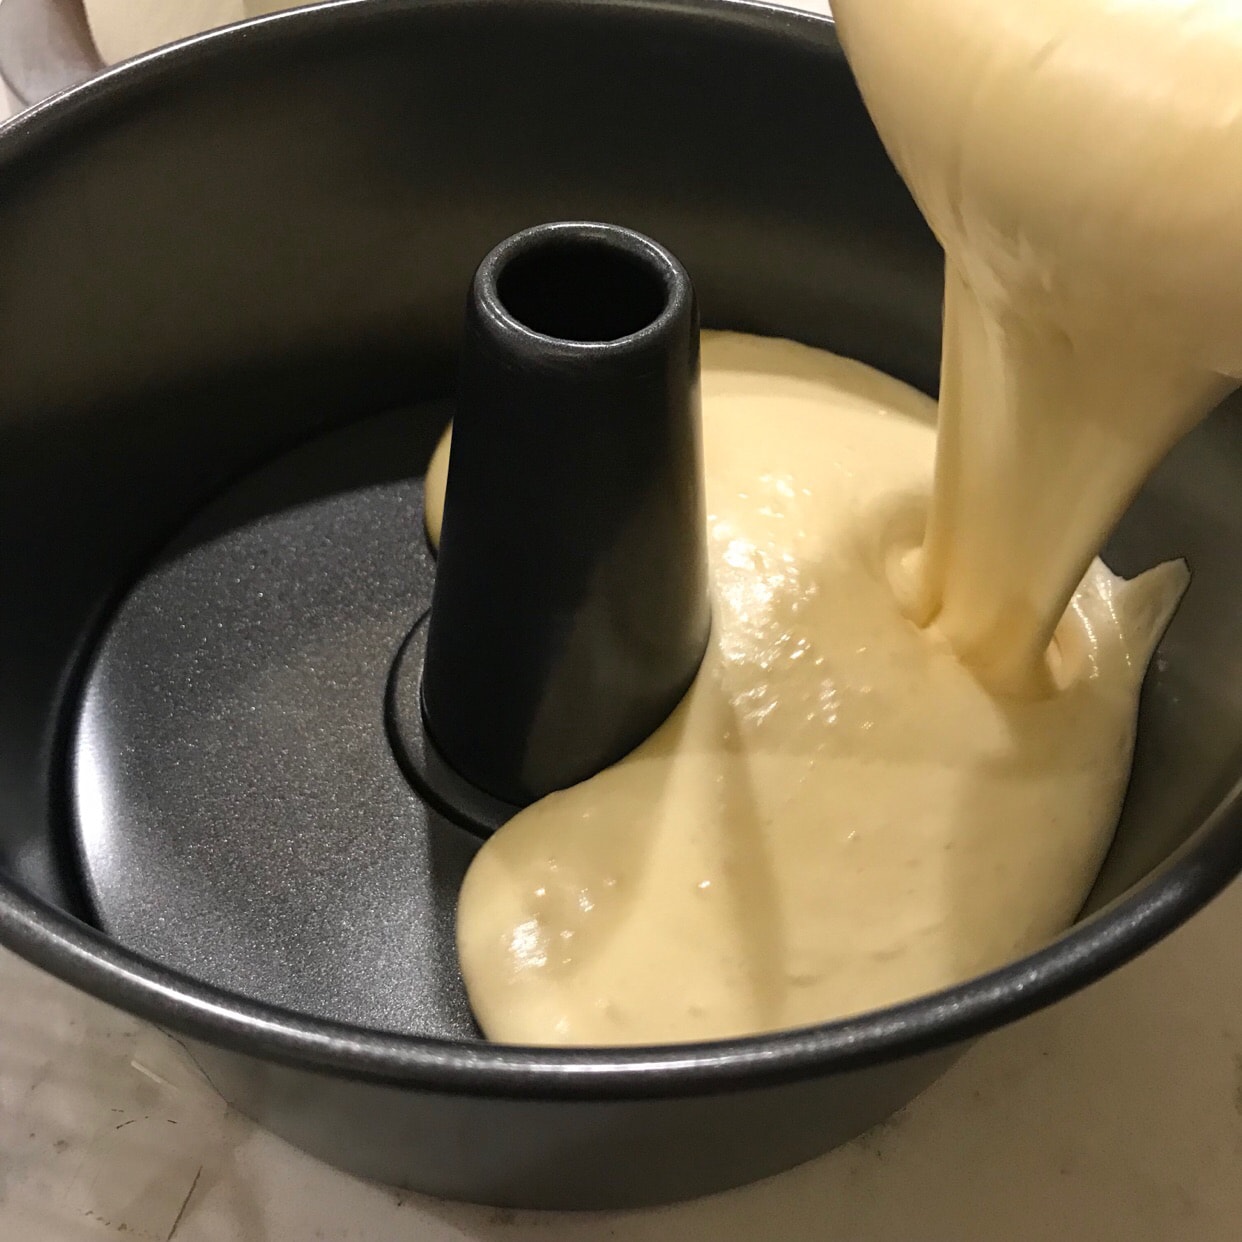
Finally mix the two bowls together and mix well
Preheat oven in advance375Fahrenheit bake30minutes
Bake again350degrees10minutes
The surface layer of the baked cake will not look good, but it will be flattened and creamed~
It is decorated after cooling~
The reason why the oven with holes is used is so that the inside can also be cooked


Coffee the morning after cooling
This step is really my first time trying. I used to just smear it casually. Why do I have to choose to decorate by myself, and the result is terrible.
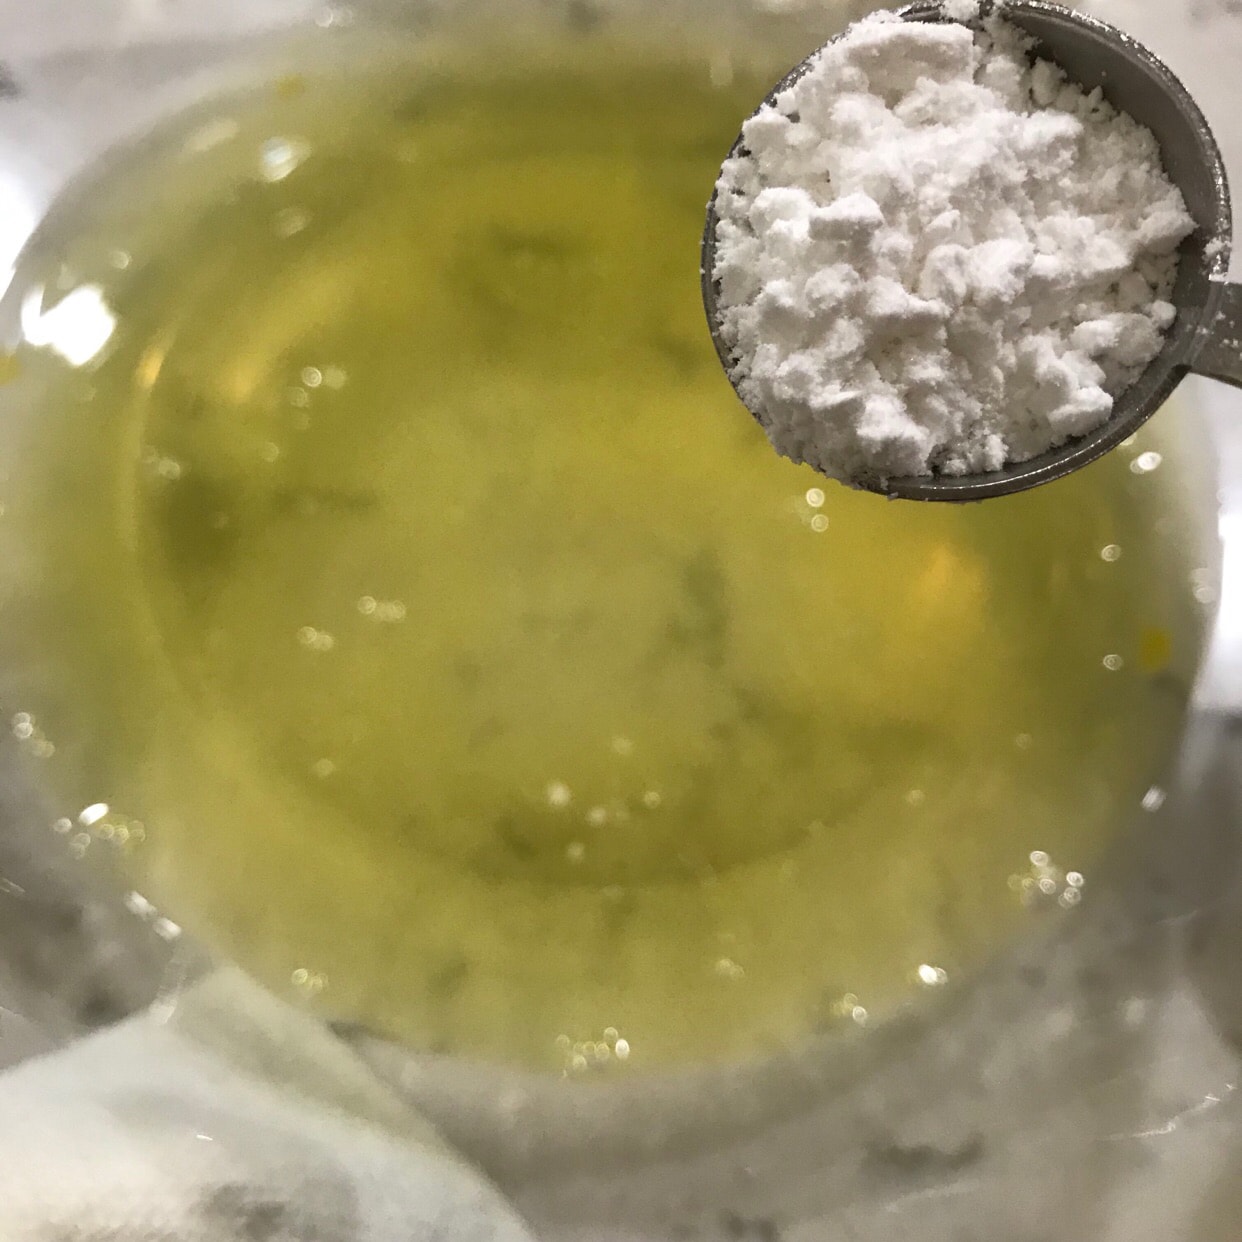
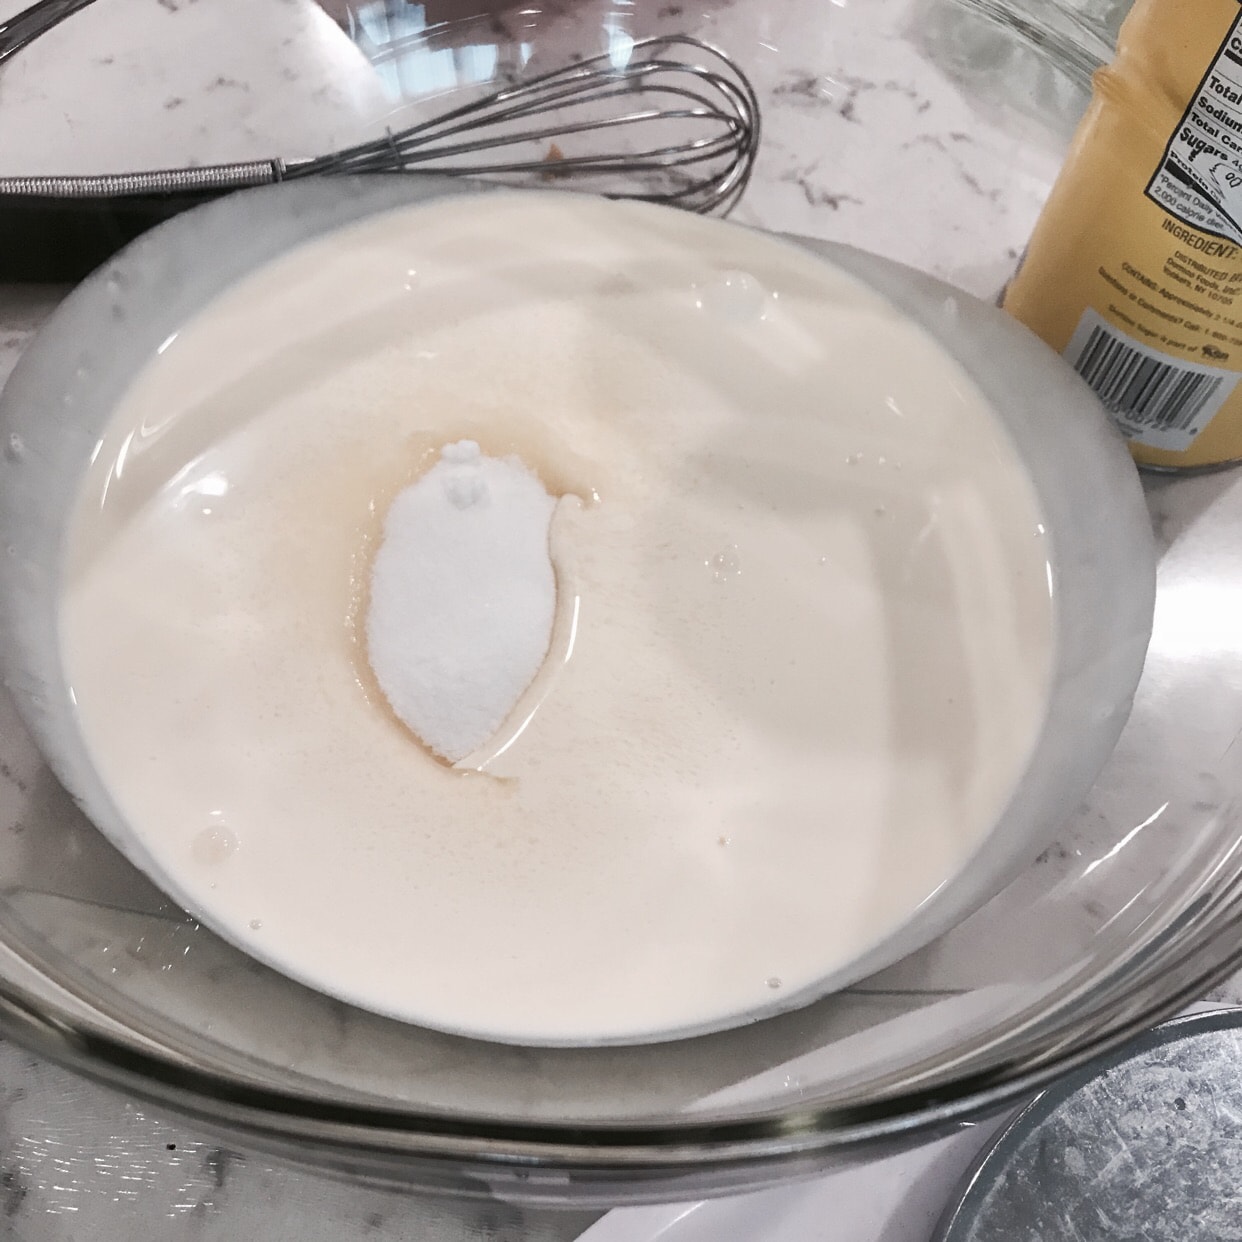
For whipping creamheavy whipping creamThis brand. The ratio of cream to sugar is 10:1
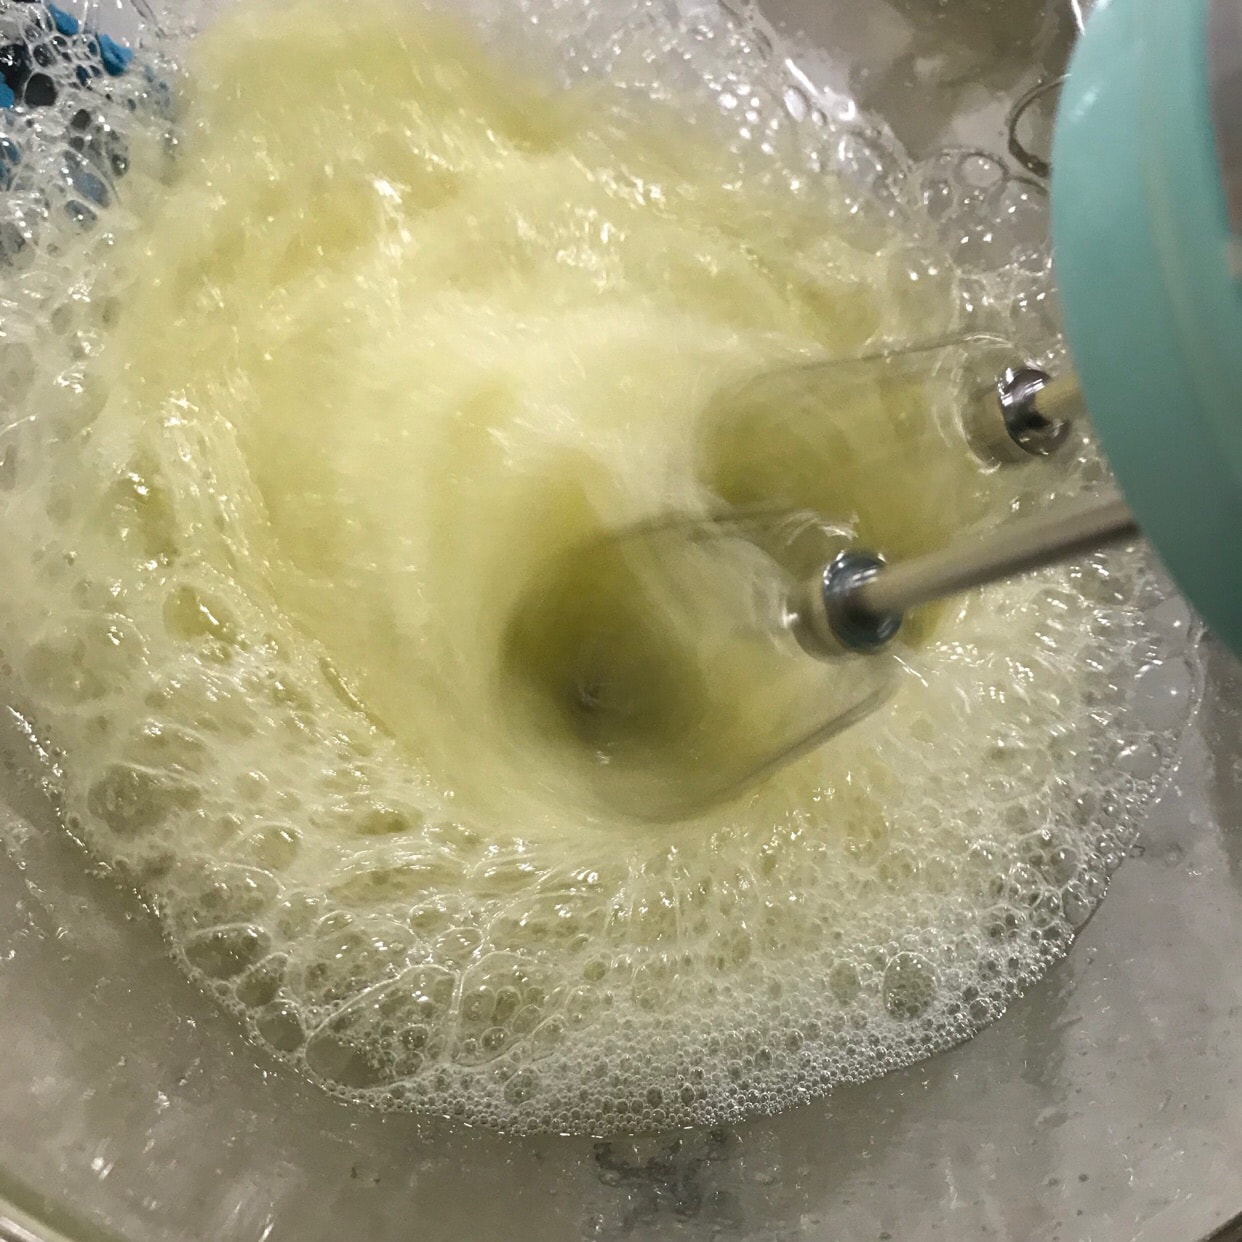
Send to a frozen state, how to describe this state (I watched a program before, and it was sent upside down and it wouldn't fall off the top of the head after watching it)


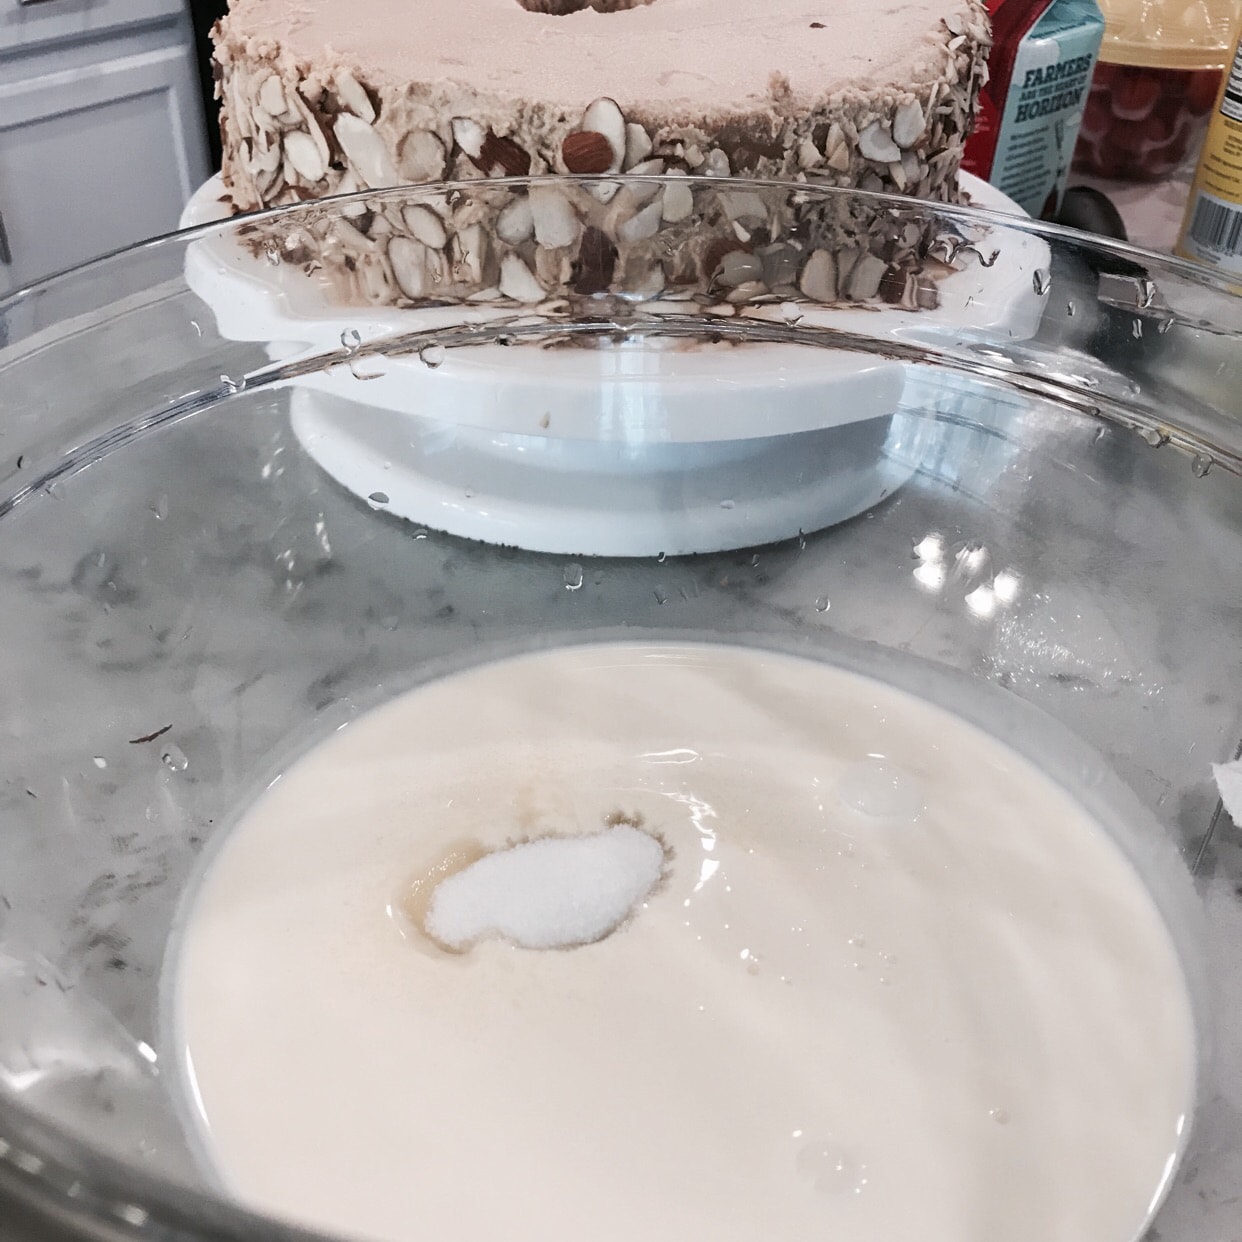
As an amateur, I need time to practice my decorating skills!
 Show Original

【凉凉厨房】新手小白首制蛋糕
为了这个晒单主题我大晚上拼了老命的做了一个蛋糕胚子,希望大家能更方便学习讨论。不懂得可以留言问我。如此拼命是不是可以得到你们的赞赞呢!
这次做的蛋糕因为换了一个烘培容器所以在原有配方上进行了比例调整,但我还是以原配方为标准来进行制作讲解。原有配方也是经过我多次的实验调整得出的配方,在此分享给大家。PS这是一份6寸蛋糕,所以容器大小比例也会随之更改。图片均是9.5寸容器,所以我比例都进行了调整但并不影响解说。

因为这是我首次尝试挤奶油裱花,然后挤奶油时候室友一直在我耳边说这里要一朵花,那里要一朵,要挤满花花才好看,导致奶油后来都融化了。所以成果比我想象中要丑一些😂见谅一下
这是一个咖啡味道的蛋糕🎂
首先做蛋糕胚子需要两个大碗:
碗A是蛋黄,碗B是蛋清。
先来说说A这碗配料:
8个蛋黄(蛋清全放入碗B里)
1/3杯砂糖(已经在原本1杯糖基础上减去了2/3,适合不爱吃甜食的朋友)
1杯Cake Flour
1/2杯油
1/2水
1tsp苏打粉
搅拌8分钟
图如下


再来说说B碗的配料:
从蛋黄那边分离出来的8个蛋清
1tsp cream of tartar
高速搅拌8分钟
最后把这两碗混在一起搅拌均匀
烤箱提前预热375华氏度烤30分钟
再350度再烤10分钟
出炉的蛋糕表层会不咋好看,但这都会被削平铺奶油的~
冷却后就是装饰了~
之所以用的有洞的烤盆为了让里面也能烤熟


冷却后的第二天早上来裱花
这个步骤真的是我第一次尝试,以前就是随便涂抹一下就好啦,为何有逼格选择自作自受的要裱花结果惨不忍睹。
淡奶油用的heavy whipping cream这个牌子的。奶油和糖比例是10:1
打发至凝固状态,怎么形容这个状态呢(之前看某节目就是打发完倒扣在头顶也不会掉就是打发好了)


业余的我需要时间来锻炼一下我这裱花的水平了!
[{"image_id":127317,"post_id":385276,"type":null,"image_url":"sns\/158571d4e433c90e74f7da8702a286ea_0x0.jpeg","size":null,"imgScale":null,"imageTagList":[]},{"image_id":127318,"post_id":385276,"type":null,"image_url":"sns\/7eab37963946b3ae73e5f37c94cabd91_0x0.jpeg","size":null,"imgScale":null,"imageTagList":[]},{"image_id":127319,"post_id":385276,"type":null,"image_url":"sns\/fda4353d3ffe0fe99a1a617c6da1eb49_0x0.jpeg","size":null,"imgScale":null,"imageTagList":[]},{"image_id":127320,"post_id":385276,"type":null,"image_url":"sns\/71e3ec1635644c8d45881d87f09b0dbc_0x0.jpeg","size":null,"imgScale":null,"imageTagList":[]},{"image_id":127321,"post_id":385276,"type":null,"image_url":"sns\/b6626d44beaacdd35b9bb05f1ebdb89e_0x0.jpeg","size":null,"imgScale":null,"imageTagList":[]},{"image_id":127322,"post_id":385276,"type":null,"image_url":"sns\/68830782cb9186bd93d8e02f2ab6fa79_0x0.jpeg","size":null,"imgScale":null,"imageTagList":[]},{"image_id":127323,"post_id":385276,"type":null,"image_url":"sns\/bf7bdf7e470d4bcaab3901075e5ef4e2_0x0.jpeg","size":null,"imgScale":null,"imageTagList":[]},{"image_id":127324,"post_id":385276,"type":null,"image_url":"sns\/2077b992809e6fd45fb1bce4c554d33d_0x0.jpeg","size":null,"imgScale":null,"imageTagList":[]},{"image_id":127325,"post_id":385276,"type":null,"image_url":"sns\/1fef6bd5739d8d634f7888931fcb2ace_0x0.jpeg","size":null,"imgScale":null,"imageTagList":[]},{"image_id":127326,"post_id":385276,"type":null,"image_url":"sns\/8da03677135e489ea9020cc5c83bd494_0x0.jpeg","size":null,"imgScale":null,"imageTagList":[]},{"image_id":127327,"post_id":385276,"type":null,"image_url":"sns\/f398a5668a6fba4e4d6ec456c4c07774_0x0.jpeg","size":null,"imgScale":null,"imageTagList":[]},{"image_id":127328,"post_id":385276,"type":null,"image_url":"sns\/b766e6055aa21570fb71d5cc25fb55e9_0x0.jpeg","size":null,"imgScale":null,"imageTagList":[]},{"image_id":127329,"post_id":385276,"type":null,"image_url":"sns\/1b51c7faa7873d2139408596276e28c7_0x0.jpeg","size":null,"imgScale":null,"imageTagList":[]},{"image_id":127330,"post_id":385276,"type":null,"image_url":"sns\/406908423919205328d96647cad4c3d9_0x0.jpeg","size":null,"imgScale":null,"imageTagList":[]},{"image_id":127331,"post_id":385276,"type":null,"image_url":"sns\/a5542eb652209b0874c6ff50eb189789_0x0.jpeg","size":null,"imgScale":null,"imageTagList":[]},{"image_id":127332,"post_id":385276,"type":null,"image_url":"sns\/1d84ab0444762781edc933c59b338d29_0x0.jpeg","size":null,"imgScale":null,"imageTagList":[]},{"image_id":127333,"post_id":385276,"type":null,"image_url":"sns\/b6e20fe8672a4448aefc3eff798ebdd8_0x0.jpeg","size":null,"imgScale":null,"imageTagList":[]},{"image_id":127334,"post_id":385276,"type":null,"image_url":"sns\/5ba3e8f8efdb8950b5414a4070370bb9_0x0.jpeg","size":null,"imgScale":null,"imageTagList":[]},{"image_id":127335,"post_id":385276,"type":null,"image_url":"sns\/acfd818e46a7f962aade060563eef142_0x0.jpeg","size":null,"imgScale":null,"imageTagList":[]},{"image_id":127336,"post_id":385276,"type":null,"image_url":"sns\/0a6876306439008fc0ce4d424003e0c2_0x0.jpeg","size":null,"imgScale":null,"imageTagList":[]},{"image_id":127337,"post_id":385276,"type":null,"image_url":"sns\/c155de5d62040757a3af823594150d2f_0x0.jpeg","size":null,"imgScale":null,"imageTagList":[]},{"image_id":127338,"post_id":385276,"type":null,"image_url":"sns\/158571d4e433c90e74f7da8702a286ea_0x0.jpeg","size":null,"imgScale":null,"imageTagList":[]}]


Ccyoyo~
June 18, 2018
Hahaha it looks better without the flowers.
哈哈哈 不裱花更好看啊。
吃货的日常
June 17, 2018
Awesome. Nut Cake.
好赞的。坚果蛋糕。