

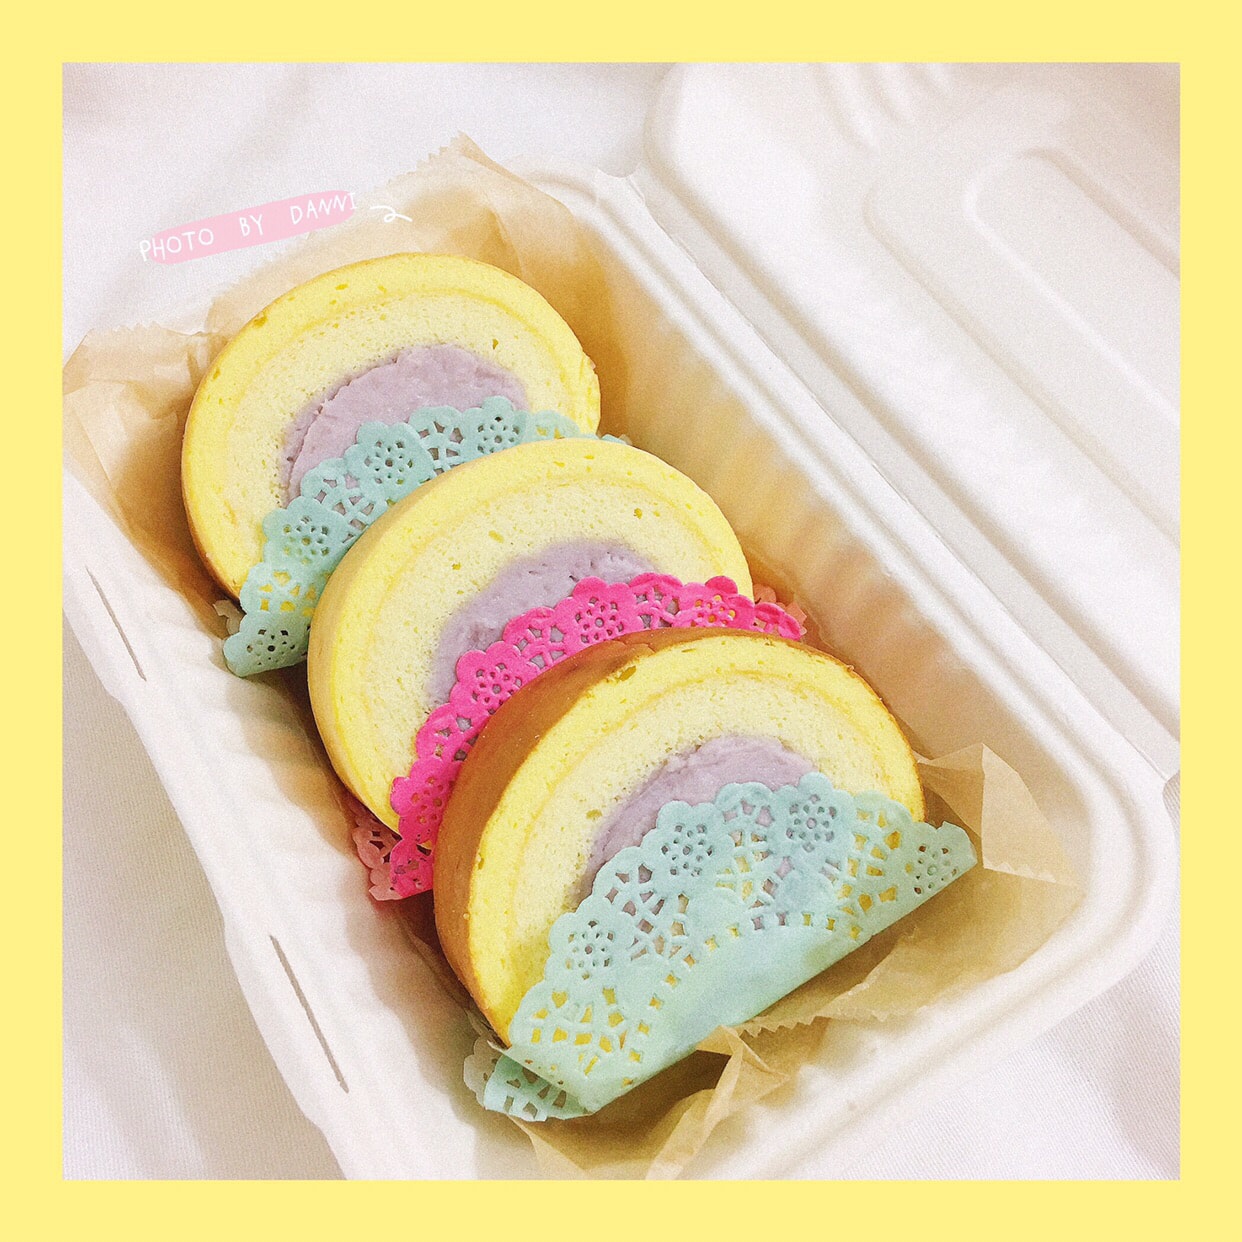
Tiger skin and taro cake is just as delicious without tiger skin pattern 🍰
——————————————————
I remember when I was a kid, my favorite food at the bakery was tiger skin cake.
And every time I tear off the outermost tiger skin and eat other things don't 🙈
Tiger skin is delicious because all the egg yolks used are especially fragrant! 🤭
I don't know where the tiger skin texture I made this time went 🤭
But it doesn't affect the taste at all, it's still delicious haha 🥰
The part that makes me eat the tiger skin is already satisfying 💕
Only after I made this cake did I realize how "egg" hurts 😂
Too much consumption of eggs 🥚 But for your delicious food
I'll forgive you hahahaha 🙈 Have a piece for breakfast?
The inner filling did not use cream, but added homemade taro paste
The whole cake tastes very solid and filling~
The practice of tiger skin👇🏻
6 egg yolks
50g powdered sugar
Corn flour 30g
Step1. All ingredients are weighed, and greased paper is placed on the baking sheet.
Step2. Beat 6 egg yolks into a water-free and oil-free bowl, add powdered sugar and beat with an egg beater until it is fluffy and white and can be drawn with eight characters. Sieve the corn flour and add it to the egg yolk paste and mix well.
Step3. Pour the batter into the baking pan and smooth it with a spatula. Before entering the oven, tap a few times on the table to knock out larger air bubbles, and bake in an oven preheated to 428 degrees Fahrenheit for 10 minutes. (Because each oven has a temperature difference, observe next to the oven to avoid the color being too dark)
Step4. After baking, move the cake to the wire rack. After the tiger skin is completely cool, tear off the oil paper.
How to make chiffon cake👇🏻
4 eggs
Caster sugar 60g
Milk 52g
40g edible oil
52g low-gluten flour
Step1. Separate the egg white protein into an anhydrous and oil-free bowl, add milk and oil to the egg yolk and mix well, then sieve in the low-gluten flour and mix well until there is no powder.
Step2. Beat the egg whites, add the caster sugar in three times, and beat the egg whites until the egg whites have small hooks.
Step3. Add 3/1 of the egg white to the egg yolk paste, gently scrape and mix evenly to avoid defoaming, then pour all the egg yolk paste into the egg white paste and continue to scrape and mix evenly. Pour the mixed cake paste into a 28x28 baking pan, Bake in a preheated oven at 374°F for 10-15 minutes until browned. Determined according to the temperature of your own oven, a toothpick inserted without sticky substance is sticky, indicating that the cake is cooked.
Step4. Buckle the baked cake upside down and let it cool. The cake can be assembled. The inside of the cake can be changed according to personal preference. Between the tiger skin and the chiffon cake body, I used a combination of low-fat salad dressing. You can also use a small amount of cream~
# 我的早餐打卡 # # 团长群BO # # 冬天就要吃点好 # # 亚米厨房 #

 Show Original
没有虎皮纹也一样好吃的虎皮芋泥蛋糕🍰
—————————————————
记得小时候去面包店最喜欢吃的就是虎皮蛋糕
而且每次都是撕掉最外层的虎皮吃其他不要🙈
虎皮好吃是因为用的全是蛋黄特别的香!🤭
这回做的虎皮纹路不知道哪里去了🤭
不过完全不影响口感还是那么好吃哈哈🥰
让我光吃虎皮的部分都已经心满意足了💕
做了这个蛋糕才知道有多么的“蛋”疼😂
实在太消耗鸡蛋🥚不过看在你好吃的份上
我就原谅你吧哈哈哈哈🙈早餐来一块吧?
内陷没有使用奶油而是加了自己做的芋泥
整个蛋糕吃起来口感非常的扎实饱腹~
虎皮的做法👇🏻
蛋黄6颗
糖粉50g
玉米粉30g
Step1. 所有材料秤量好,烤盘上铺上油纸。
Step2.将6颗蛋黄打入一个无水无油的碗里,加入糖粉用打蛋器搅打到蓬松泛白且可以画八字的状态,玉米粉过筛加入蛋黄糊中搅拌均匀。
Step3.将面糊倒入烤盘中用刮板抹平整,进烤箱前在桌上轻敲几下敲出较大的气泡,放入已经预热到428华氏度的烤箱中烘烤10分钟。 (因为每家的烤箱都有温差,在烤箱旁边观察避免上色太黑)
Step4.烤好将蛋糕移到铁网架上,虎皮完全凉透后把油纸撕下。
戚风蛋糕做法👇🏻
鸡蛋4颗
细砂糖60g
牛奶52g
食用油40g
低筋面粉52g
Step1.蛋清蛋白分离在无水无油的碗里,蛋黄内加入牛奶和油混合均匀,再筛入低筋面粉拌匀至无粉状。
Step2.打发蛋白,分三次加入细砂糖,将蛋白打发至提起打蛋器蛋白有小弯钩即可。
Step3.取3/1的蛋白加入蛋黄糊,轻轻刮拌均匀避免消泡,再将蛋黄糊全部倒入蛋白糊中继续刮拌均匀,将混合好的蛋糕糊倒入28x28的烤盘里,烤箱预热374华氏度烤10-15分钟至上色。按照自家烤箱温度决定,牙签插入无粘稠物蘸黏说明蛋糕就是熟了。
Step4.烤好的蛋糕倒扣出来放凉就可以组装蛋糕了,内陷按个人喜好随意更改。虎皮和戚风蛋糕体之间我用了低脂沙拉酱抹匀做的结合。也可以使用少量奶油~
# 我的早餐打卡 # # 团长群BO # # 冬天就要吃点好 # # 亚米厨房 #