


puff pastry

Puff pastry puff is really my favorite, the puff pastry on top is fragrant and crispy, very delicious, I can't buy puff pastry puff, I can only try to make it myself Now, I found a few videos on the Internet, and started moving immediately👩🍳👩🍳👩🍳👩🍳👩🍳
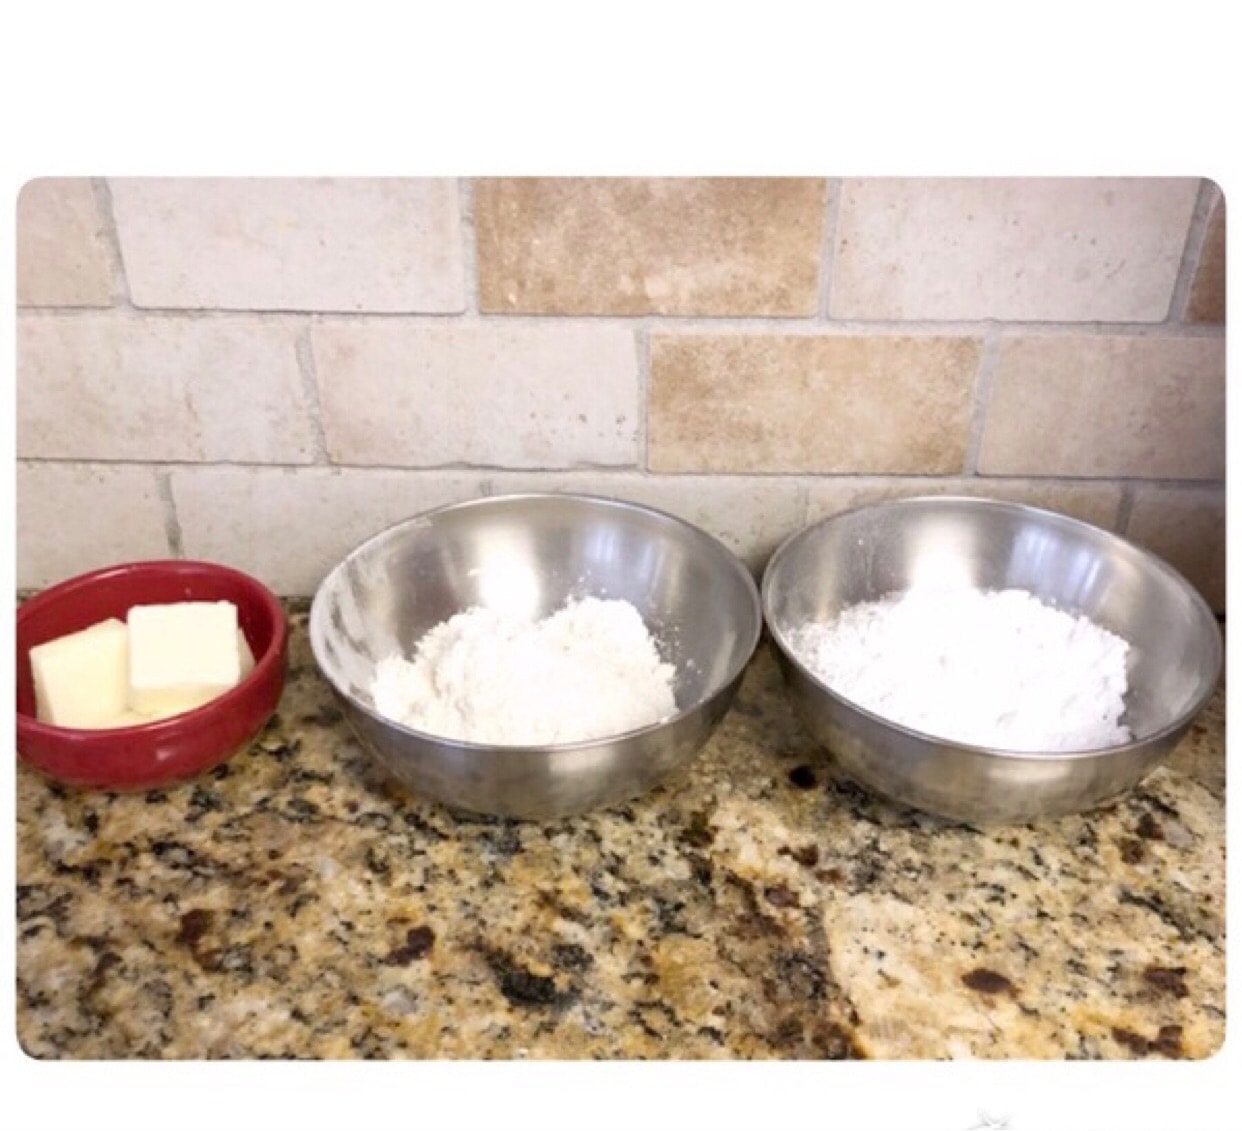
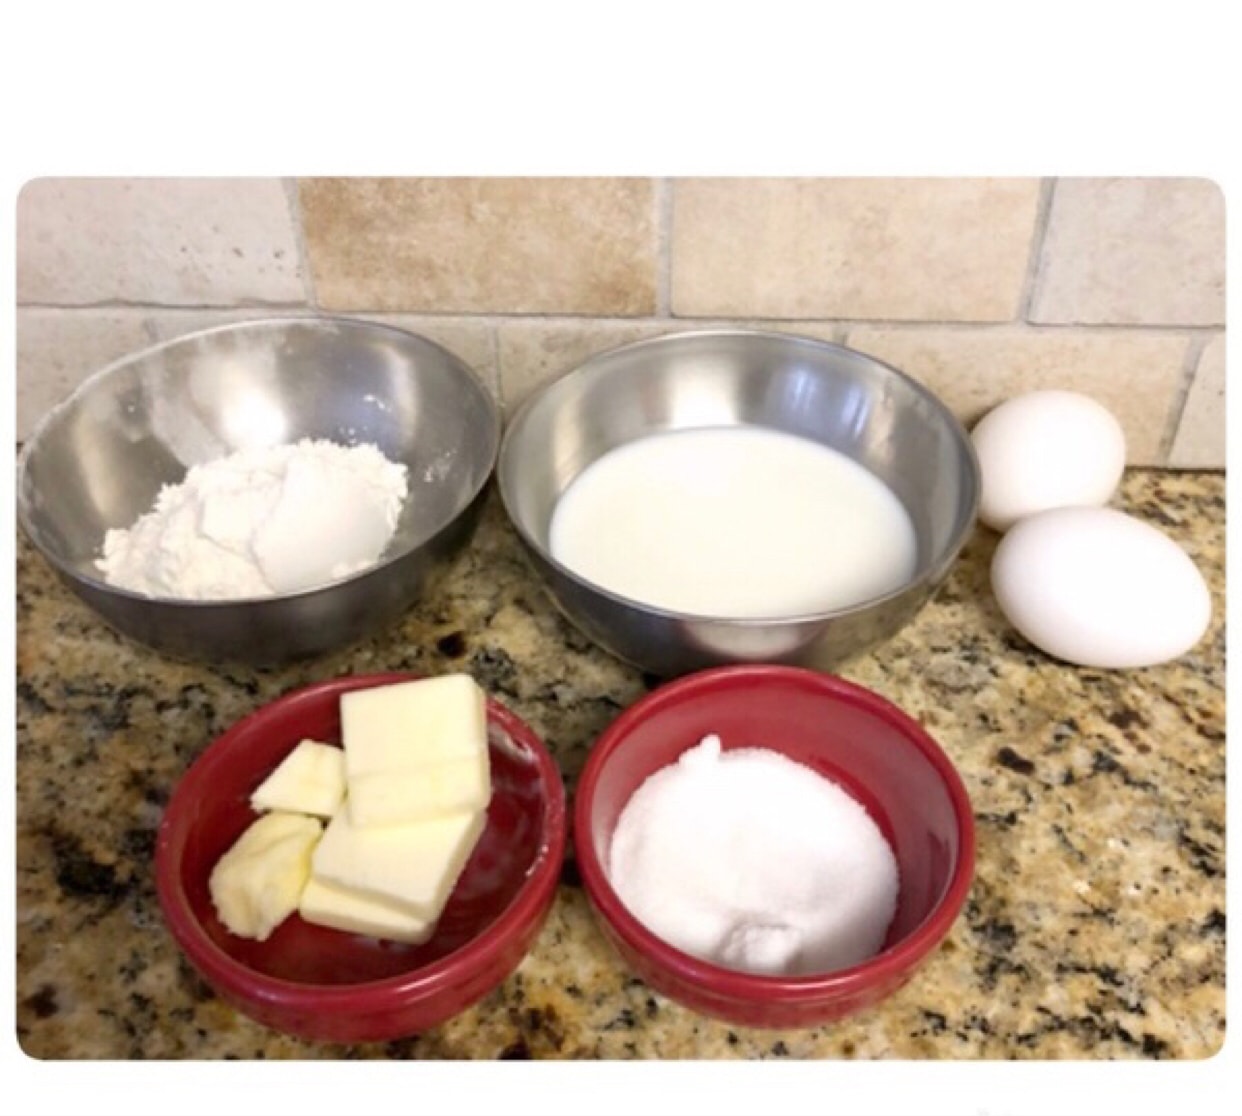
Materials:
Puff pastry section:
Unsalted butter40G
Powdered sugar25 (I have done it with white sugar before, or you can just Stir it for a while, the recipe I found says powdered sugar, this time I tried to use sugar power, and it feels the same OK)
All purpose flour (all purpose flour)50g
Puff Section:
Milk85g
Unsalted butter35g
All purpose flour53g
eggs2pcs
You can start now!
Puff pastry making:
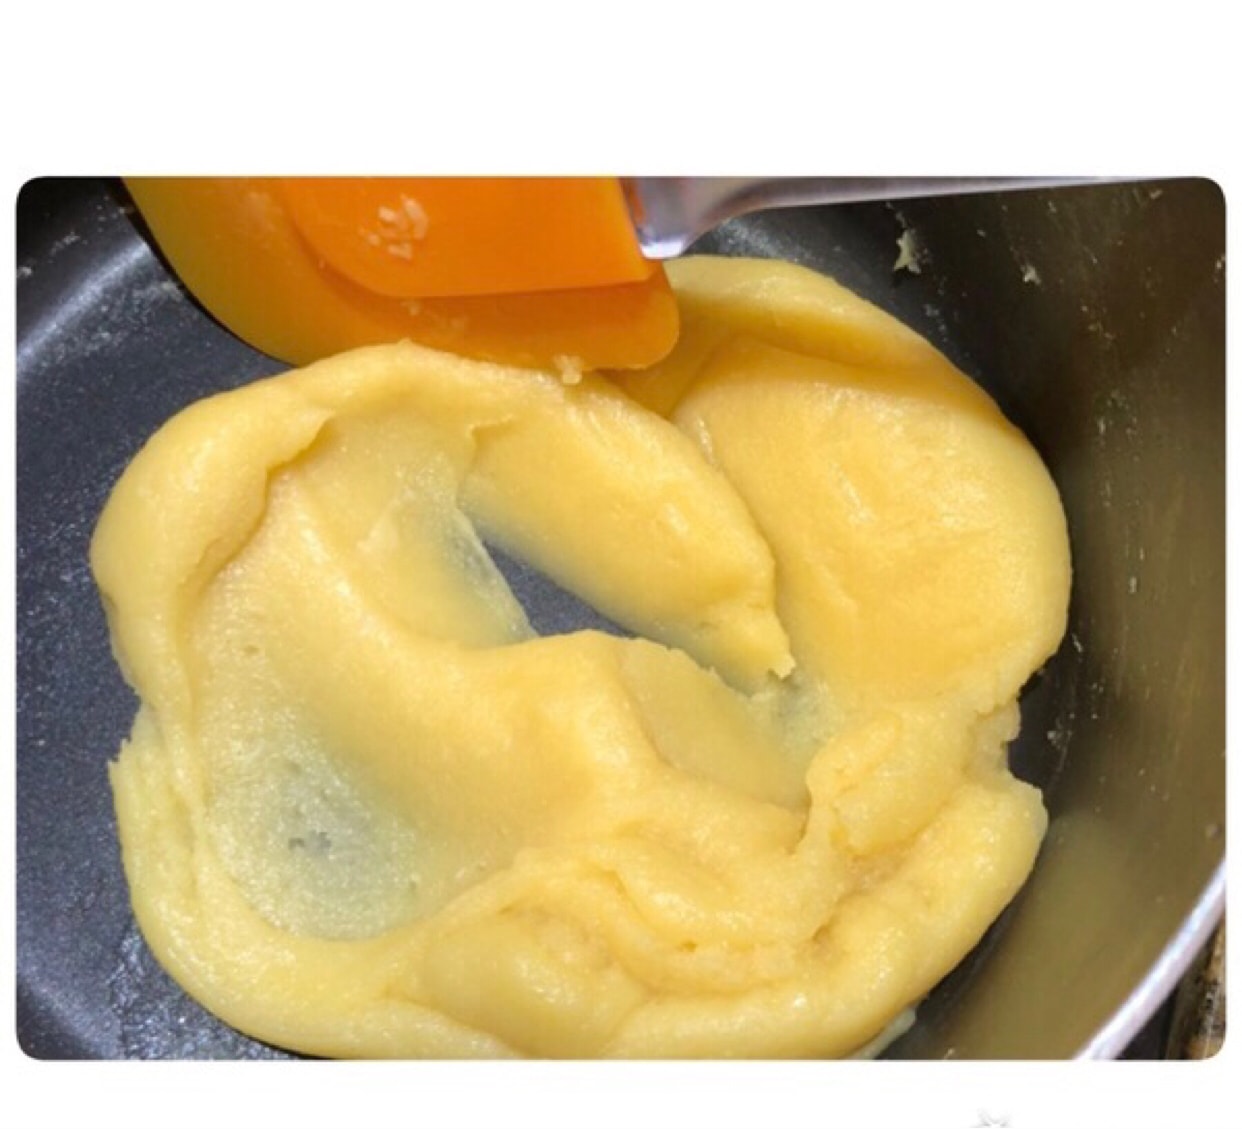
The butter is softened at room temperature in advance, then the butter and powdered sugar are mixed well! See no particles!
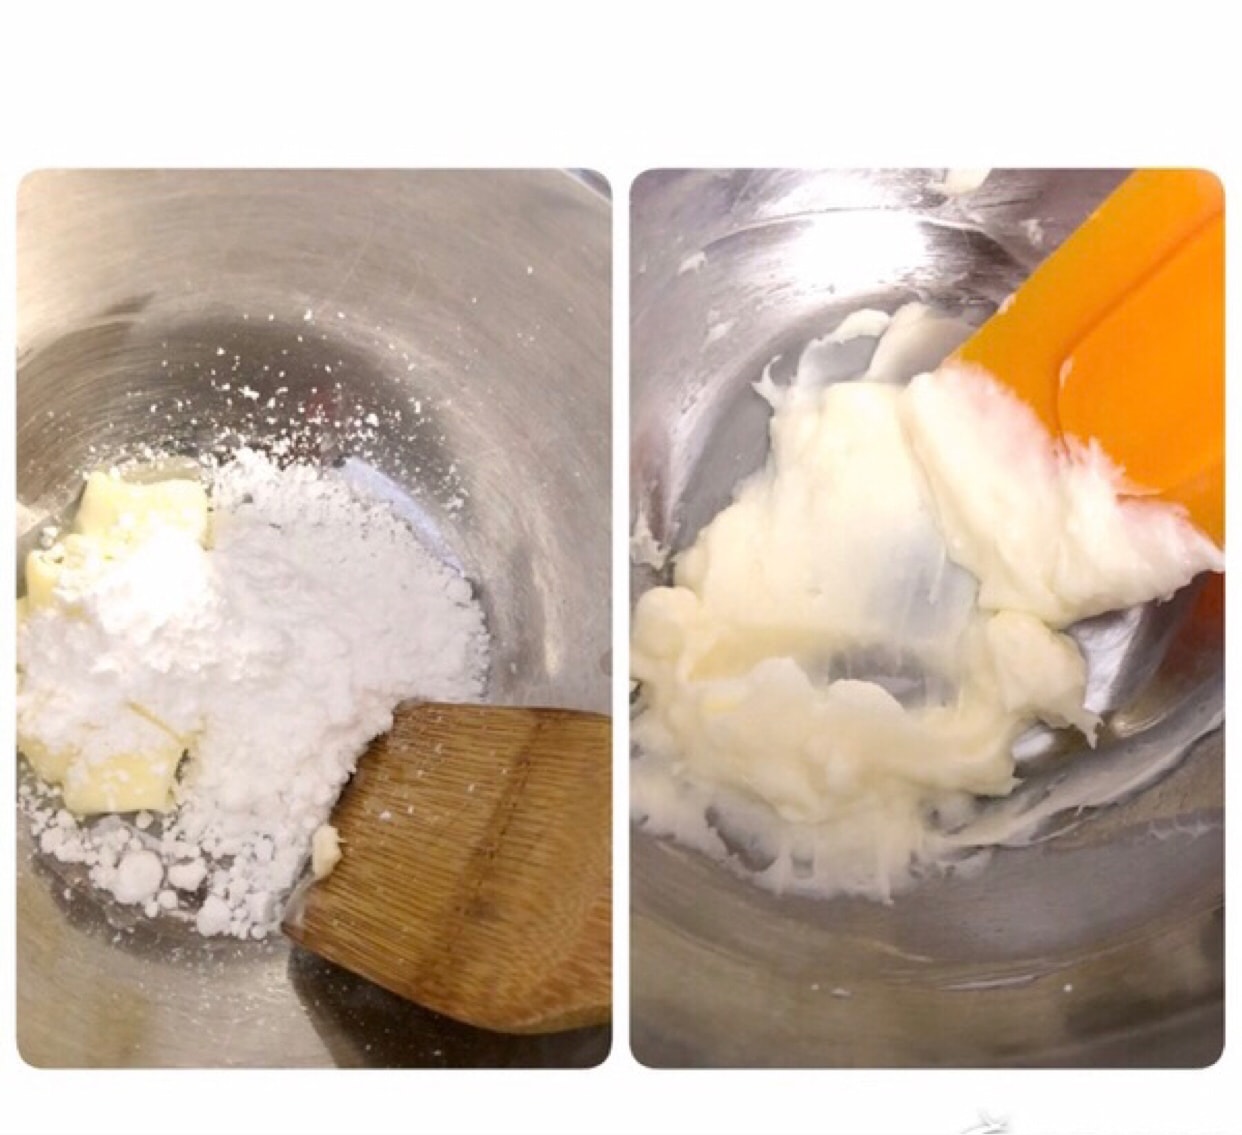
After mixing, add the sifted flour and mix until there are no particles!
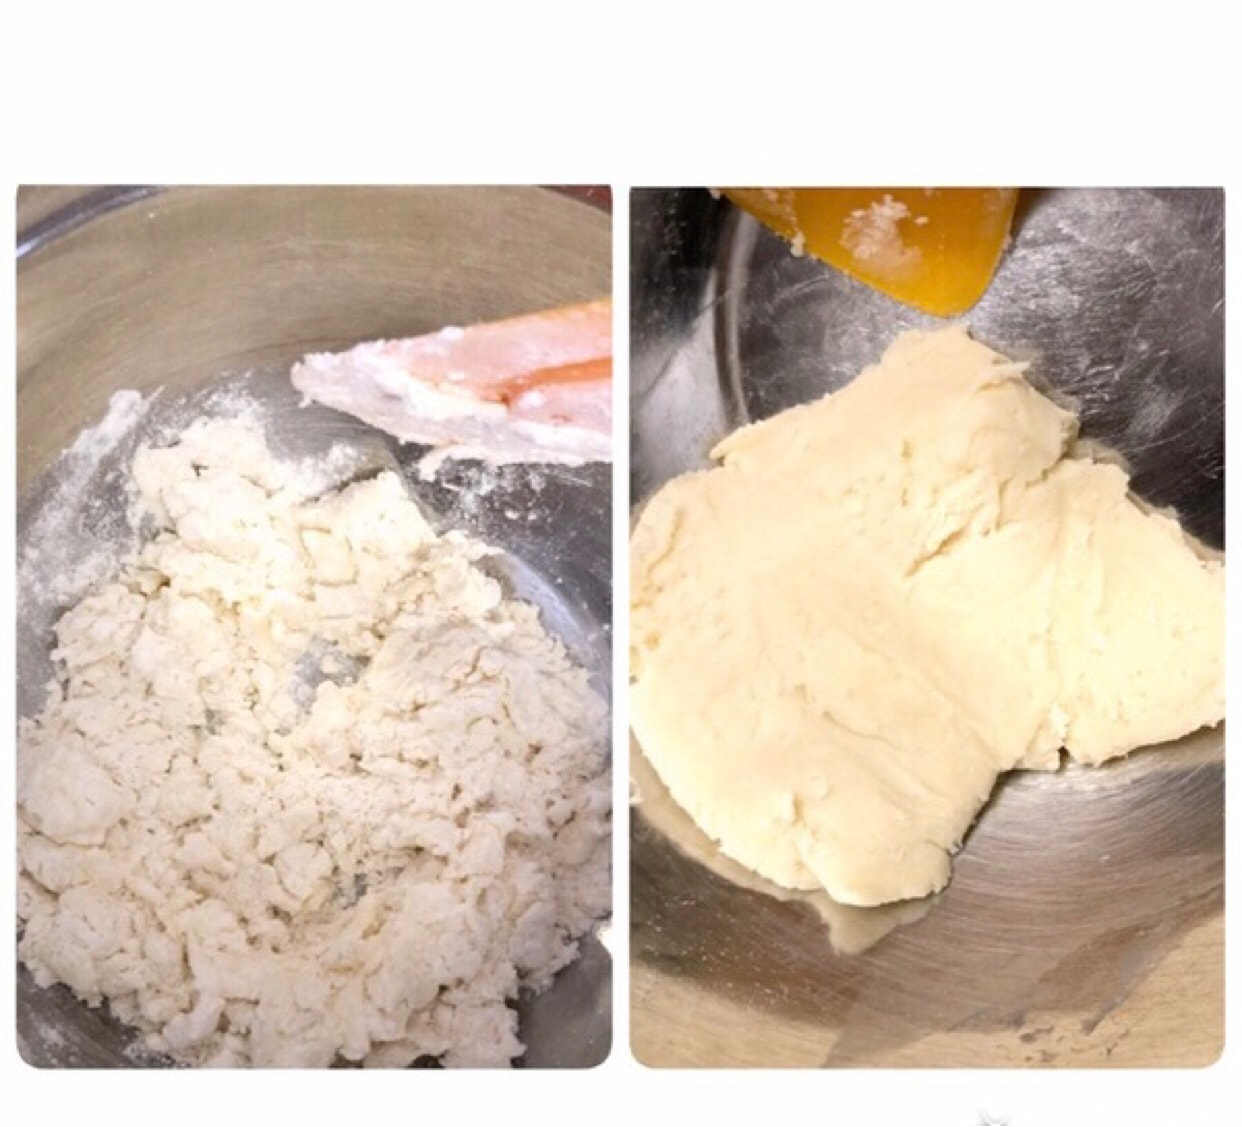
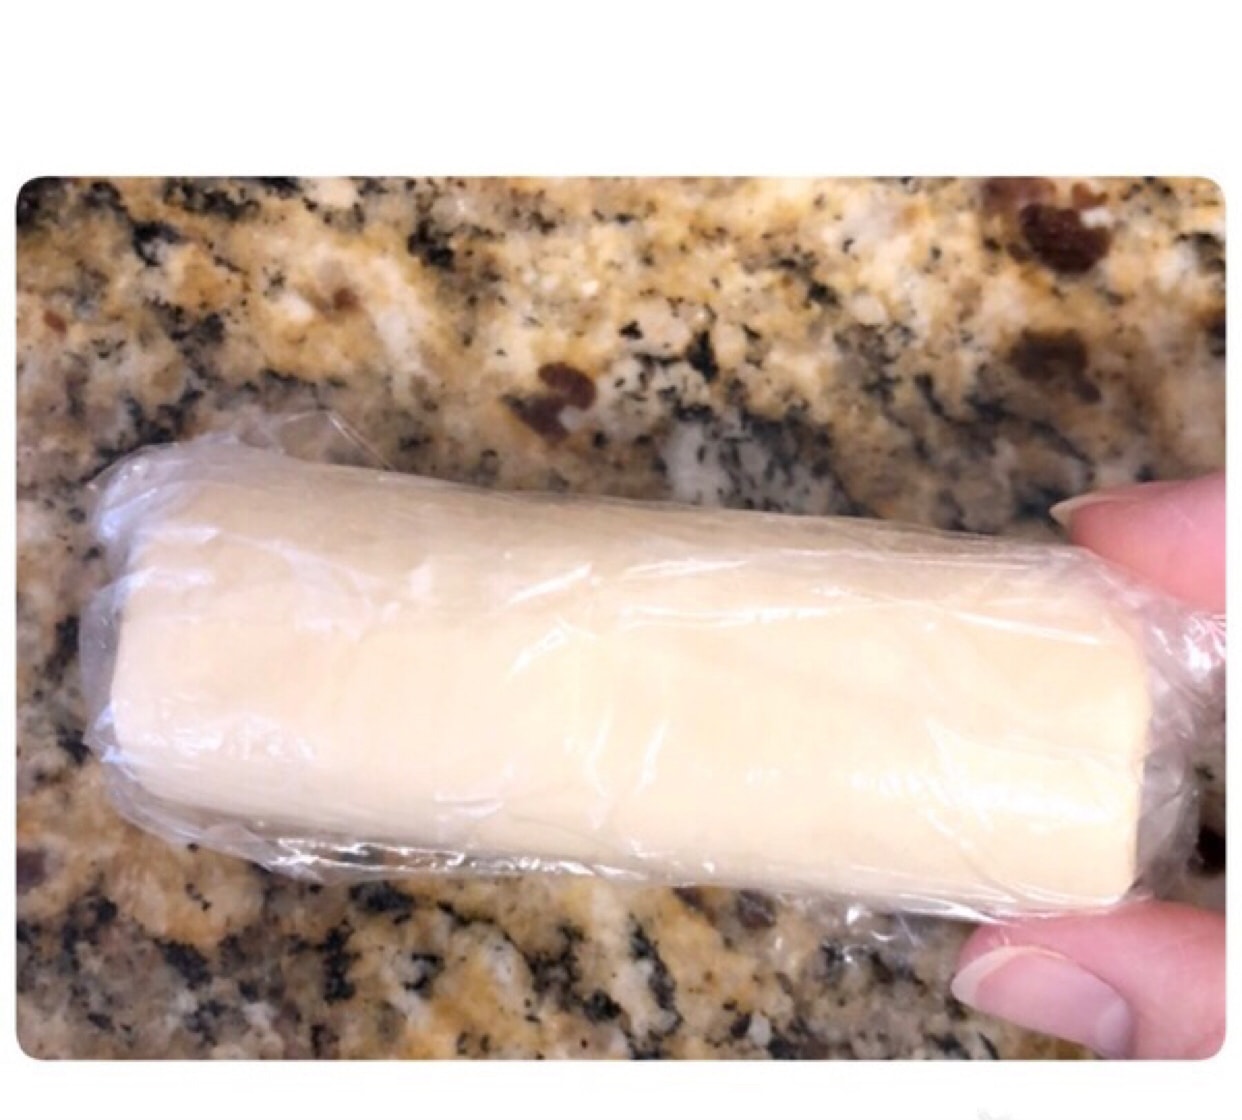
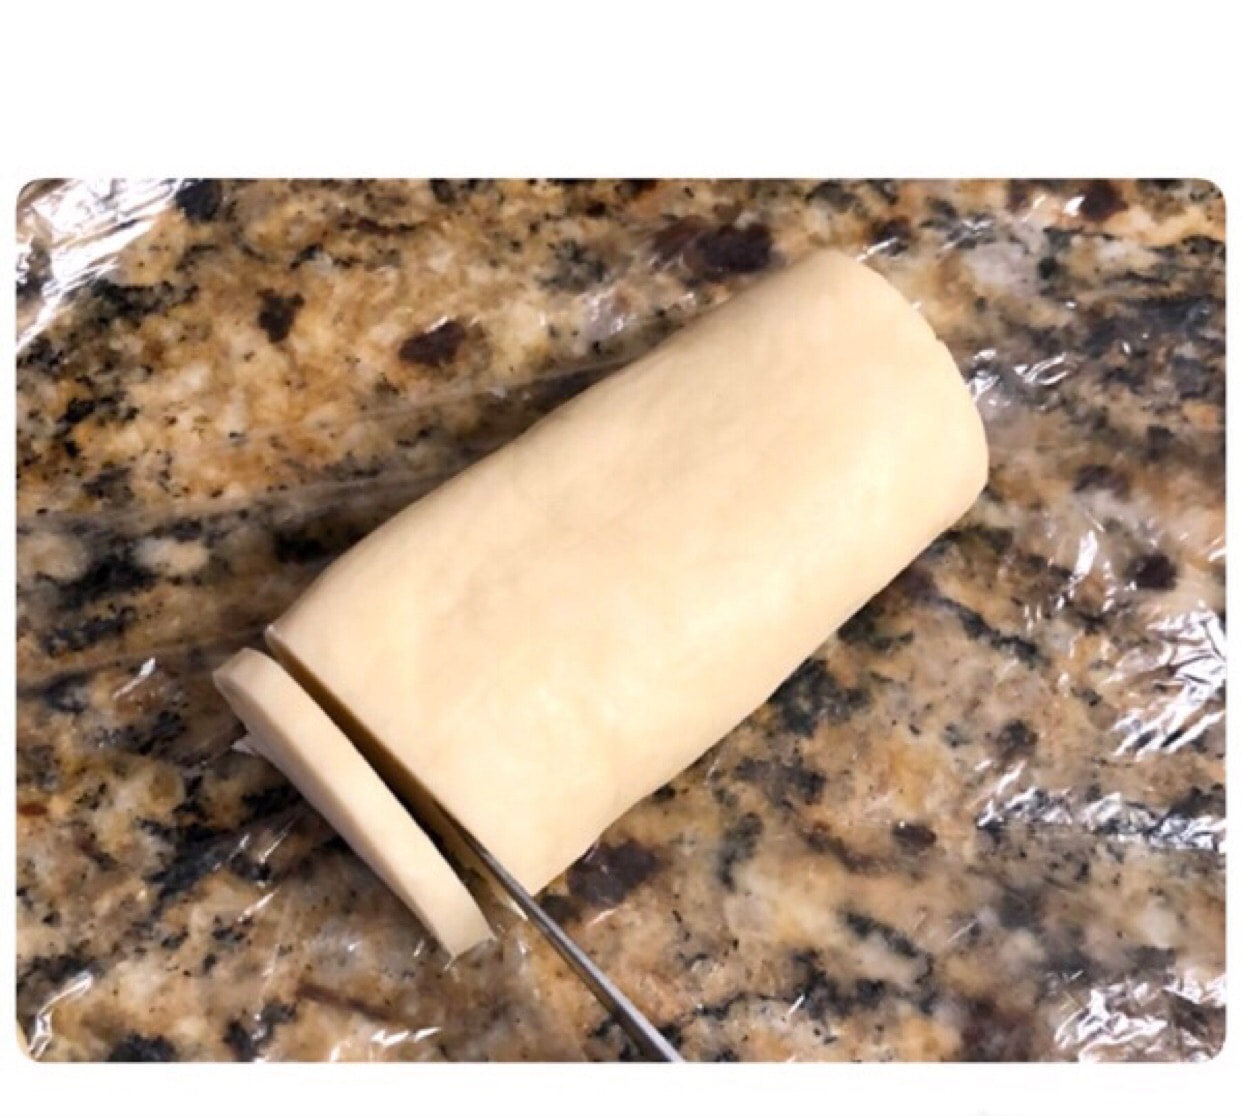
Then put the stirred puff pastry on top of the plastic wrap and roll it into a square like a long strip, or a long round shape! Wrap it up and put it in the fridge to set!
Puff Making:
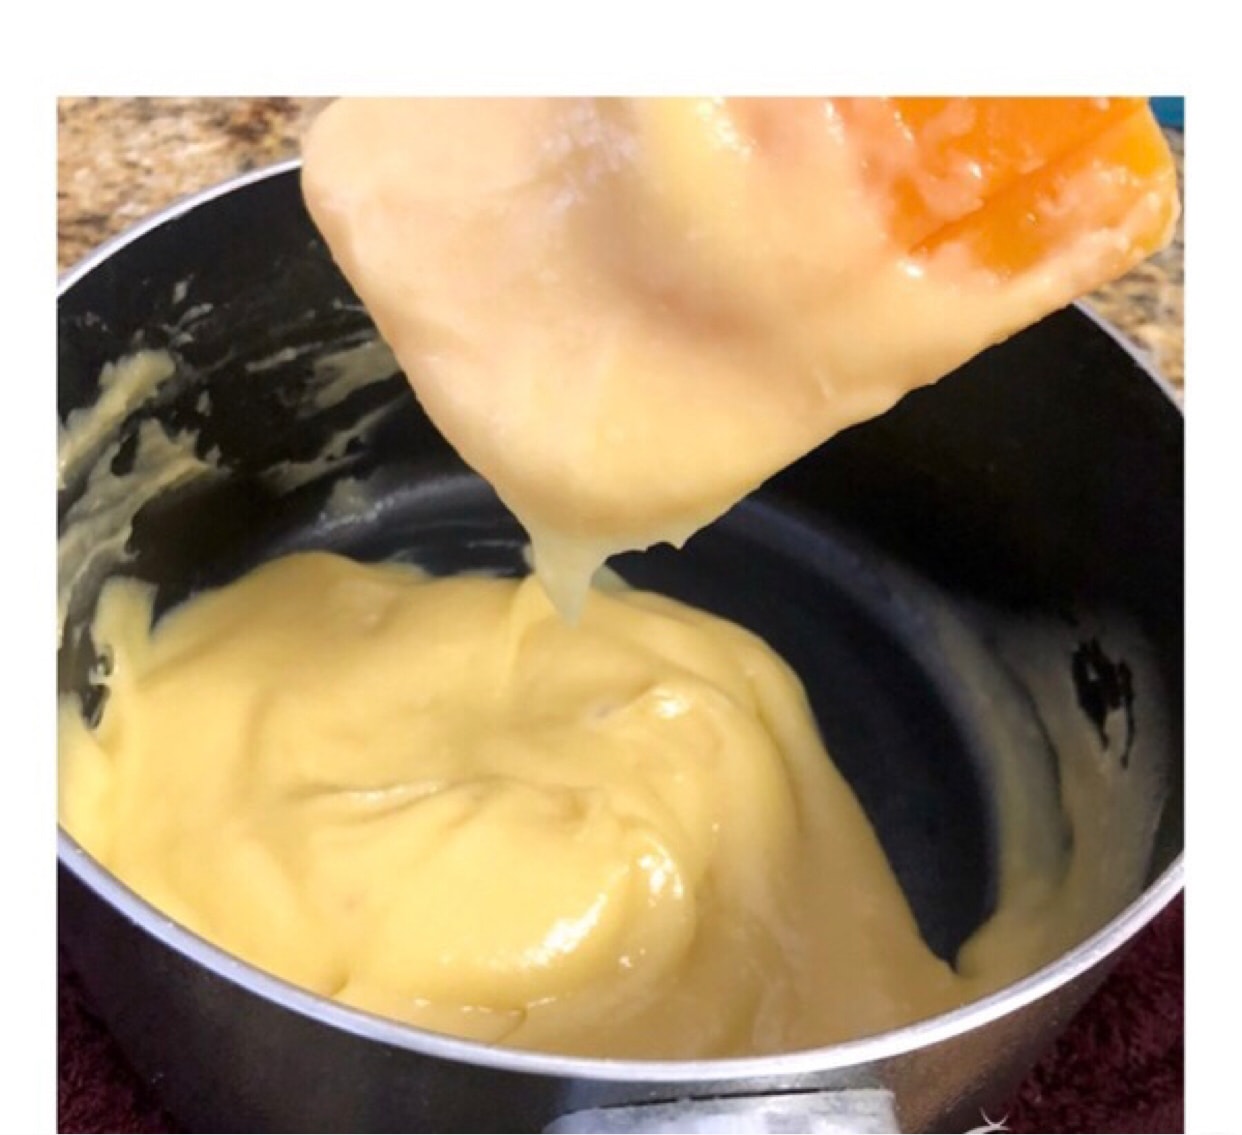
Put milk, sugar and butter in a pot, boil and stir together!
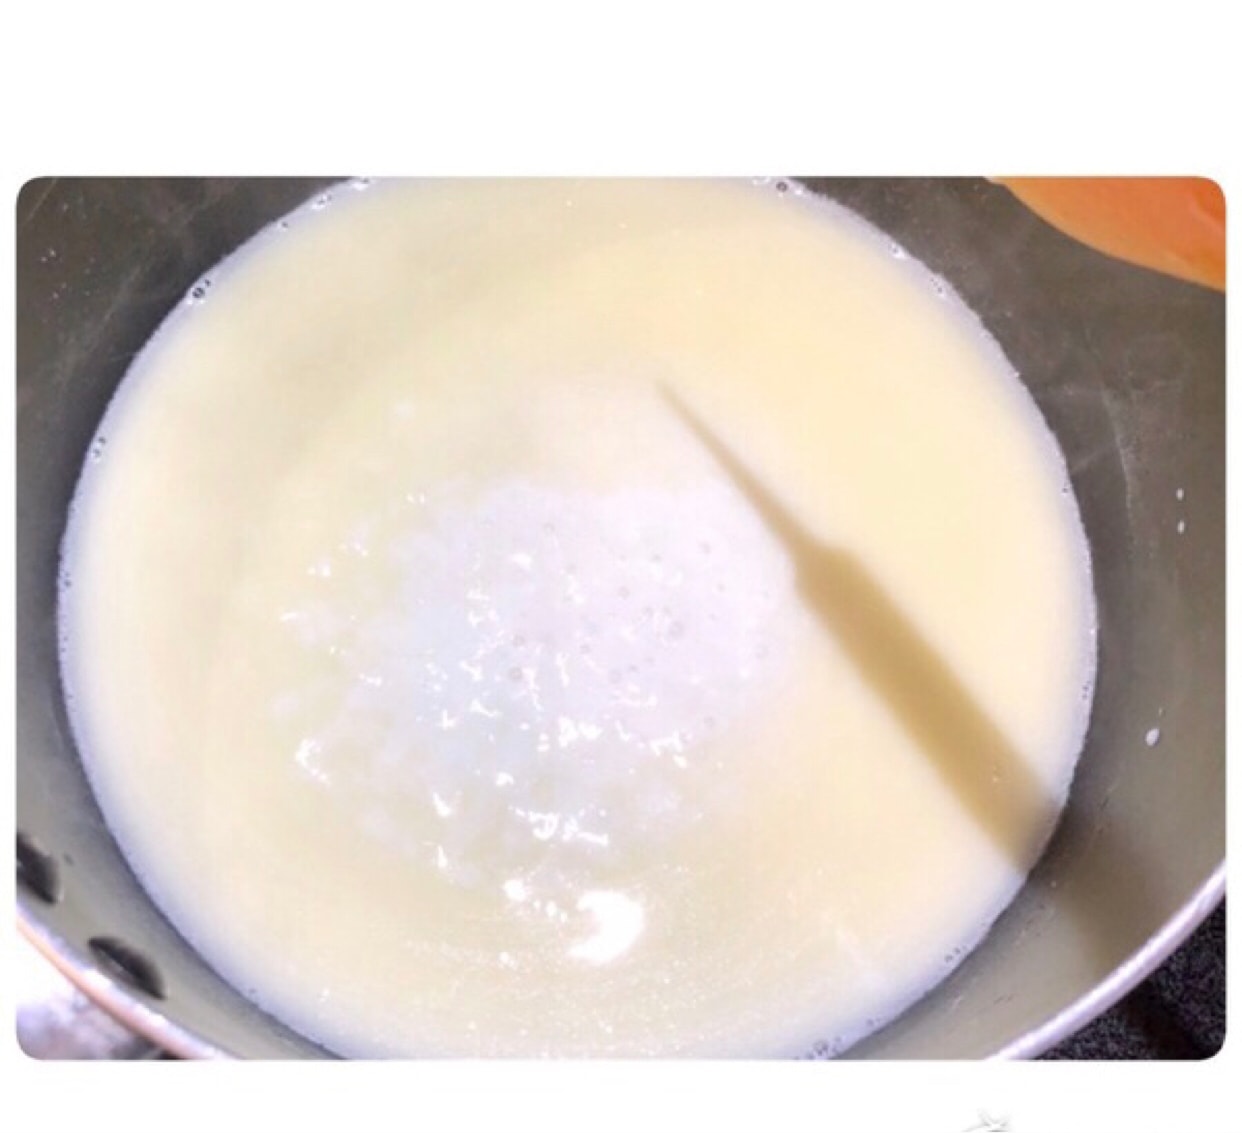
Add the sifted flour and continue to mix until there are no lumps!
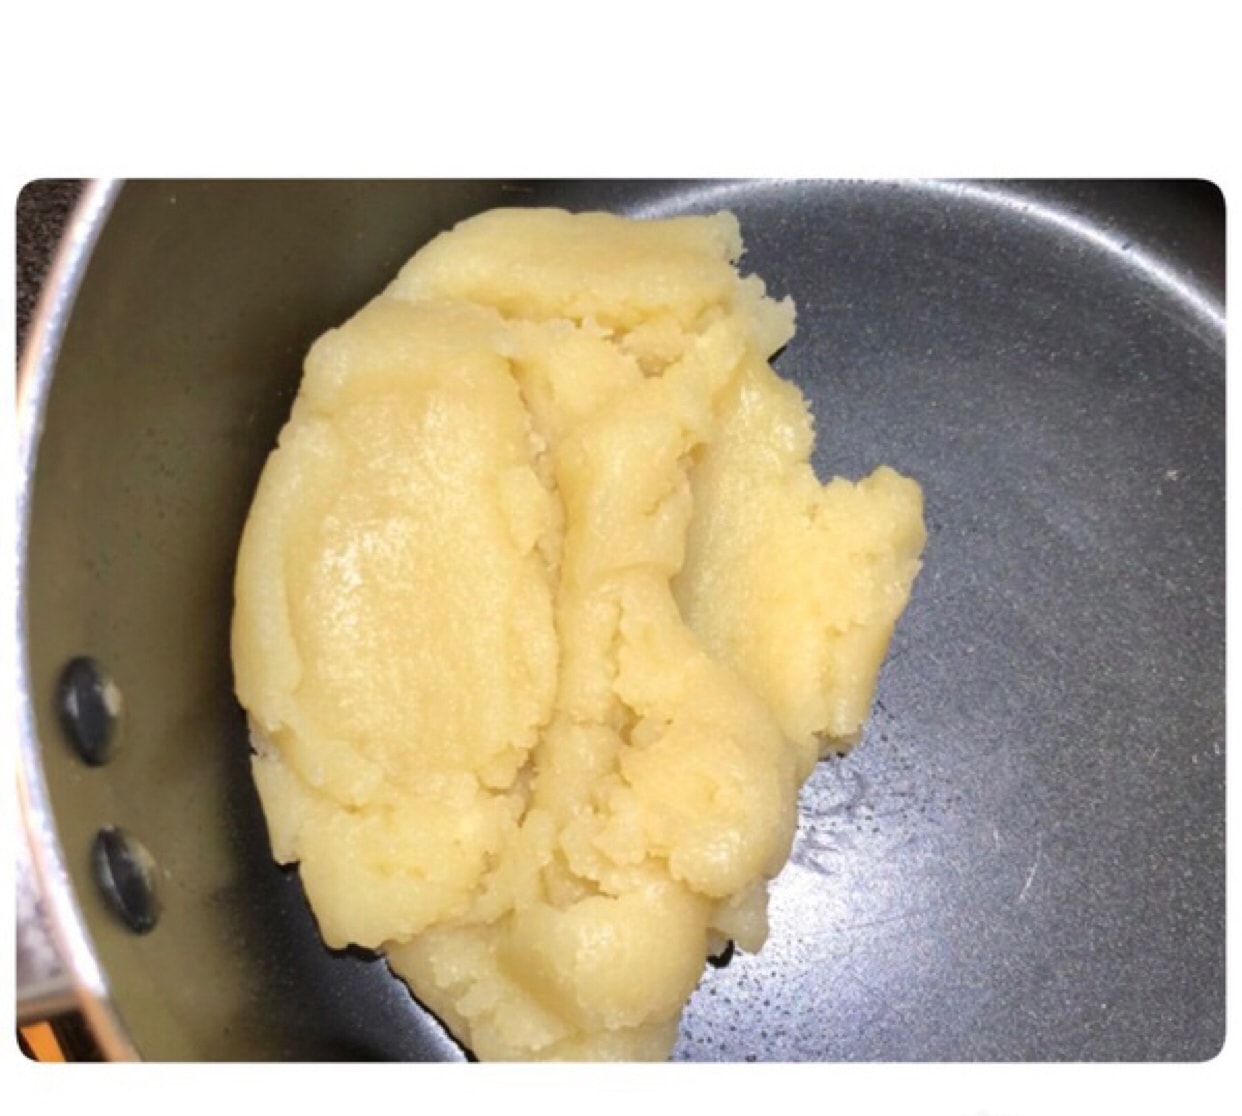
Remove the pot from the heat, add an egg, and continue to stir. The speed should be a little faster at this time, so as not to cool too quickly, and keep stirring until there are no particles!
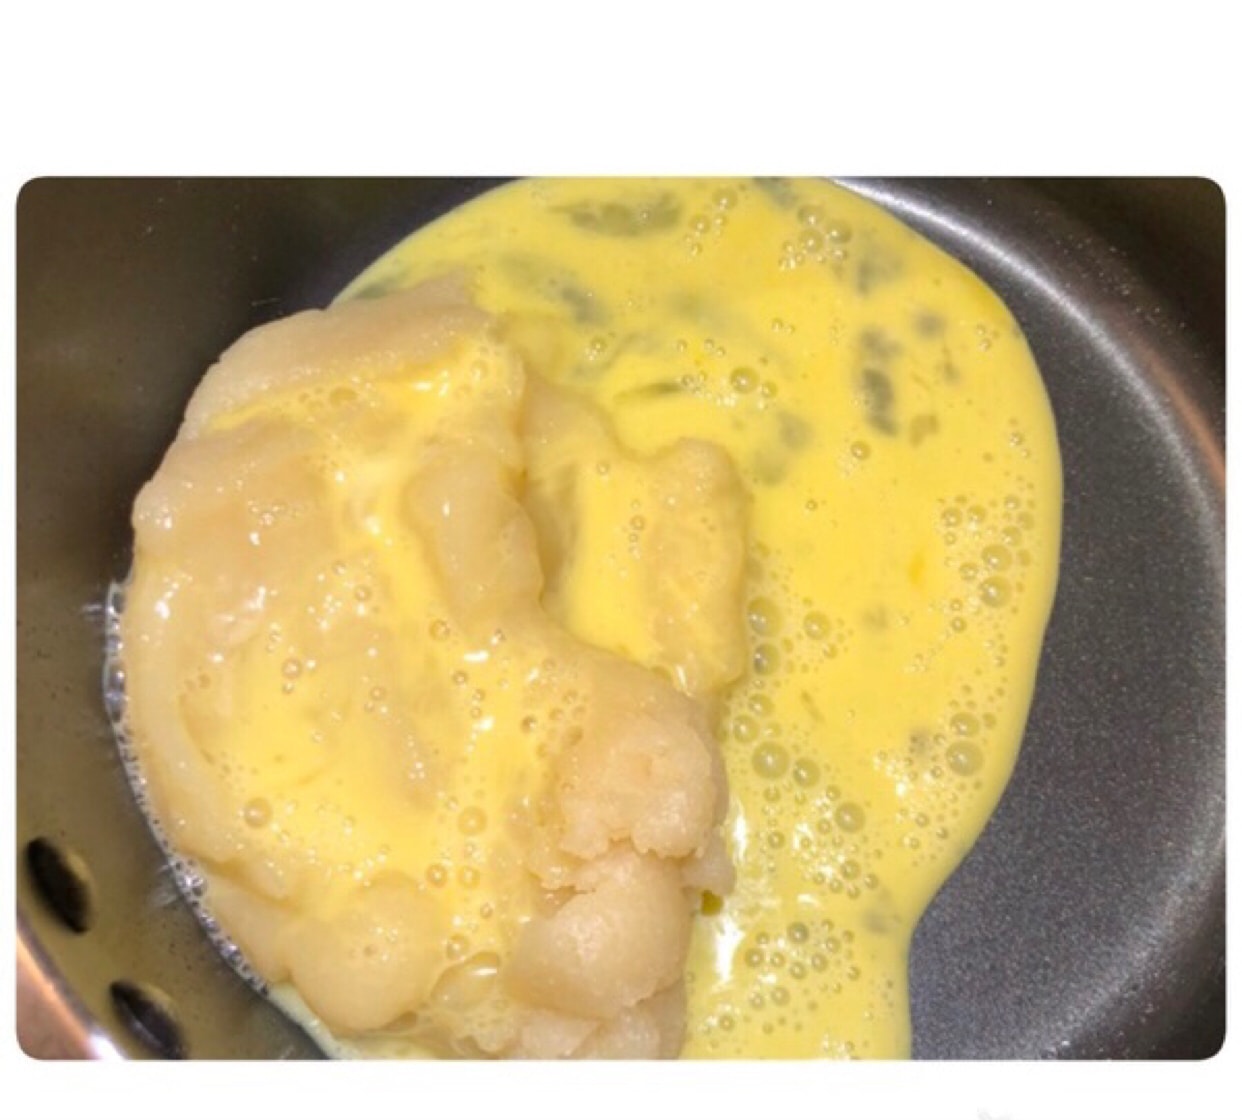
When adding the second egg I recommend adding half and whisking first, because I only used one and a half eggs the first time, but this time I added two It mainly depends on the result of mixing!
The stirred puffs normally have an inverted triangle shape when they are lifted up. My photo is too slow! My inverted triangle has fallen off😂!
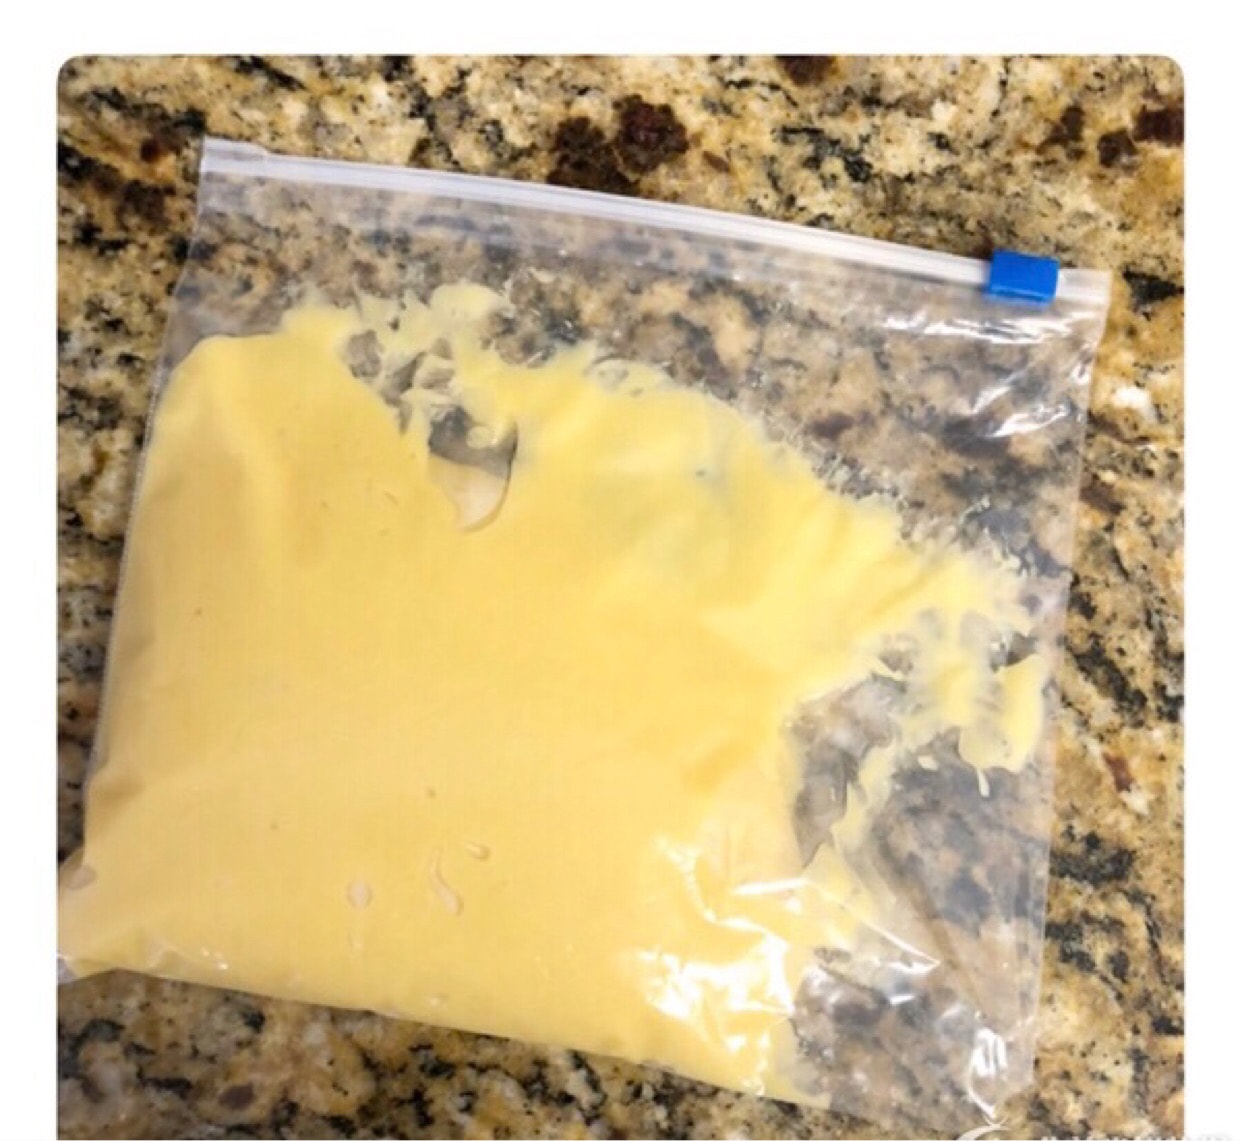
After I'm done, I always use a ziplock bag as a piping bag!
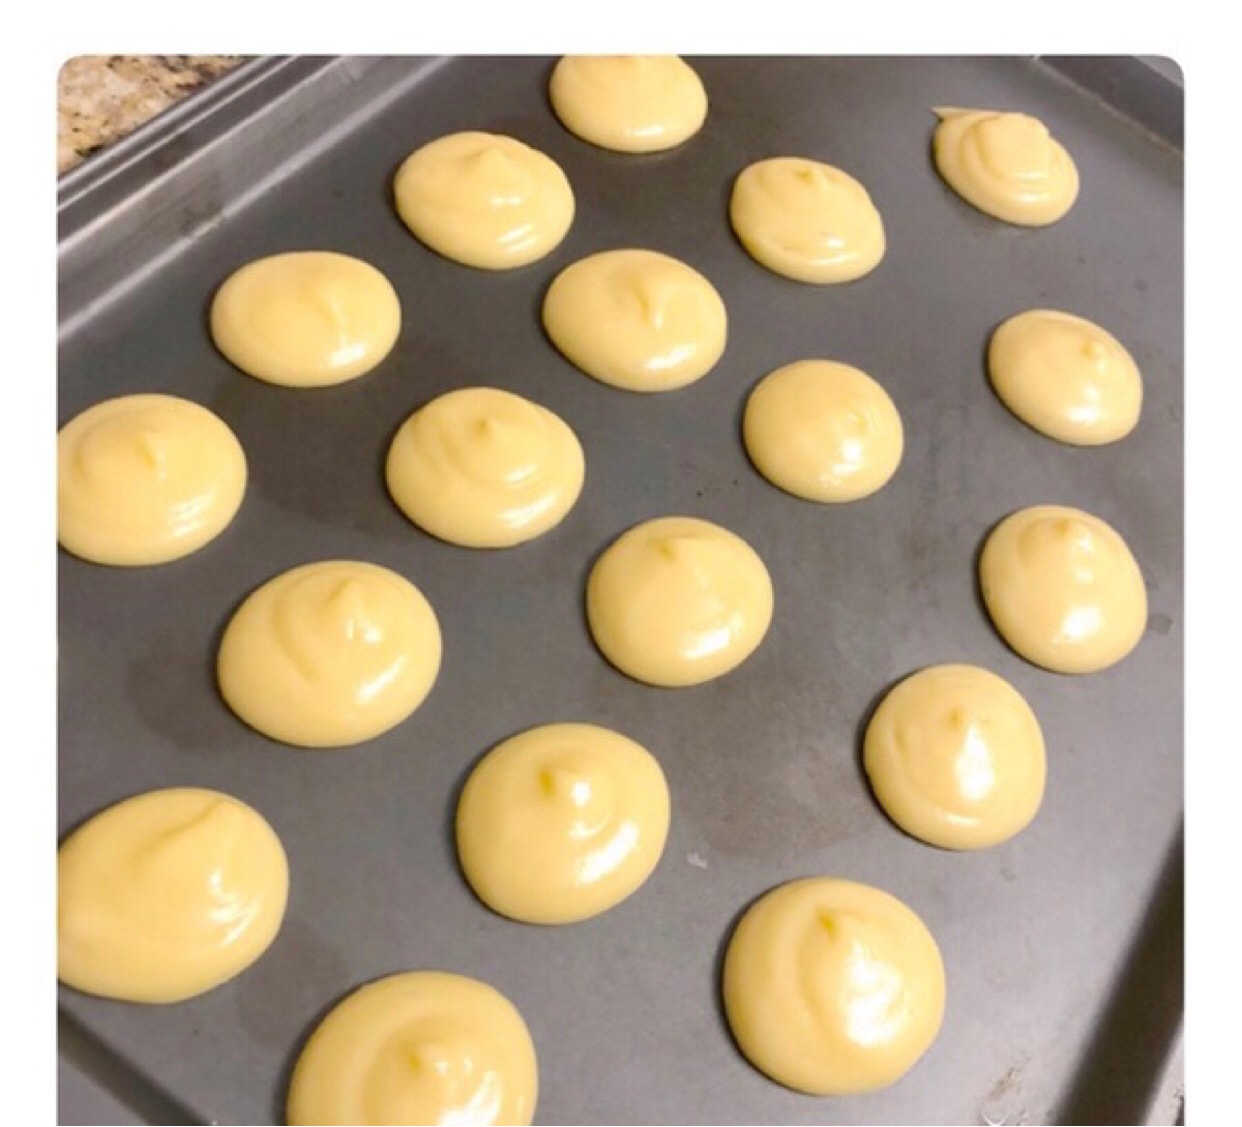
⚠️The oven can be preheated earlier355⚠️
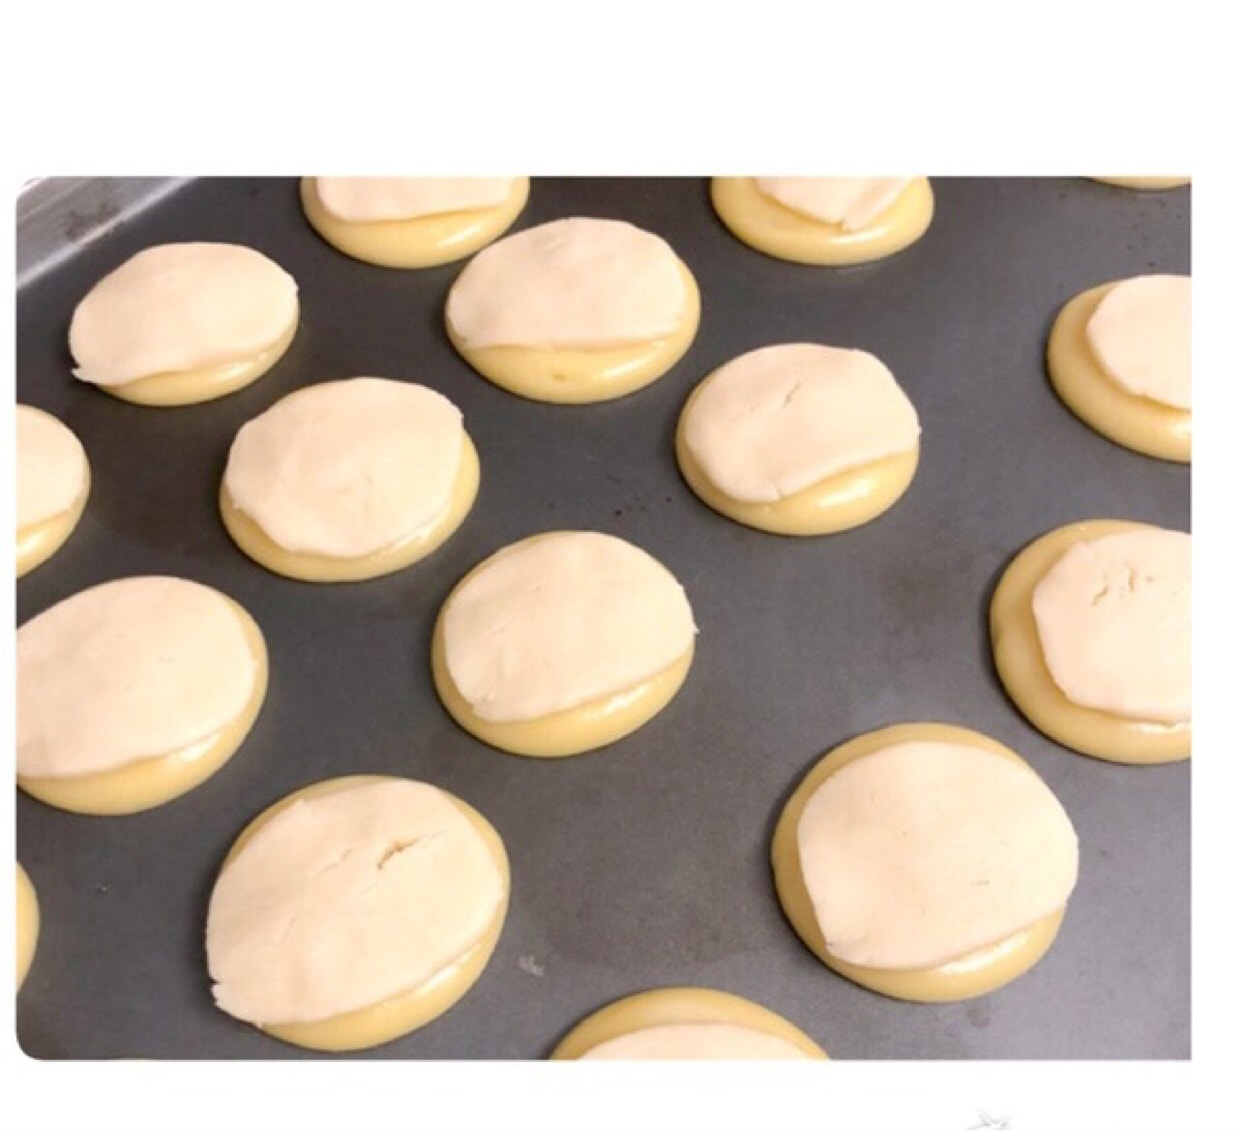
Squeeze them out one by one, keeping a little distance in the middle, because it will expand when baking, so as not to stick together!
⚠️Touch the water with your fingers, and gently touch the raised point on the top of the puff with your fingers, so that it will not stick Fingers, puffs are baked too
Take out the puff pastry in the refrigerator and slice it fast, otherwise the puff pastry will soften!
Put the sliced puff pastry on top of the puffs! It's ready to go into the oven!
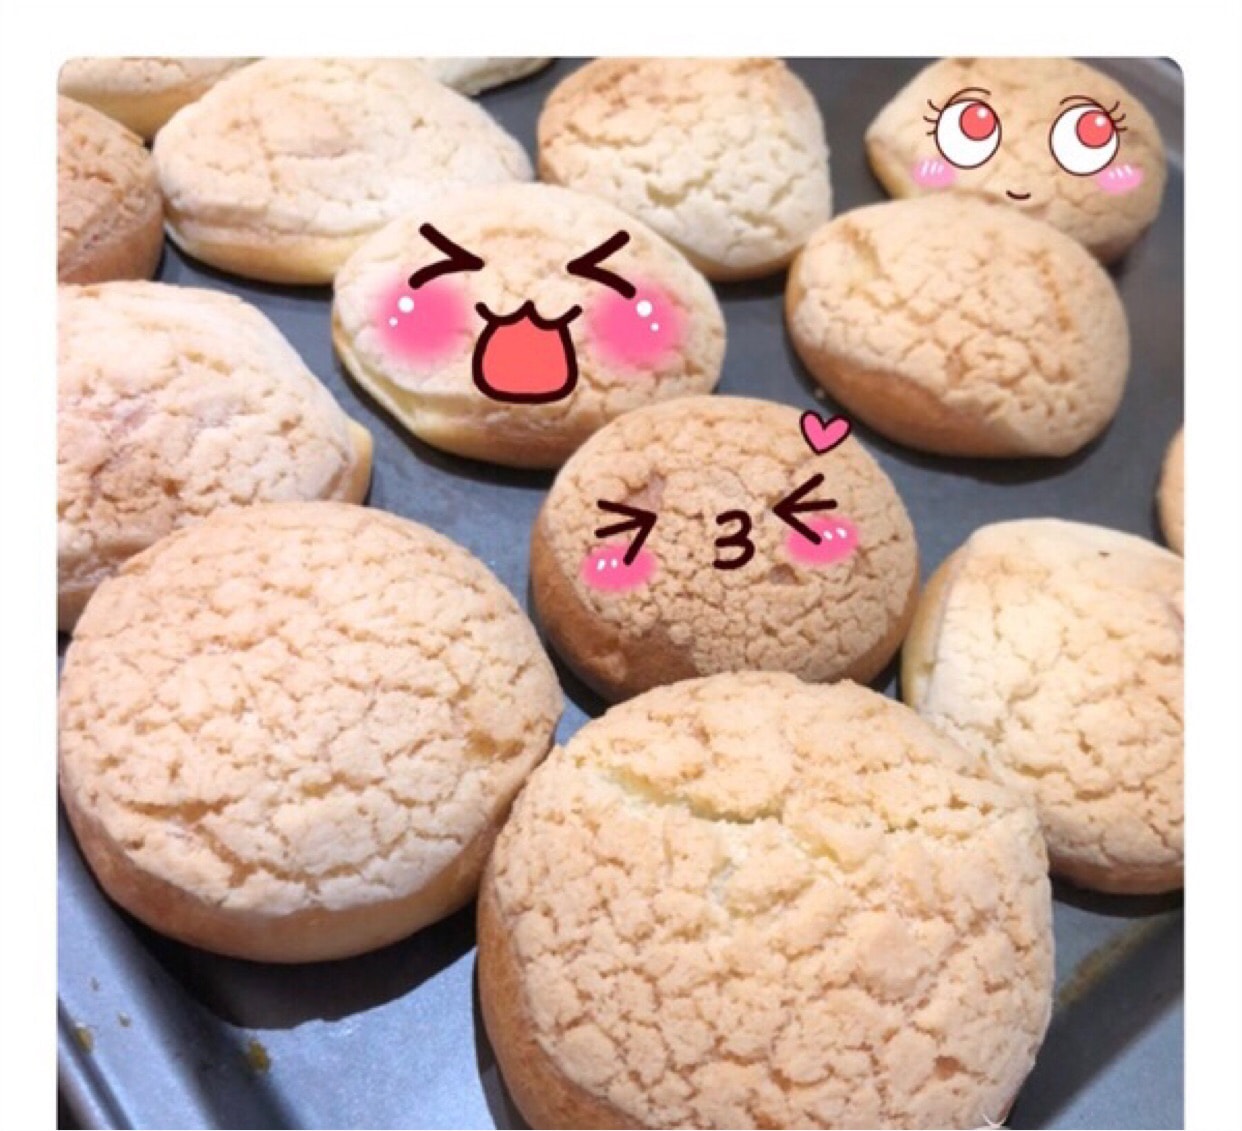
Bake in the oven25minutes, bake20minutes, you have to observe a little, everyone's oven is different, so as not to black out! When it comes to coloring it isOK! After baking, take it out and let it cool down!
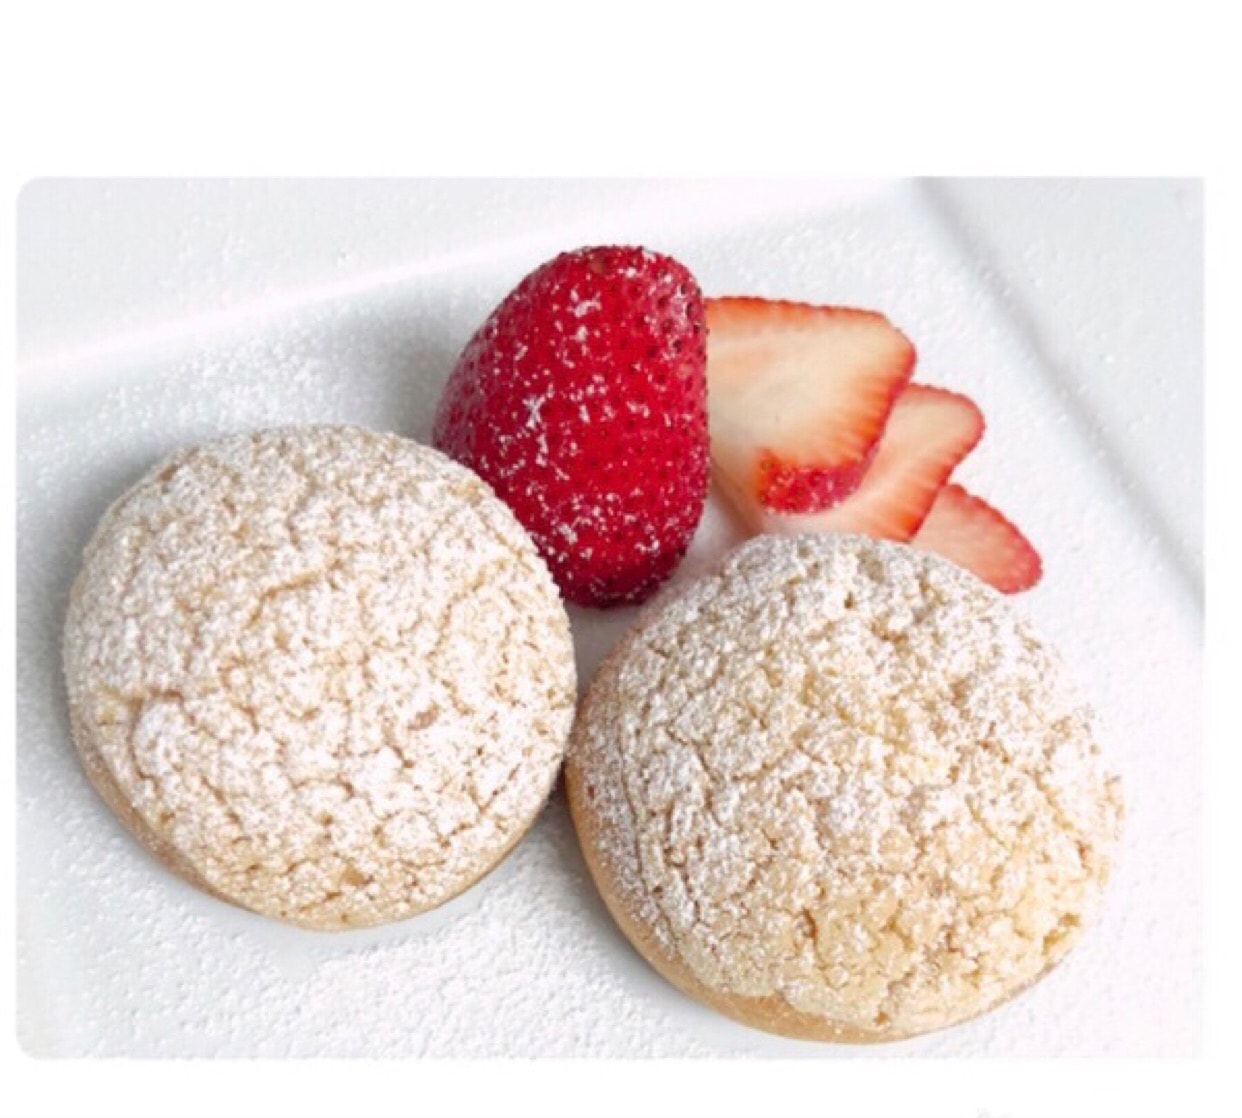
I forgot to take a picture of the cream here, I used the supermarket boughtheavy cream 200g, strawberry jam10g (the family likes strawberry flavor, so I added strawberry jam) sugar I put < /span>50 (If there is no strawberry jam, you may need to add more sugar. I didn’t make it very sweet here. For those of you who like sweet, Powdered sugar can be added by yourself)
Make a hole in the bottom of the puff, squeeze the cream in from underneath, and your puff is ready to eat! Or sometimes I cut it in half, squeeze some cream and spread some fruit, it's also great👍👍
Tip:
🌟Puff skins must be kept in the refrigerator so that they can be cut!
🌟When adding eggs, remember to keep the pot off the heat. Don’t add the eggs all at once. If it’s too wet, the puffs won’t bake. !
🌟After each egg is added, lift it up to see if there is an inverted triangle, if so, your puffs are ready !
🌟Do not open the oven in the middle of baking the puffs, so as not to collapse the puffs
🌟Bake20 Take a little observation in about a minute, don't bake too dark, my oven, the ones next to the bake are a little so dark😂
 Show Original

酥皮泡芙

酥皮泡芙真的是我的最爱,上面的酥皮又香又脆,非常好吃,买不到酥皮泡芙,只能自己尝试着做了,上网找了几个视频,马上动起来👩🍳👩🍳👩🍳👩🍳👩🍳
材料:
酥皮部分:
无盐黄油40G
糖粉25(之前用白砂糖做过,也可以就是要多搅拌一会,找的食谱写着糖粉,这次我就试着用sugar power做了,感觉也是OK)
中筋面粉(all purpose flour)50g
泡芙部分:
牛奶85g
无盐黄油35g
中筋面粉53g
蛋2个
现在就可以开始了!
酥皮制作:

牛油提前室温软化,然后牛油加糖粉搅拌均匀!看到无颗粒!

搅拌好之后,加入过筛好的面粉,一样搅拌均匀到无颗粒!

然后把搅拌好的酥皮放到保鲜膜上面,搓到类似长条的正方形,或者长条圆形都可以!包起来,放冰箱里面定型!

泡芙制作:

锅里放入牛奶,糖和牛油,一起煮沸搅拌均匀!

加入过筛好的面粉,继续搅拌至无颗粒!

锅离火,加入一颗鸡蛋,继续搅拌,这时候速度要稍微快一点点,以免太快冷却,要一直搅拌至无颗粒!

加入第二颗蛋的时候我建议先加入半颗搅拌,因为第一次做的时候我只用了一颗半的蛋,但是这次我加了两颗,主要还是看搅拌出来的成果!

搅拌好的泡芙正常是提起来会有倒三角的形状,我这个照太慢了!我的倒三角已经掉下去了😂!

做好之后,我都是用保鲜袋当作裱花袋来用!

⚠️这里烤箱可以提前开始预热355⚠️
挤一颗颗出来,中间保持点距离,因为烤的时候会在膨胀起来,以免都粘在一起!
⚠️用手指碰下水,把泡芙上面凸起来的那点,用手指轻轻碰下,这样不会粘手指,泡芙烤出来也

把冰箱里面的酥皮拿出来切片,速度要快,不然酥皮会软掉!

切好的酥皮一块块的贴到泡芙上面去!就准备入烤箱了!

入烤箱烤25分钟,烤20分钟的时候你要稍微观察一下,每个人烤箱不一样,以免黑掉!上色的时候就OK!烤好之后拿出来放凉准备!

奶油这里我忘记照相了,我用的是超市买的heavy cream200g,草莓酱10g(家里人喜欢草莓味,所以我就给加了草莓酱)糖我放了50(如果没有草莓酱的话,糖可能要多加点,这里我没有做的很甜,喜欢甜的你们,糖粉可以自己加点)
在泡芙的底部搓个洞,奶油从下面挤进去,你的泡芙就可以开始吃了!或者有时候我都是切对半,挤点奶油铺点水果,也是棒棒哒👍👍

Tip:
🌟泡芙皮一定要放冰箱,这样才有办法切!
🌟加蛋的时候切记锅子要离火,鸡蛋不能一次都加进去,太湿的话泡芙就烤不起来了!
🌟每次加入鸡蛋之后要提起来看下有没有倒三角了,有的话你的泡芙就准备好了!
🌟烤泡芙的时候中途不要打开烤箱,以免泡芙塌掉
🌟烤20分钟左右就要稍微观察一下,不要烤太黑,我的烤箱,烤旁边的那几个都有点那么的黑了😂